IBM VEST Workshops
45 min
Last updated 02/25/2024

104: Low-code integration using AI

Introduction

Data mapping is among the most important design steps in building an integration flow. This design-time task is usually the most tedious, time-consuming, complex, and error-prone because it requires deep understanding of all the data fields on the source and target systems. Building a successful data mapping also requires business analysis, domain expertise, and technical knowledge on both source and target systems.

Our goal in creating Mapping Assist was to simplify and automate data mapping. And when coupled with the extensive list of pre-built, security rich connectors, it can accelerate the delivery of value to the business through integration.

ACME Retail has acquired another business and needs to synchronize the contacts between two CRM applications. In this demo, we assist ACME using AI and low-code integration, synchronizing contact information between the Salesforce and Insightly CRM systems. We will recognize and automatically match fields with high confidence levels. We will also recommend and assist with other fields where there is lower confidence. And we will generate a transformation across the fields when the field formats are not the same. As you continue to use the Mapping Assist capability it learns from previously accepted matches to raise confidence levels in future mapping efforts.

Using AI-powered mapping, we can reduce errors and speed integration development.
In the demo, we will execute the following steps:
• Access the Cloud Pak for Integration environment
• Create and implement an API-enabled flow to map the fields for ‘contact’ between Salesforce and Insightly CRM
• Auto-map fields wherever the matching confidence is above 80%
• Generate a data transformation when the field formats do not match
• Execute the flow to see the results

Let’s get started!

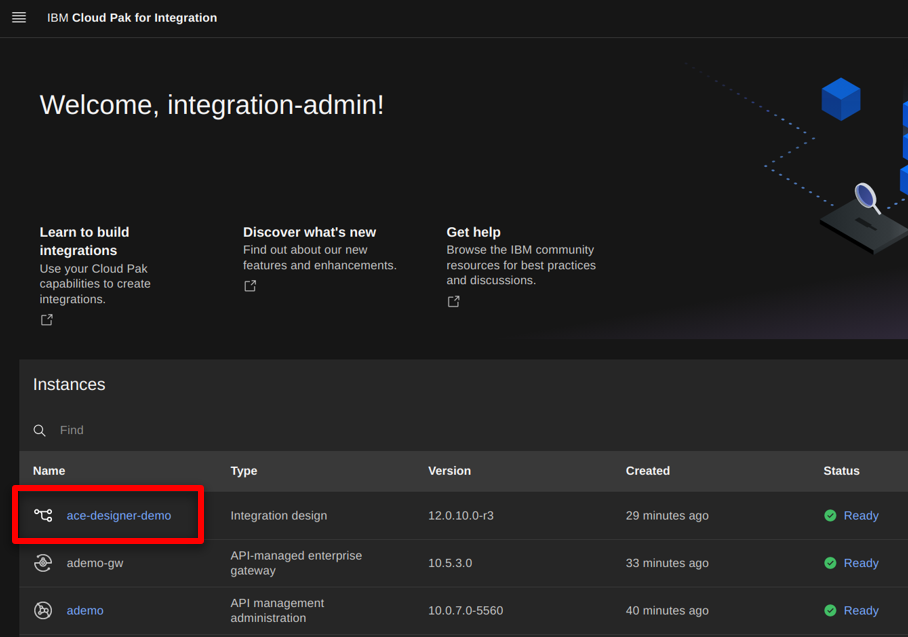
1 - Accessing the environment

1.1 Log in to Cloud Pak for Integration
Narration IBM Cloud Pak for Integration is a hybrid integration solution that provides an automated lifecycle across multiple styles of enterprise integration. With IBM Cloud Pak for Integration, companies can speed integration development, reduce costs, and maintain enhanced security, governance, and availability. Let’s see IBM Cloud Pak for Integration in action. For today’s demo, we are using IBM Cloud Pak for Integration installed on the IBM cloud. Let me log in.
Action 1.1.1 Log in with Username ‘integration-admin’ (1), the Password (2) created in Demo preparation, and click Sign In .
1.2 View the Cloud Pak for Integration home screen
Narration Welcome to IBM Cloud Pak for Integration! We’re now at the home screen showing all the capabilities of the Cloud Pak brought together in one place. Specialized integration capabilities — for API management, application integration, messaging, and more — are built on top of powerful automation services.

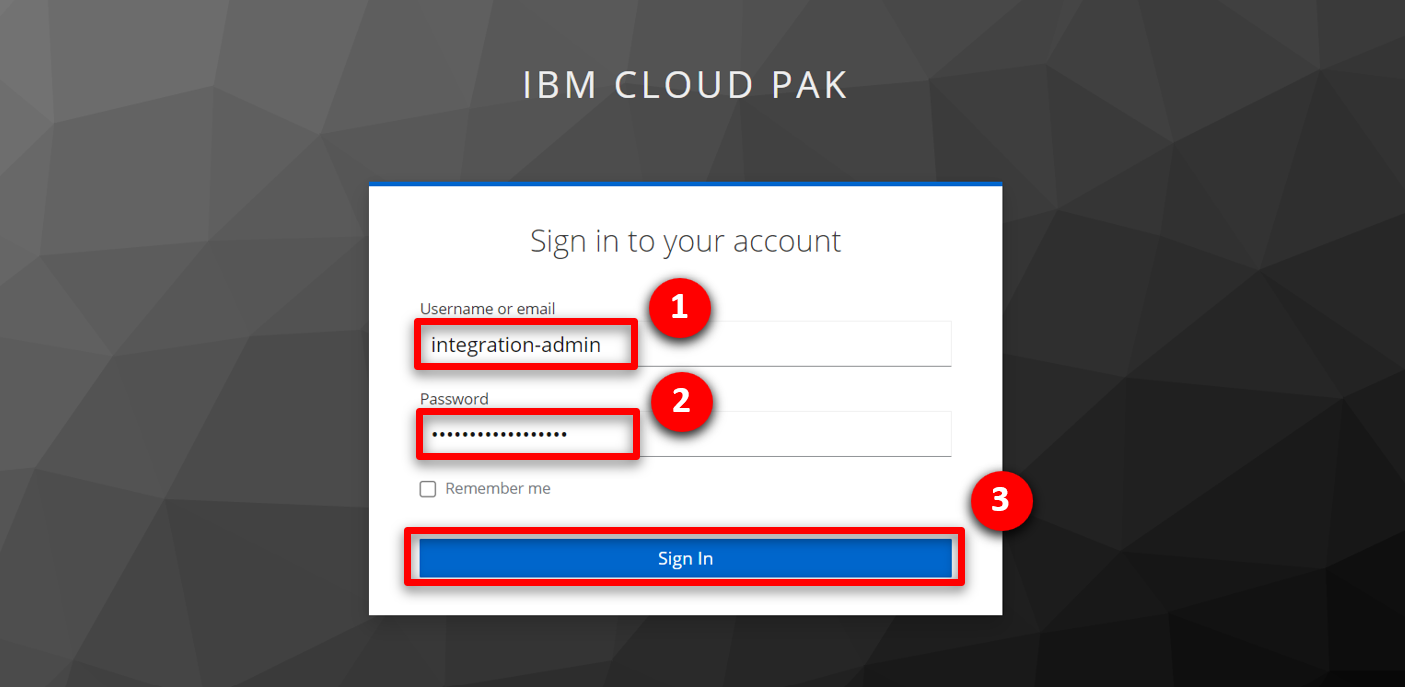
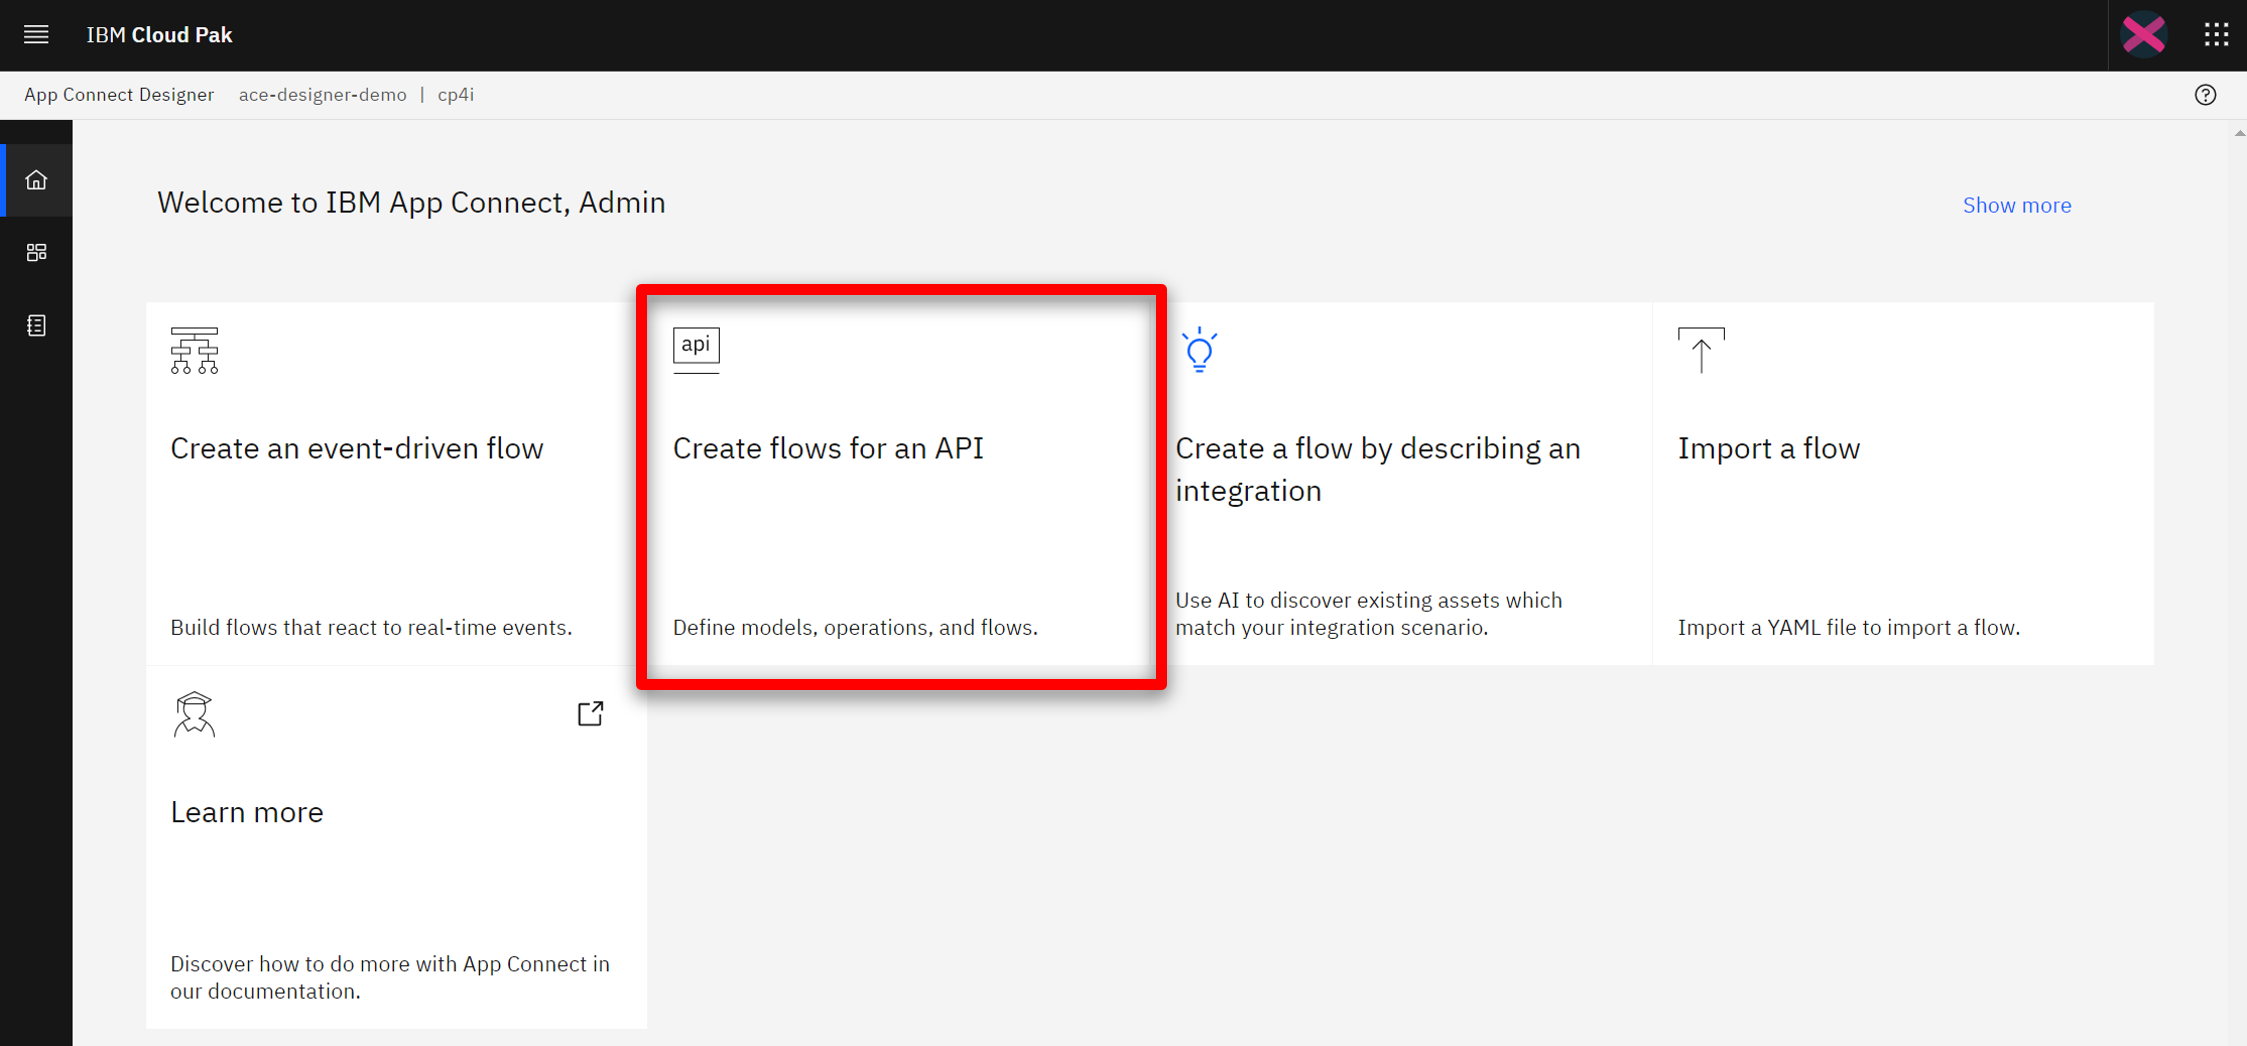
In this demo, we’ll use the App Connect Designer’s Mapping Assist capability to speed the transformation of complex data formats used by cloud applications, such as Salesforce and Insightly. Let’s open our App Connect Designer.
Action 1.2.1 Show the home page and click ace-designer-demo .

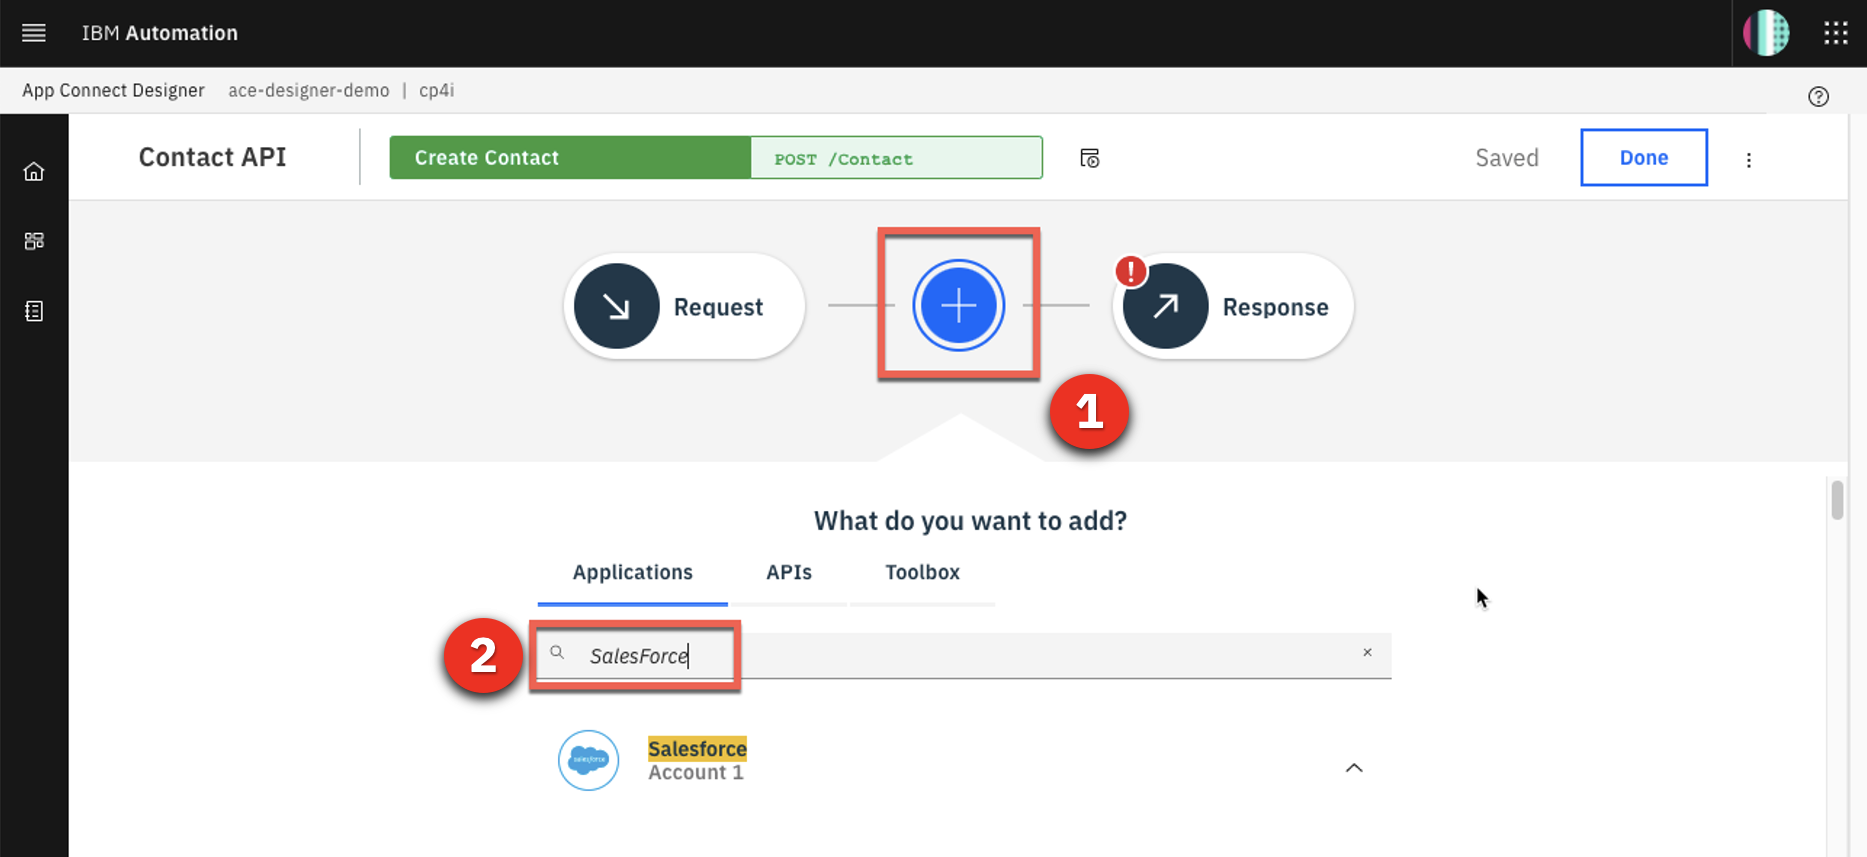
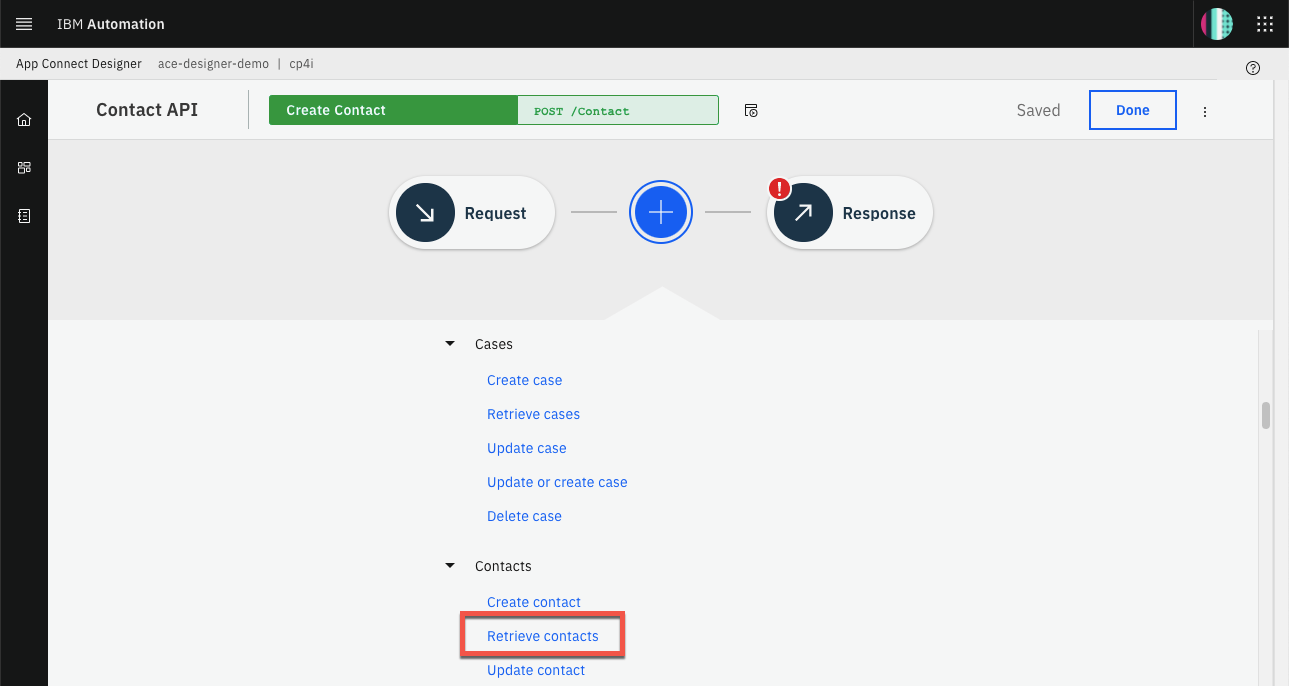
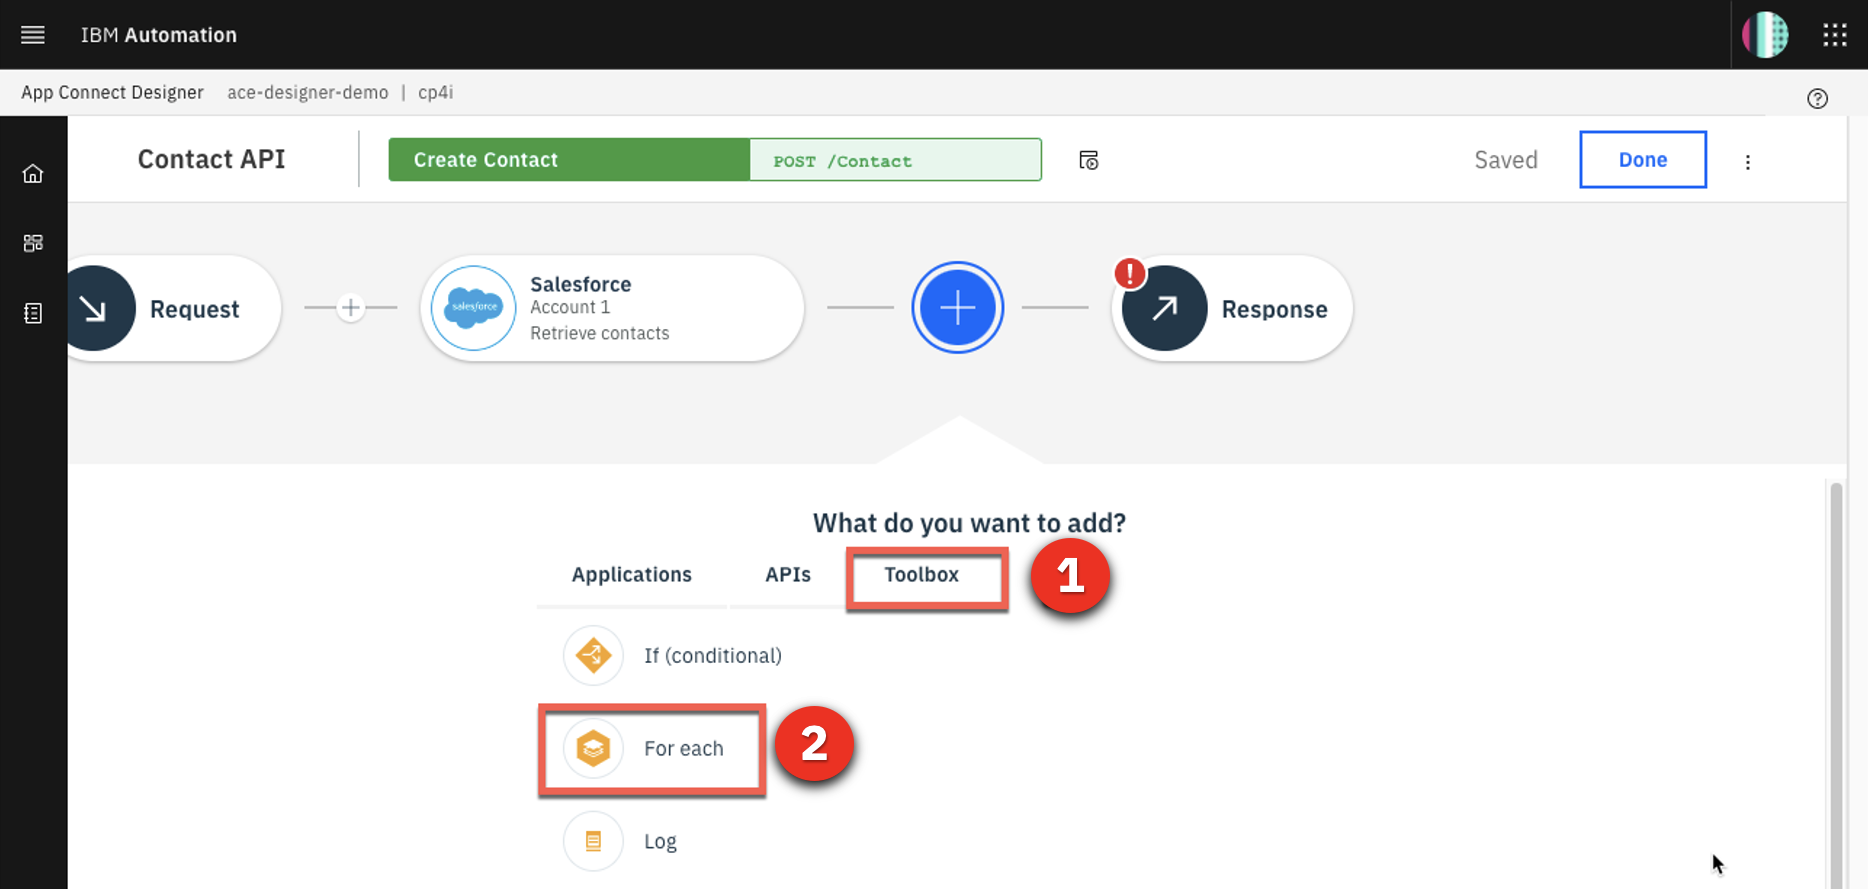
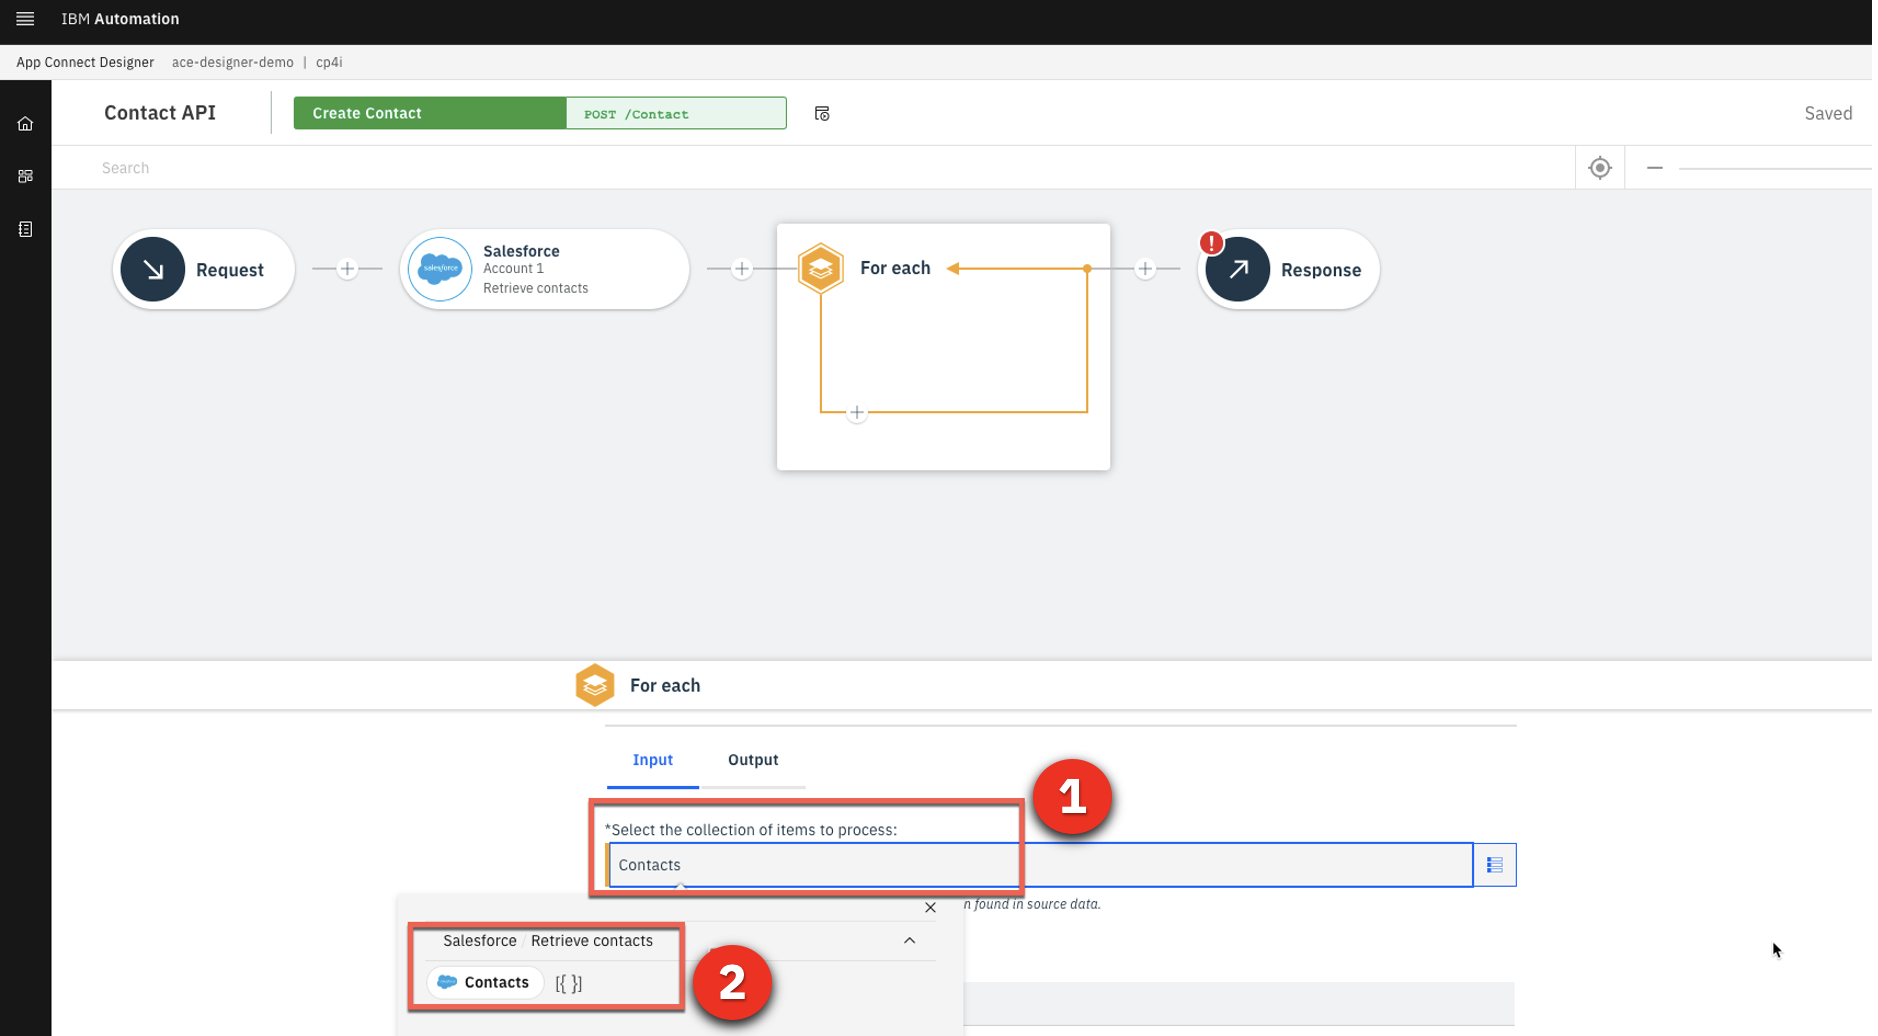
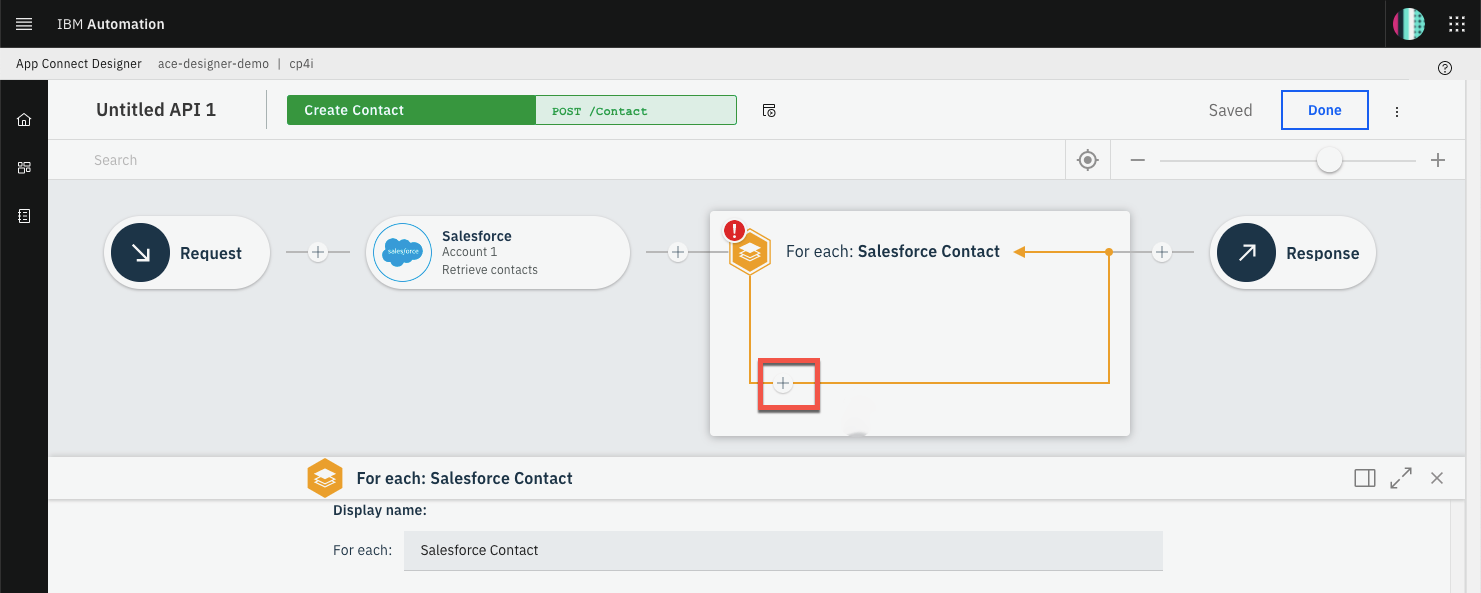
2 - Creating the flow

2.1 Create flows for an API
Narration Here we are in the designer tooling. This is where we can create all our API integration flows and manage our connectivity to our services and endpoints. As we begin, there is nothing here yet, so let’s build some integration logic. Let’s see how simple it is to create our flow for an API. First, we need to create a model for our contact.
Action 2.1.1 Click Create flows for an API .
Action 2.1.2 Rename the API Contact API (1), name the model Contact (2), and click Create model (3).
2.2 Create properties
Narration Let’s start by defining our properties. There will be an ID, FirstName, LastName, Email, Address, Phone, and Mobile. As you can see, we are developing our API based on a model. It’s completely model-driven, and we’ve just modeled our ‘Contact’ object. Next, we’ll design and implement the operation that is related to this ‘Contact’ model.
Action 2.2.1 In the property name, enter ID and click Add property . Repeat the same steps to include FirstName , LastName , Email , Address , Phone , and Mobile (1). Click Operations (2).
2.3 Create operation
Narration First, let’s select the “Create Contact” operation. This operation syncs the data from Salesforce to Insightly CRM. Let’s implement our API flow.
Action 2.3.1 Click the Select an operation to add dropdown. select Create Contact (2).
Action 2.3.2 Click Implement flow .

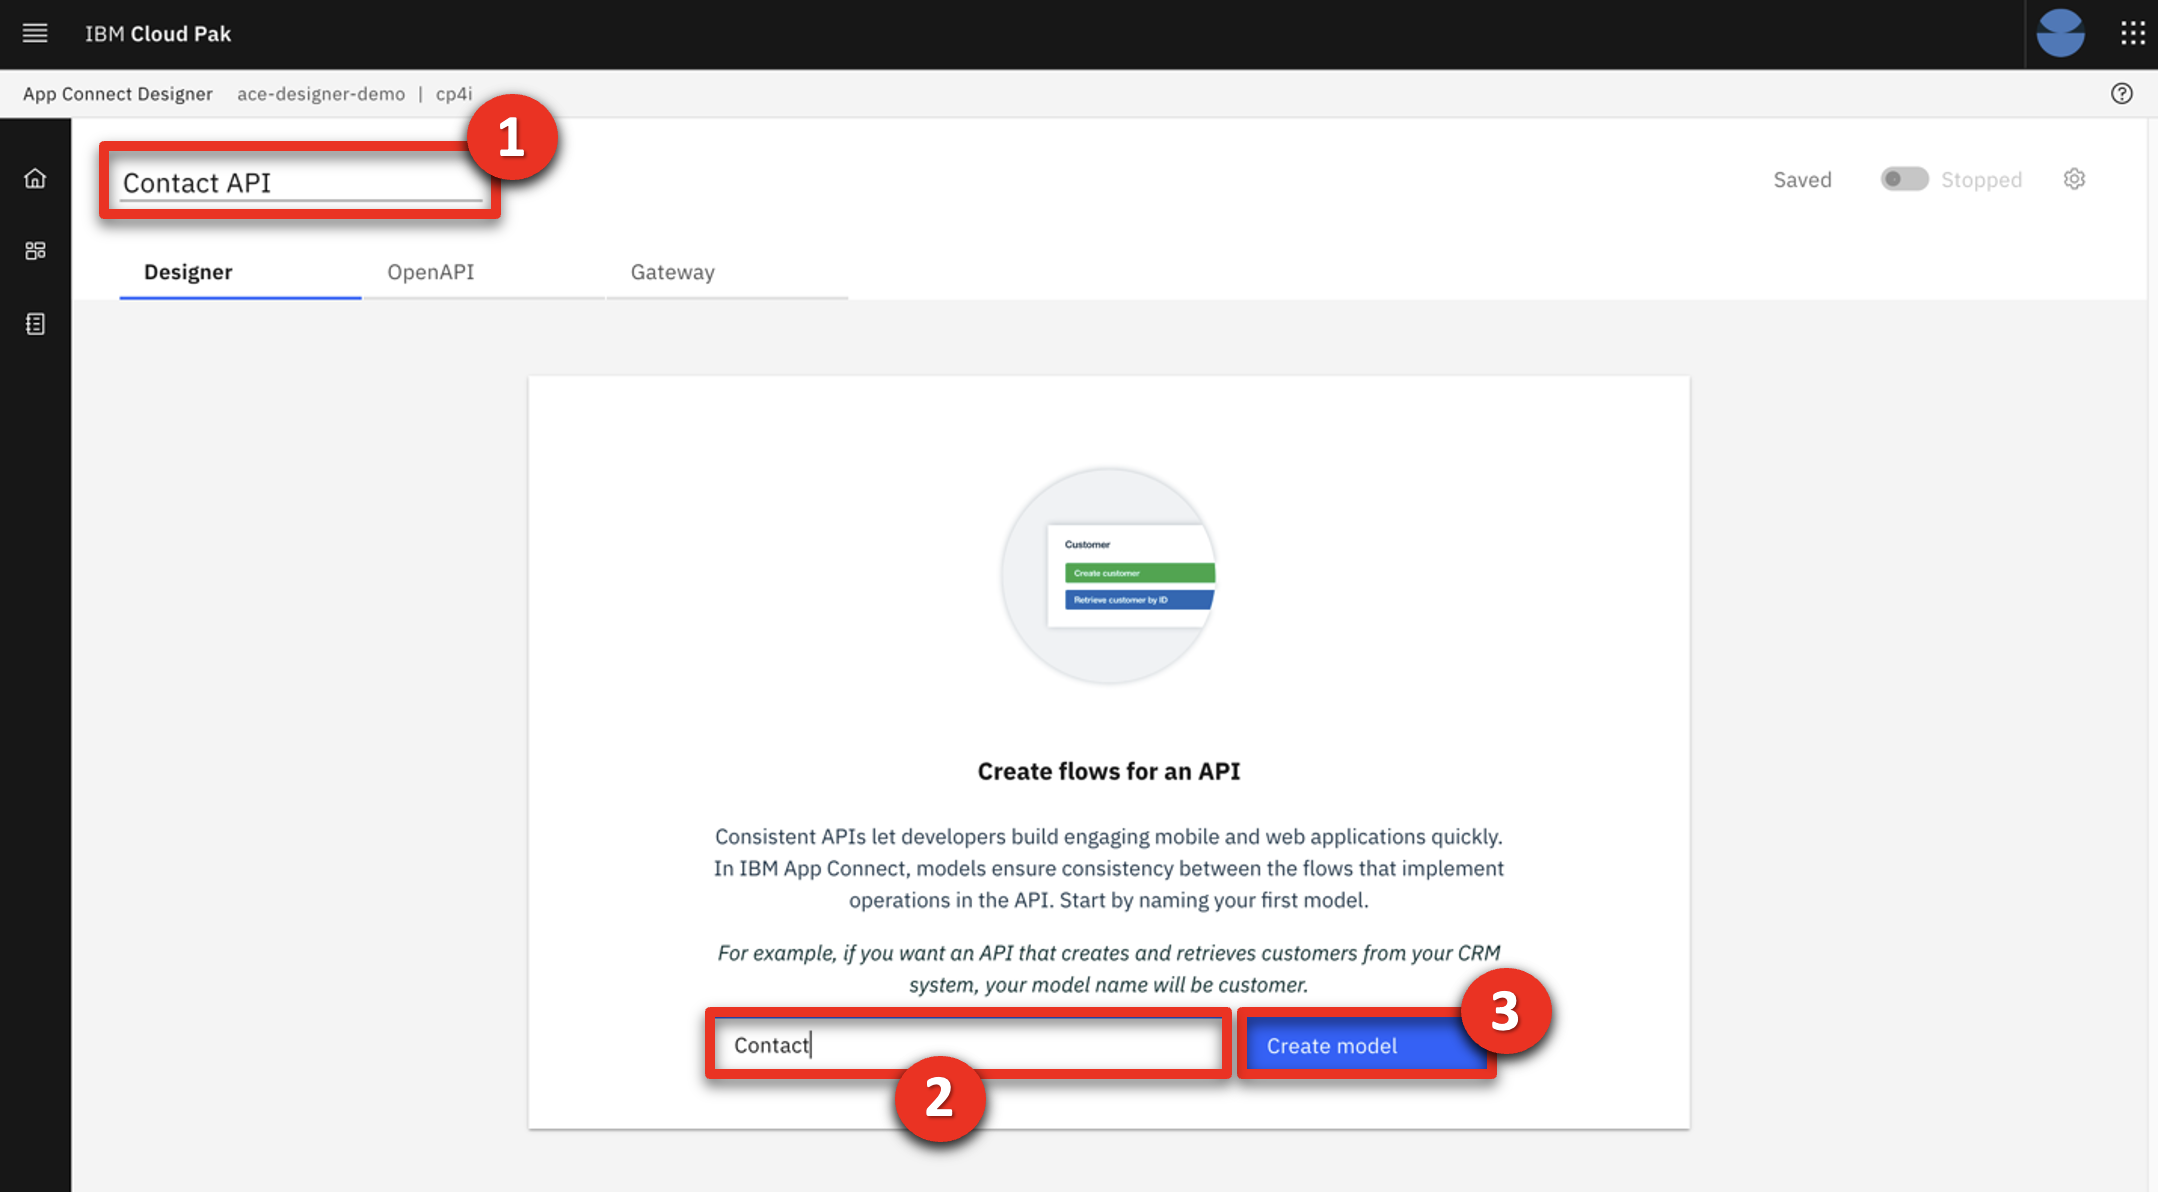
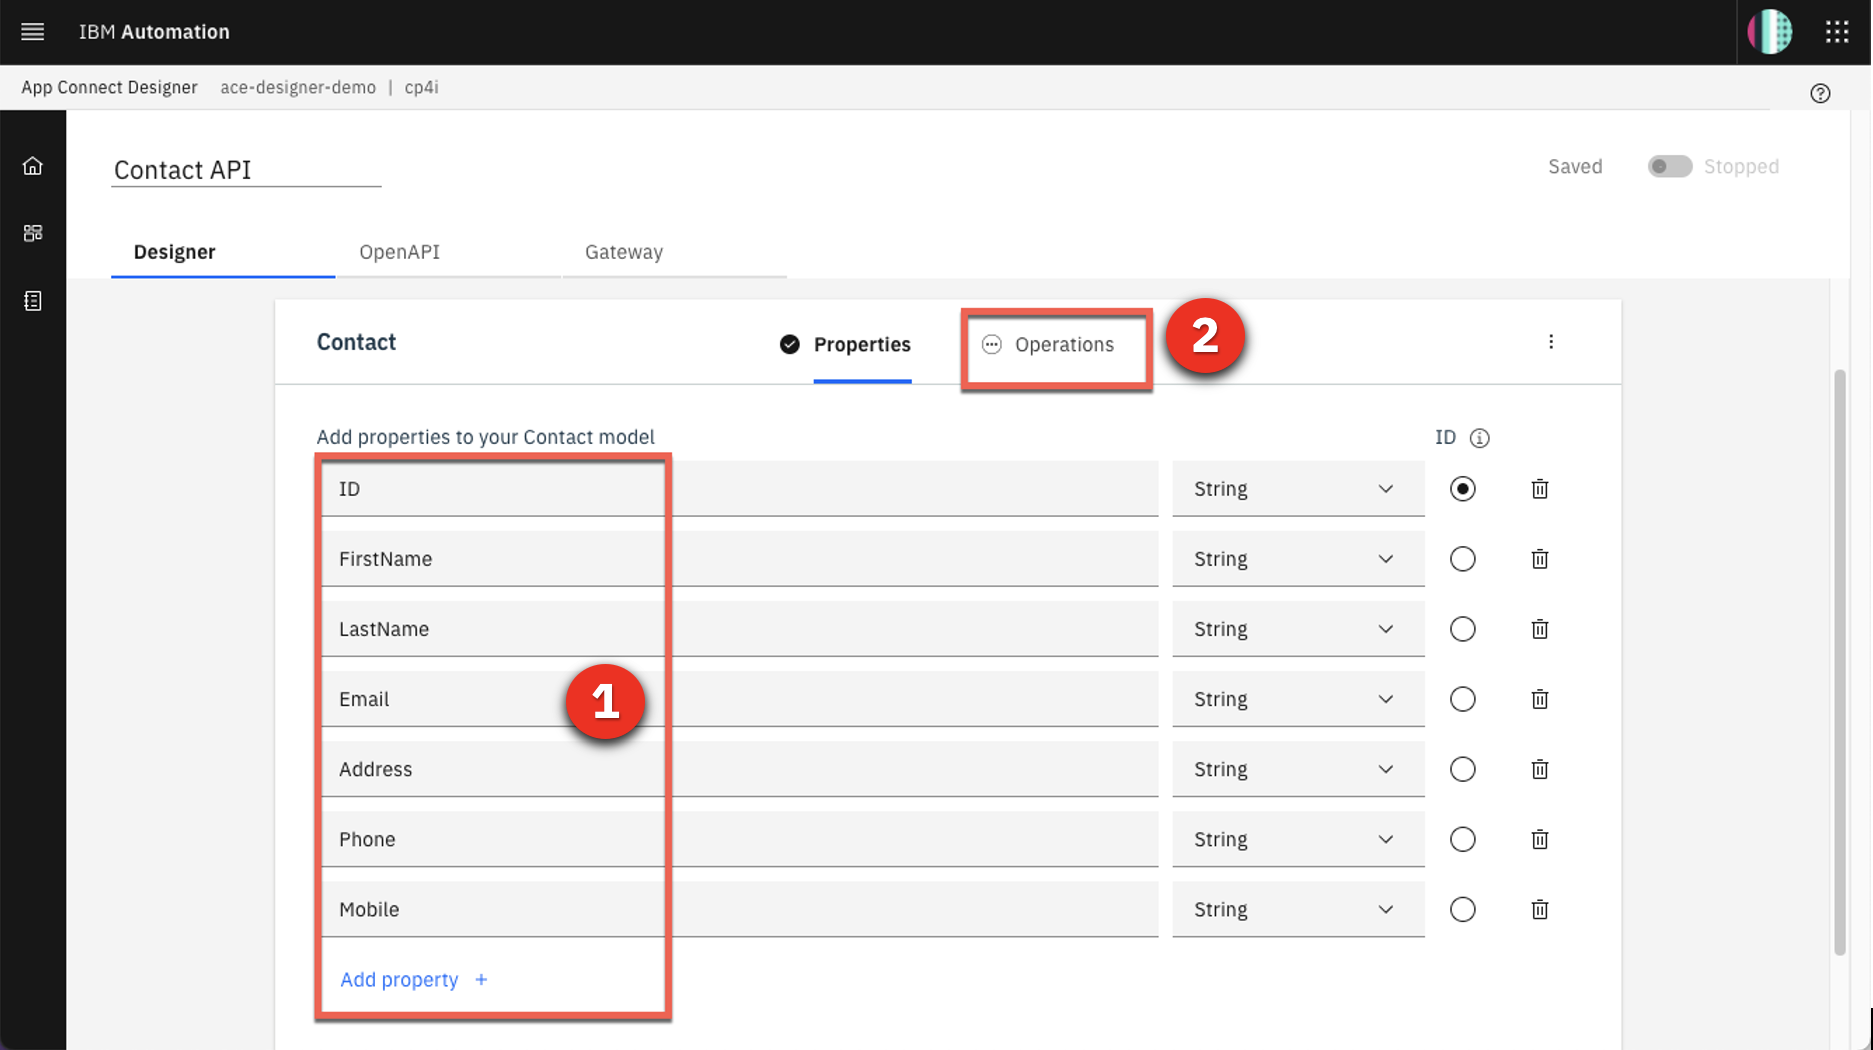
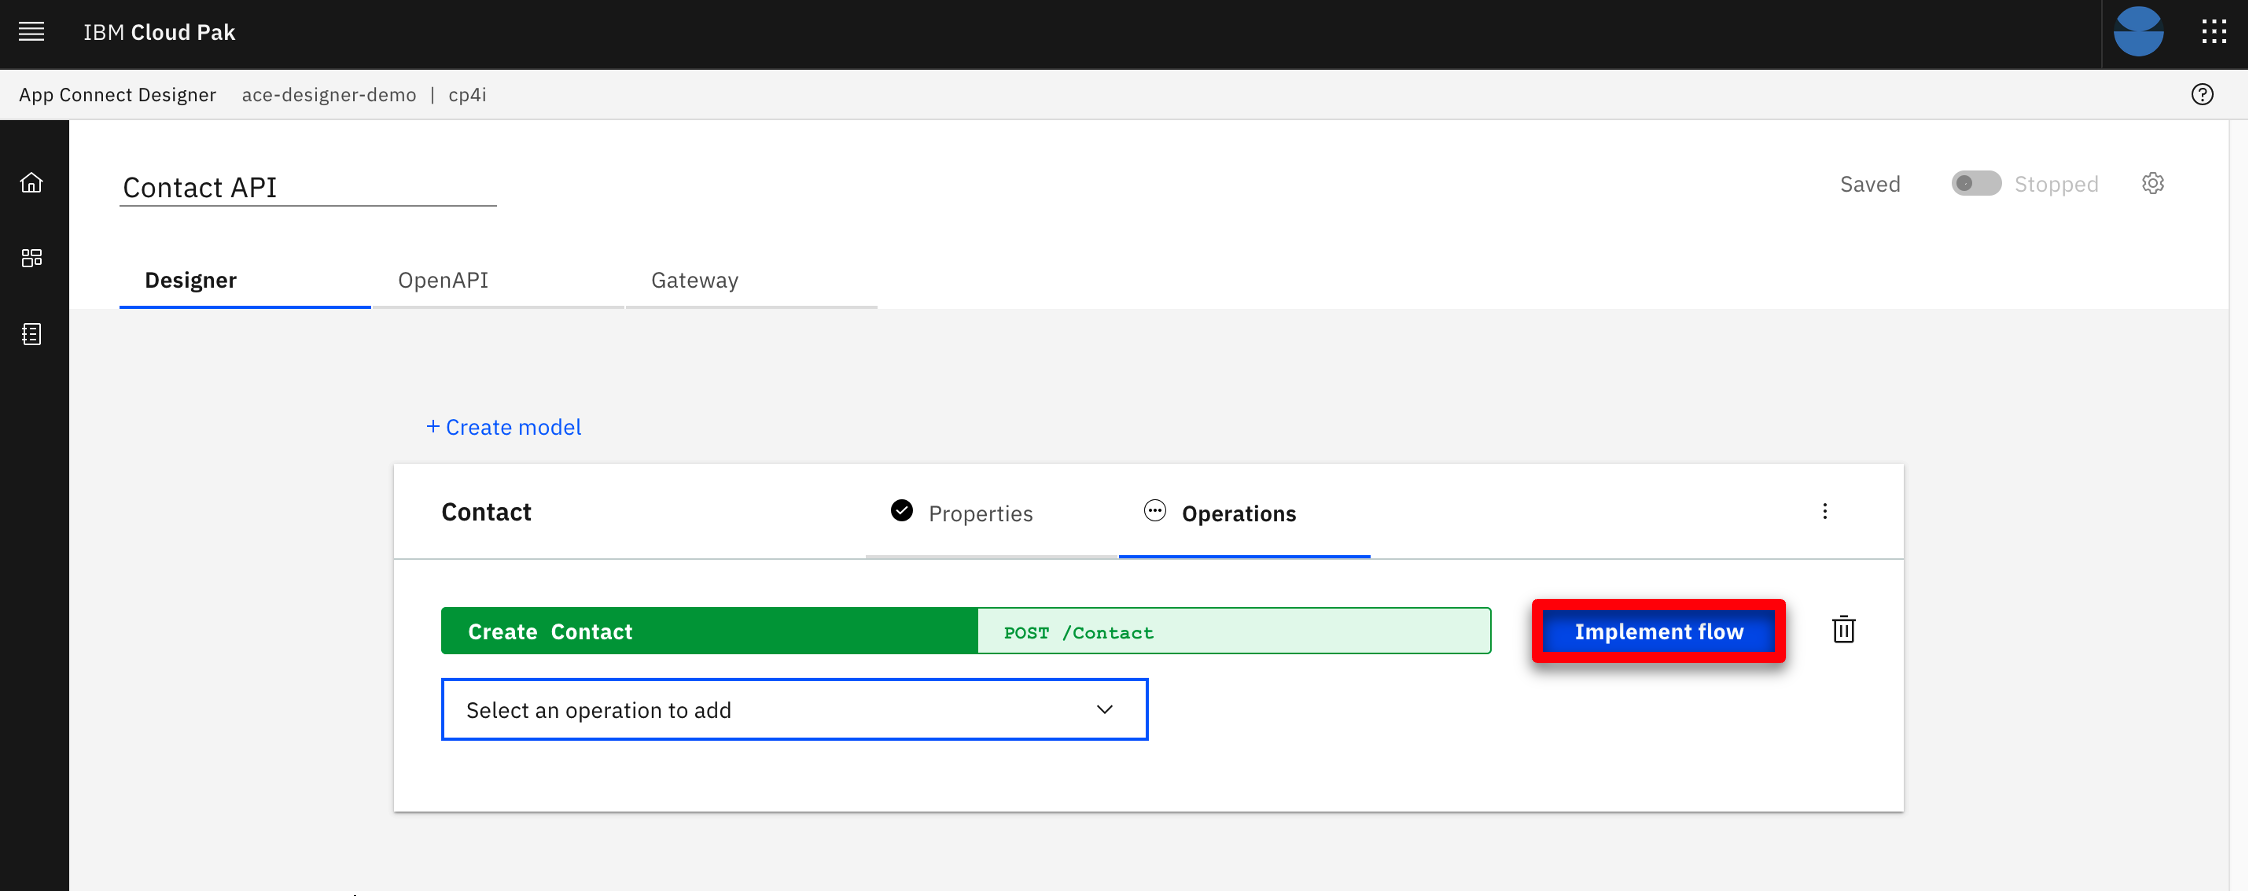
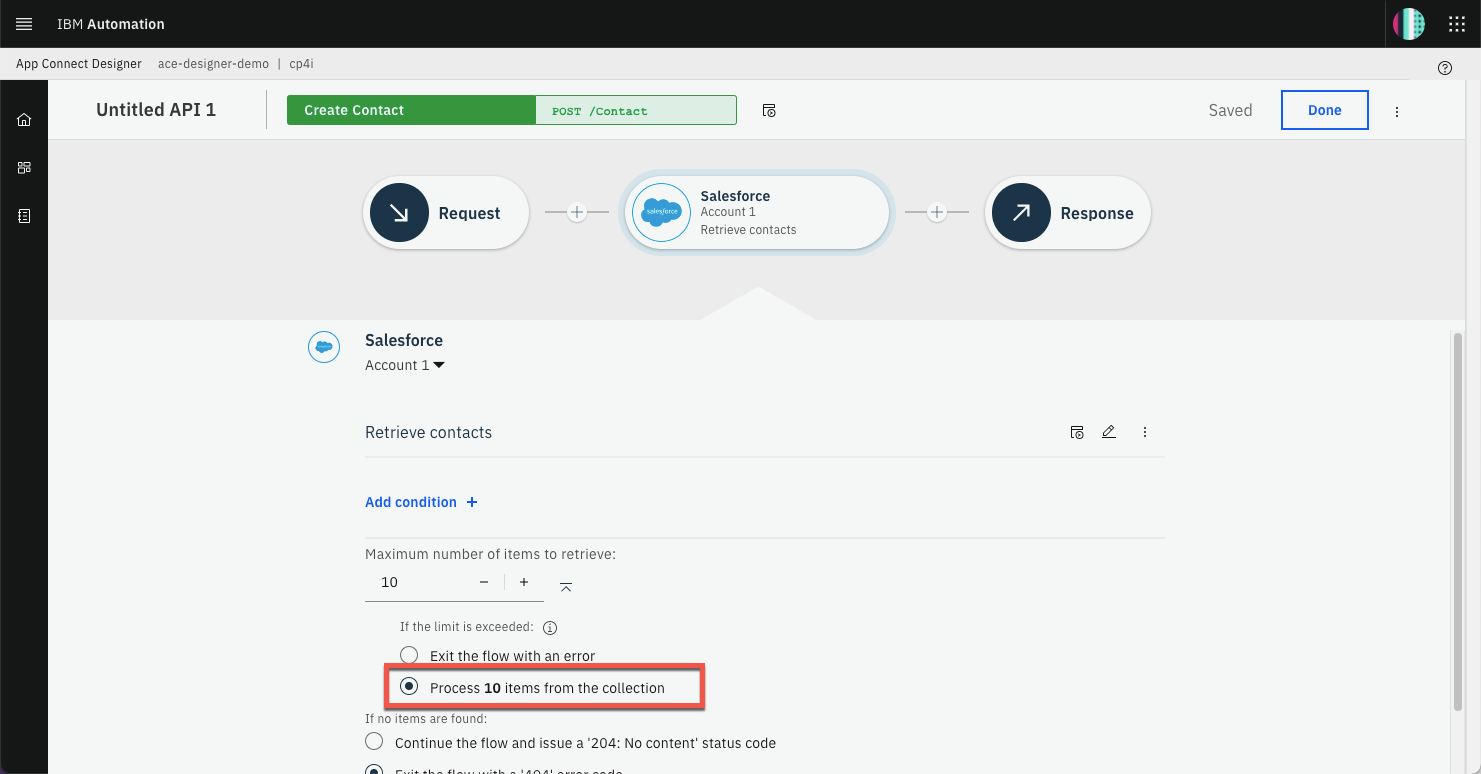
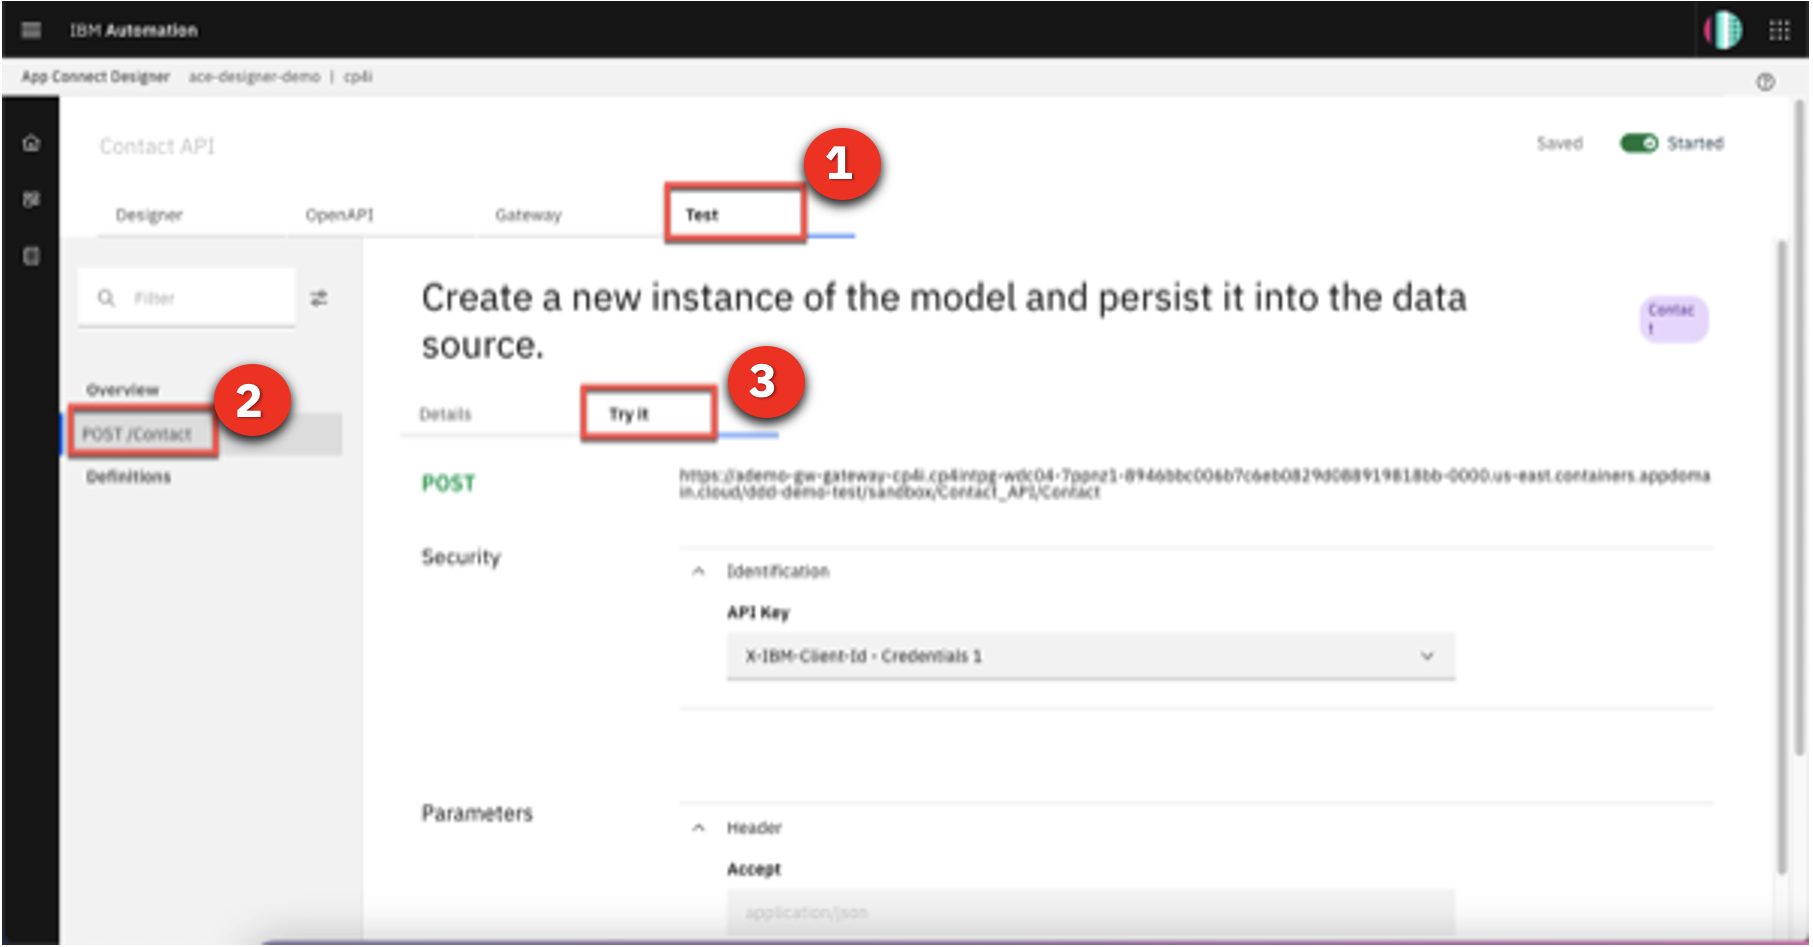
3 - Implementing the flow

3.1 Adjust flow response
Narration Here we see our initial demo flow, which initially has just a ‘Request’ node and a ‘Response’ node. We will use the designer flow editor to edit and change our flow to add the necessary additional steps.

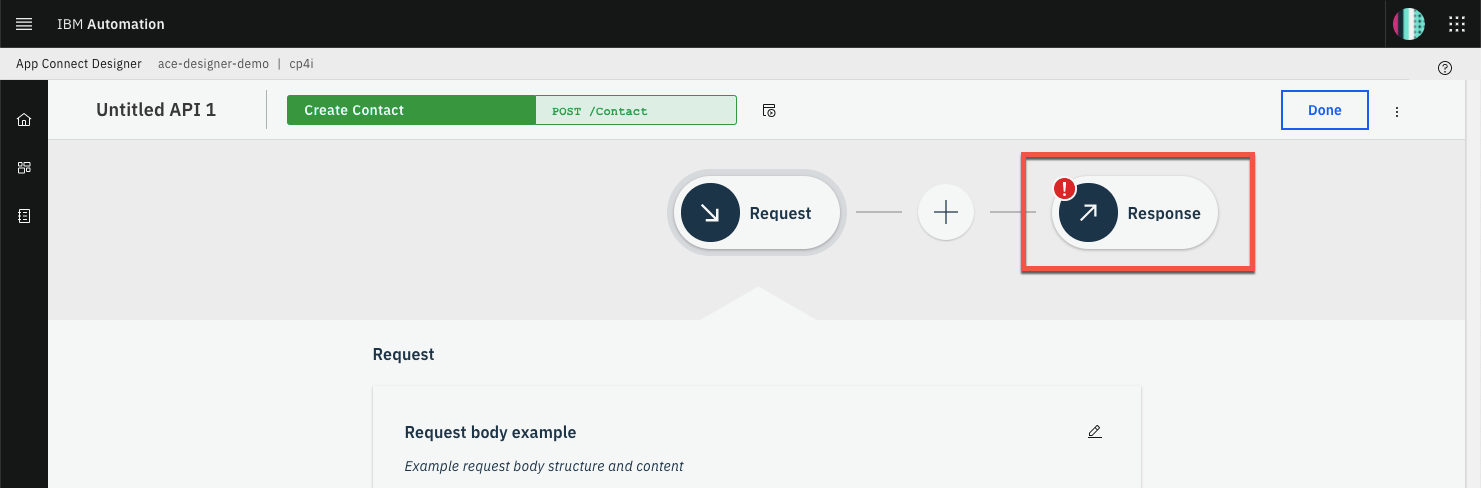
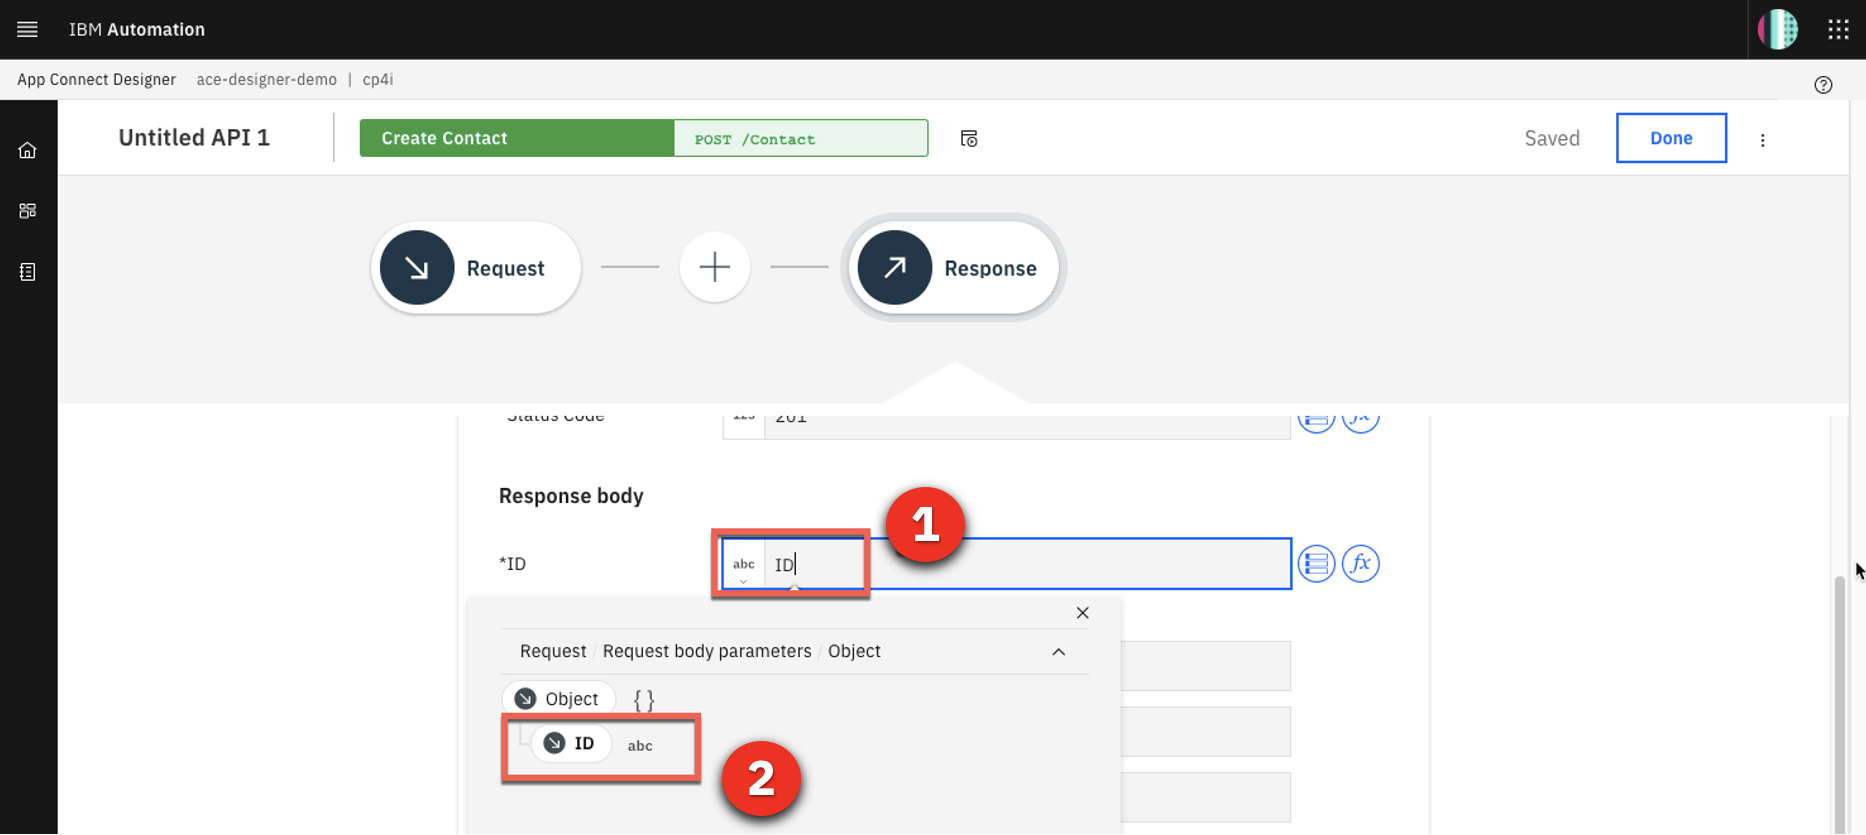
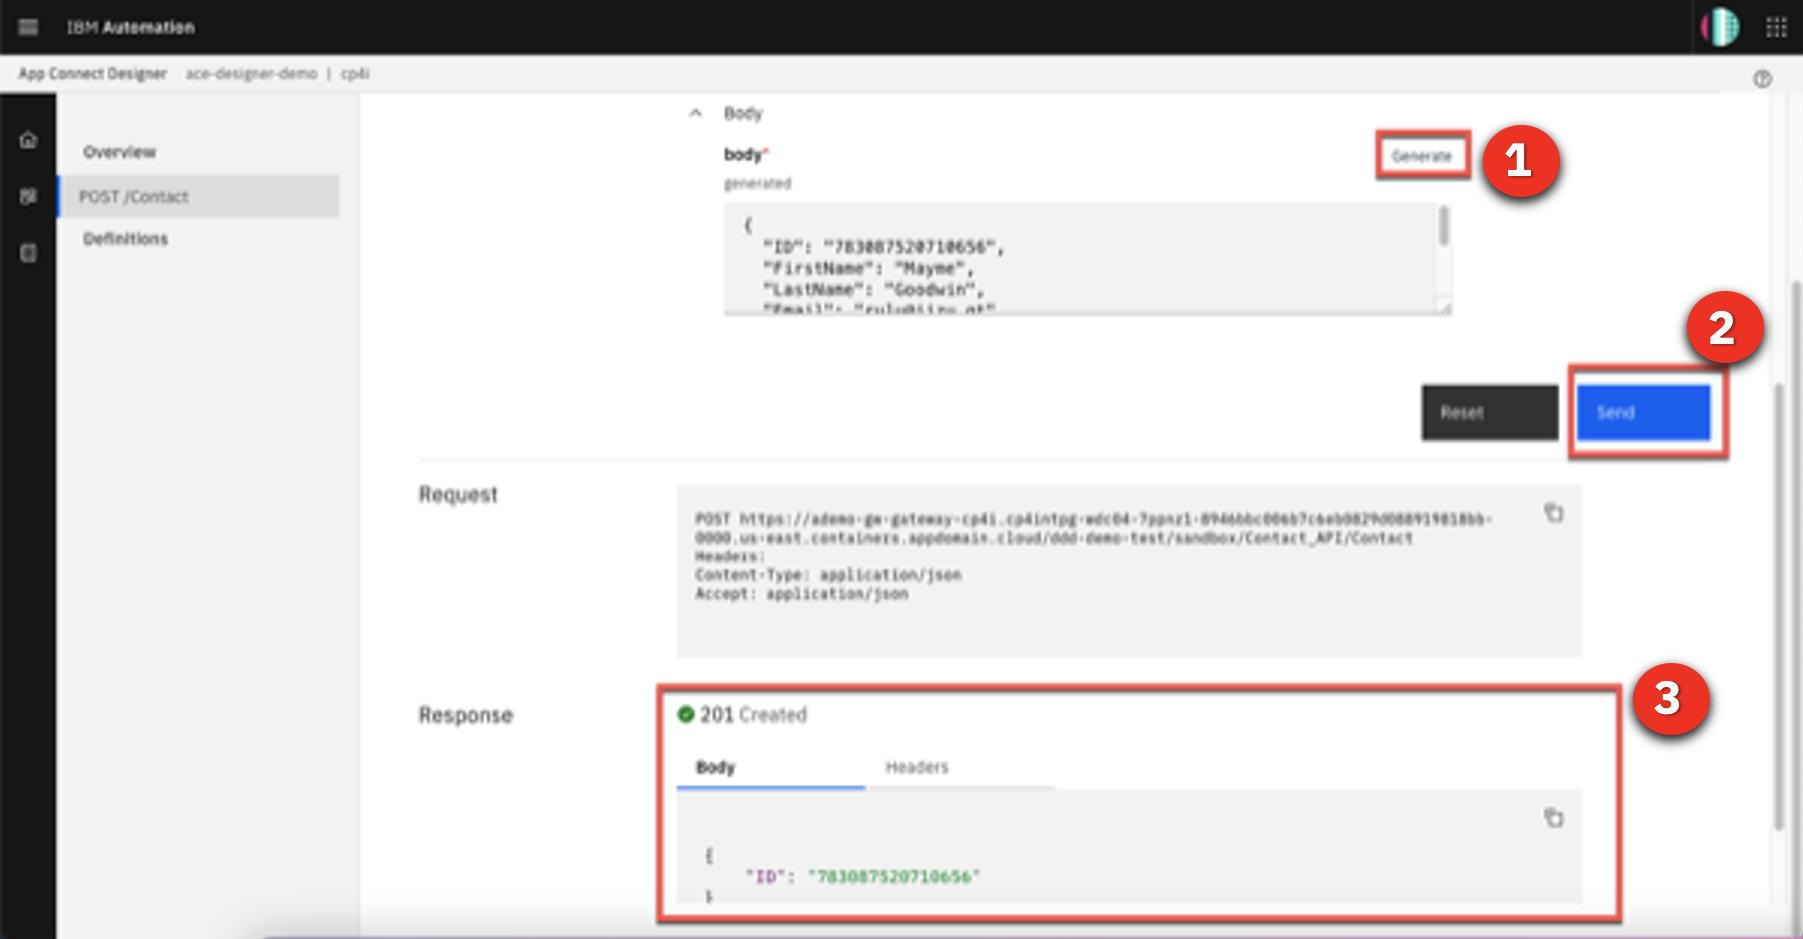
Before we add to our flow, let’s adjust the response that is returned when the flow is called. This response serves to close the API flow and is a required construct. Because there is no data needed by the caller of the API flow (but a response is required), we can have a very simple response. We will add the ID to the response.
Action 3.1.1 Click the Response node.
Action 3.1.2 Enter ID in the ID field (1), and select the ID object (2).
3.2 Retrieve contacts
Narration Our API will be easy to create. The API will retrieve the contacts from Salesforce. For each contact that is retrieved, we will sync the data to Insightly CRM. Let’s include our pre-configured Salesforce connector and select the “Retrieve contacts” operation.
Action 3.2.1 Click the Plus icon (1). Search for the Salesforce connector (2).
Action 3.2.2 From your pre-configured Salesforce connector, select Retrieve contacts .
Action 3.2.3 Select Process 10 items from the collection .
3.3 ‘For each’ statement
Narration Now, we need to add a ‘for each’ statement because we need to retrieve all of the contacts from Salesforce. For each contact, we need to create a contact in the Insightly CRM. We’ll select the “Salesforce Contacts” object as the object to be processed.
Action 3.3.1 Click the Plus icon.
Action 3.3.2 Then, open the Toolbox tab (1) and select the For each statement (2).
Action 3.3.3 Enter Contacts in the Select the collection of items to process field (1), and select the Salesforce Contacts object (2).
3.4 Create contacts
Narration Now we are configuring our flow to connect to the Insightly CRM. Our Insightly account is pre-configured, so we select the ‘Create Contact’ operation. The Mapping Assist feature starts to work in the background, generating suggestions for us to populate the target fields in Insightly.
Action 3.4.1 In the For each loop, click the Plus icon.
Action 3.4.2 In the Applications tab, search for the Insightly connector.
Action 3.4.3 Select the Create contact operation.

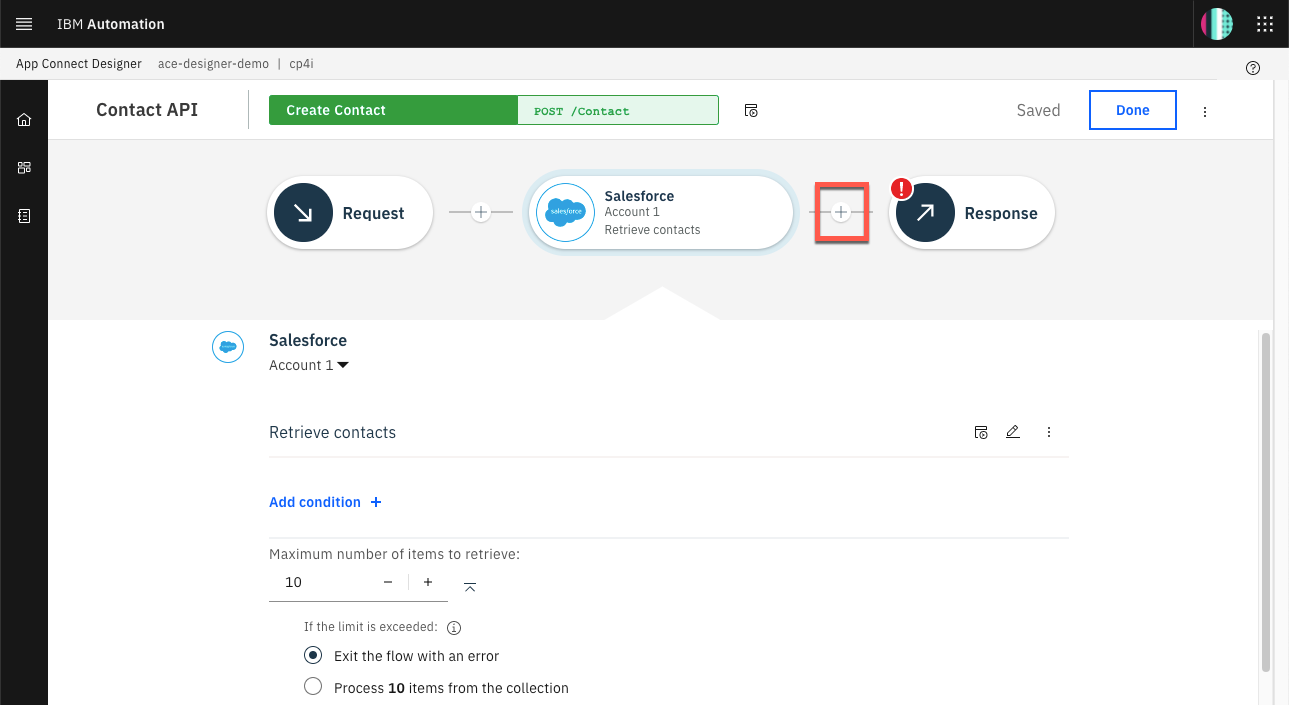
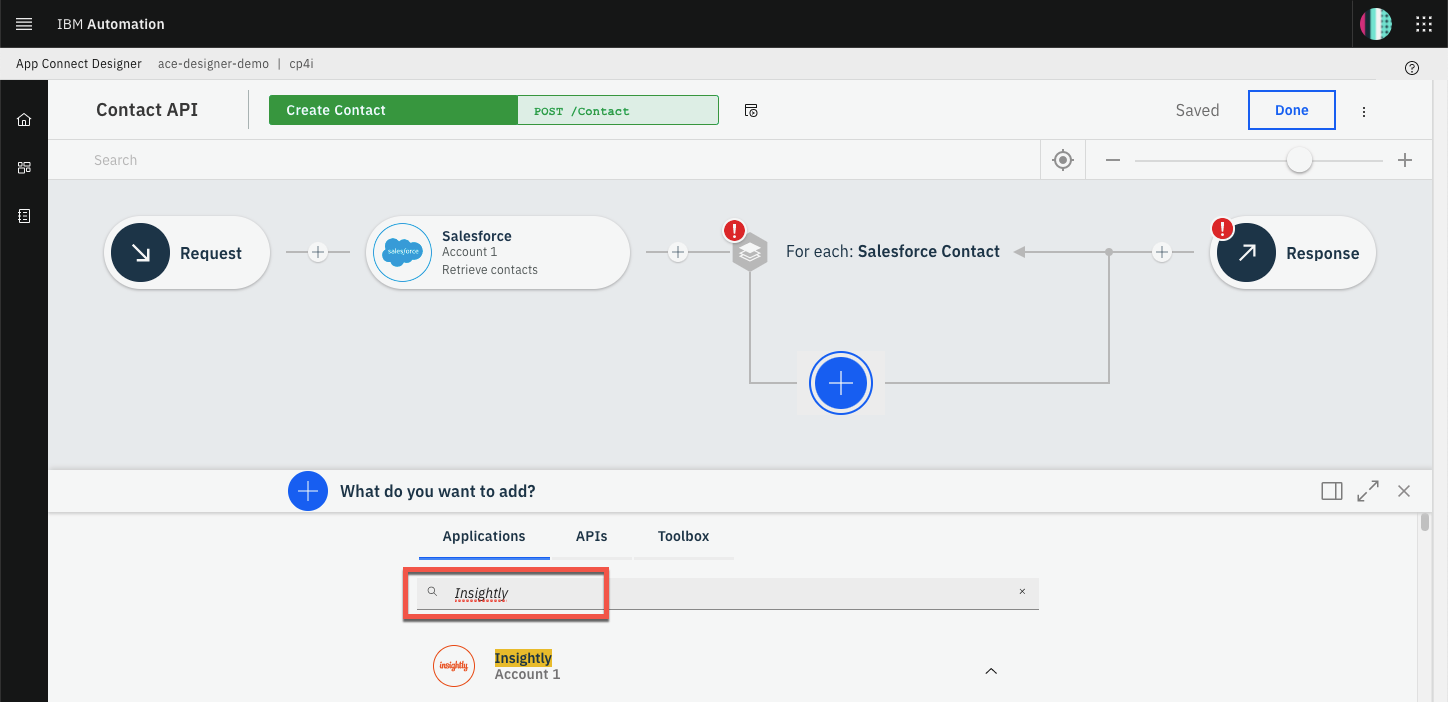
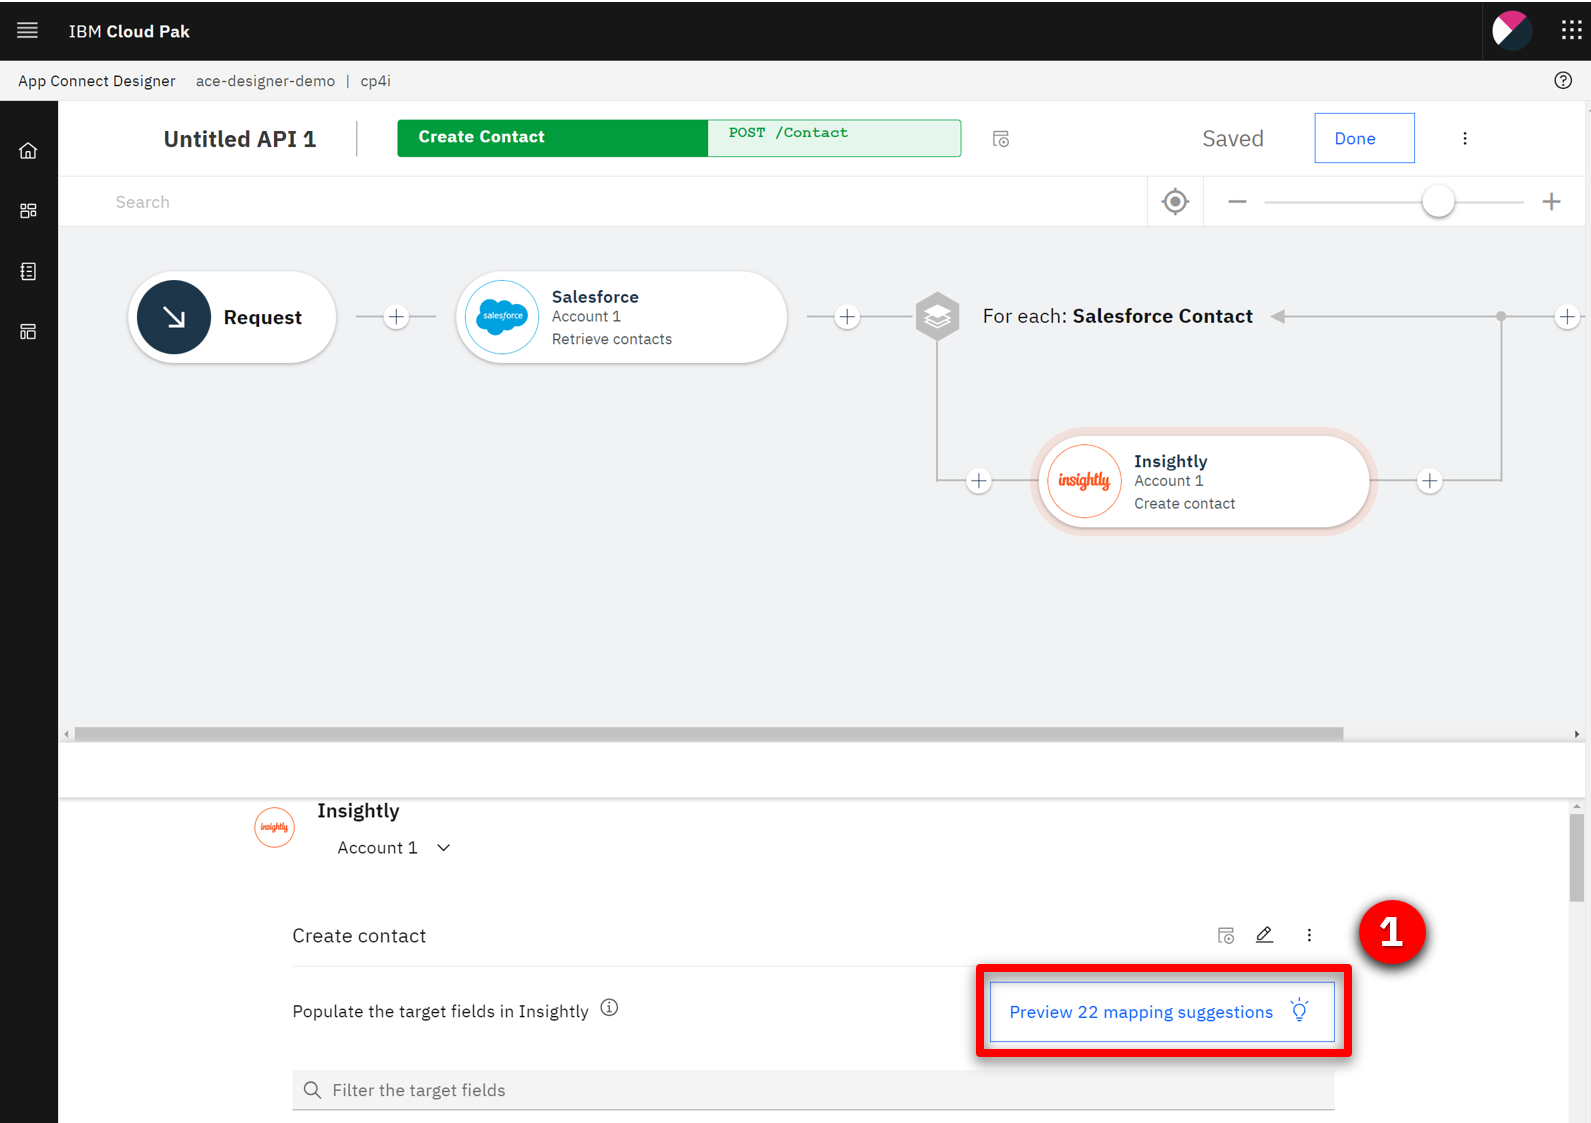
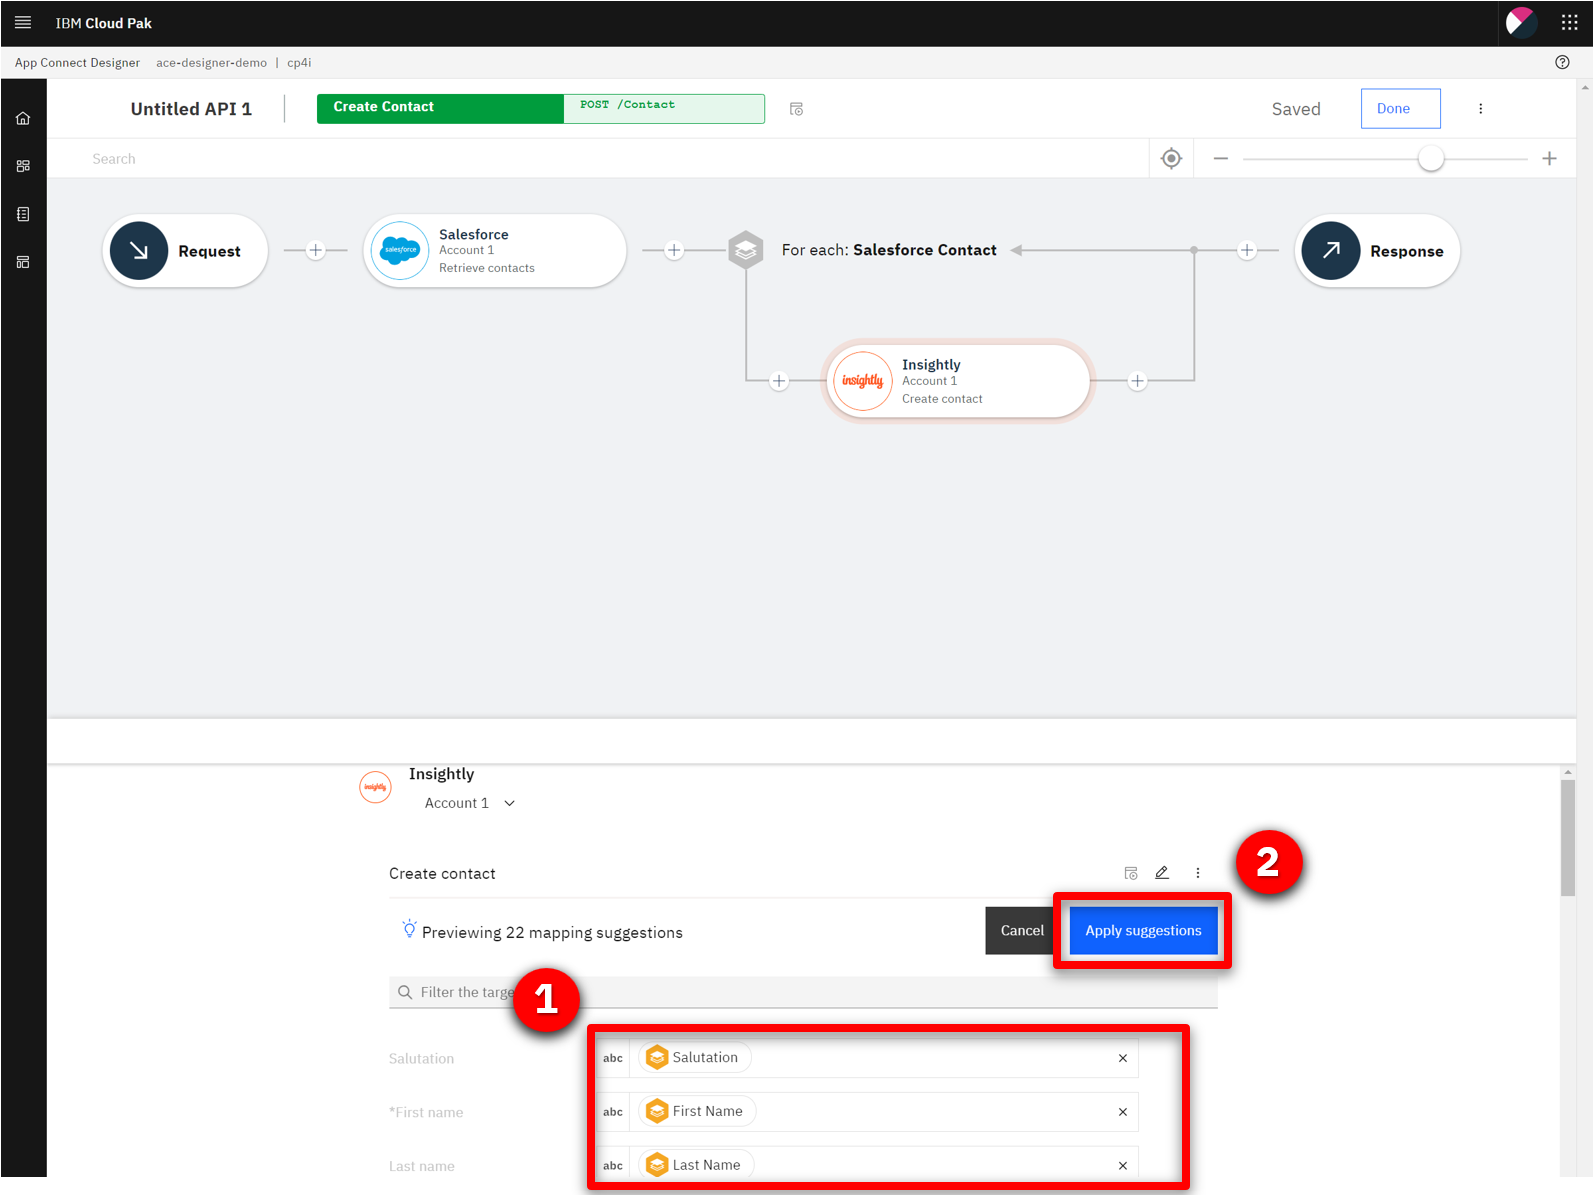
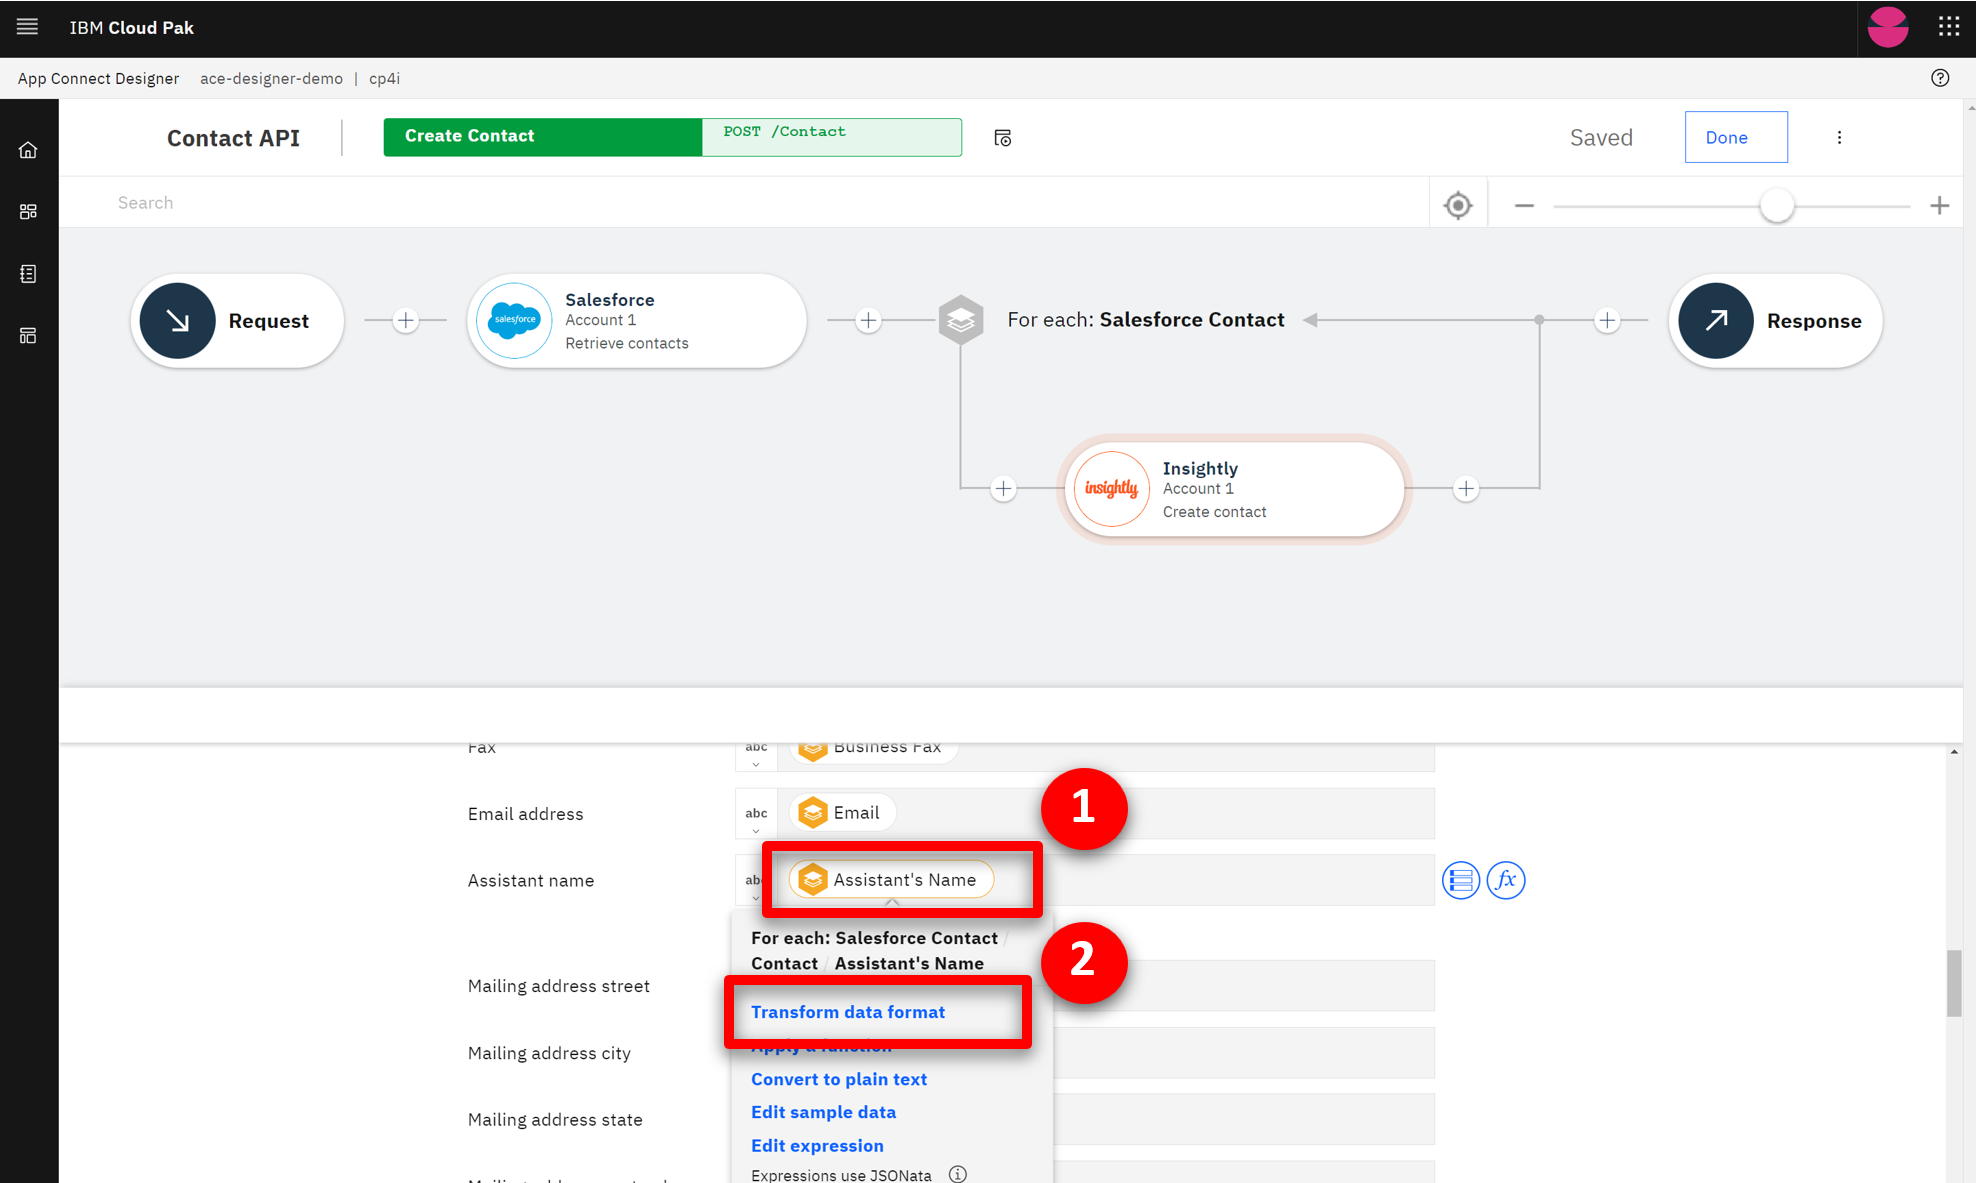
4 - Using the Mapping Assist feature

4.1 View suggestions
Narration In the node, you can manually define the map between the Salesforce and Insightly fields. However, this is difficult because there are lots of fields, and the products will probably have different field names for the same objects.

With Mapping Assist, you don’t need to type all of these mappings. We’ll use AI to simplify our work! Once Insightly’s ‘Create Contact’ node is added, mapping suggestions are automatically generated. The best possible matches (top suggestions) are presented, which can be automatically inserted into fields with a single click. These top suggestions have an 80% (or higher) confidence score, and the count (20+ suggestions) identifies the total number of fields that will be populated with mappings.
Action 4.1.1 Point out Mapping Assist’s Preview [20+] mapping suggestions and click on the button.


The exact number of suggestions may vary.

4.2 Apply suggestions
Narration By clicking “Preview mapping suggestions”, all suggestions with a confidence score of at least 80% are automatically displayed into Insightly’s ‘Create Contact’ node. Note that there are suggestions for simple fields as well as for more complex, nested fields. Mapping Assist uses a pre-trained AI algorithm to provide intelligent, customized data map suggestions. From this interface, we can clear the suggestions, or we can accept and apply the suggestions.
Action 4.2.1 Show the list of suggestions (1) and click Apply suggestions (2).
4.3 Resolve warnings
Narration Mapping Assist’s AI algorithm sometimes finds multiple high-confidence mapping possibilities. When this occurs, we need to decide which mapping we want to accept.
Action 4.3.1 You may or may not see this situation. When this happens, a warning message is shown. You need to resolve any/all fields where this occurs. Delete the field name that is currently mapped to the field with the warning.
Action 4.3.2 Click the selection list icon next to the field (1), and select the mapping option listed with the “For Each” option from the displayed list (2). Repeat these steps for each field that has a warning.
4.4 Generate a transformation
Narration In some situations, a direct mapping may not be adequate, for instance the data format of the “source” does not match the data format of the “target” field. In this situation you can generate a JSONata expression to define how the source data should be presented in the target application. JSONata is a declarative open-source query and transformation language for JSON data.

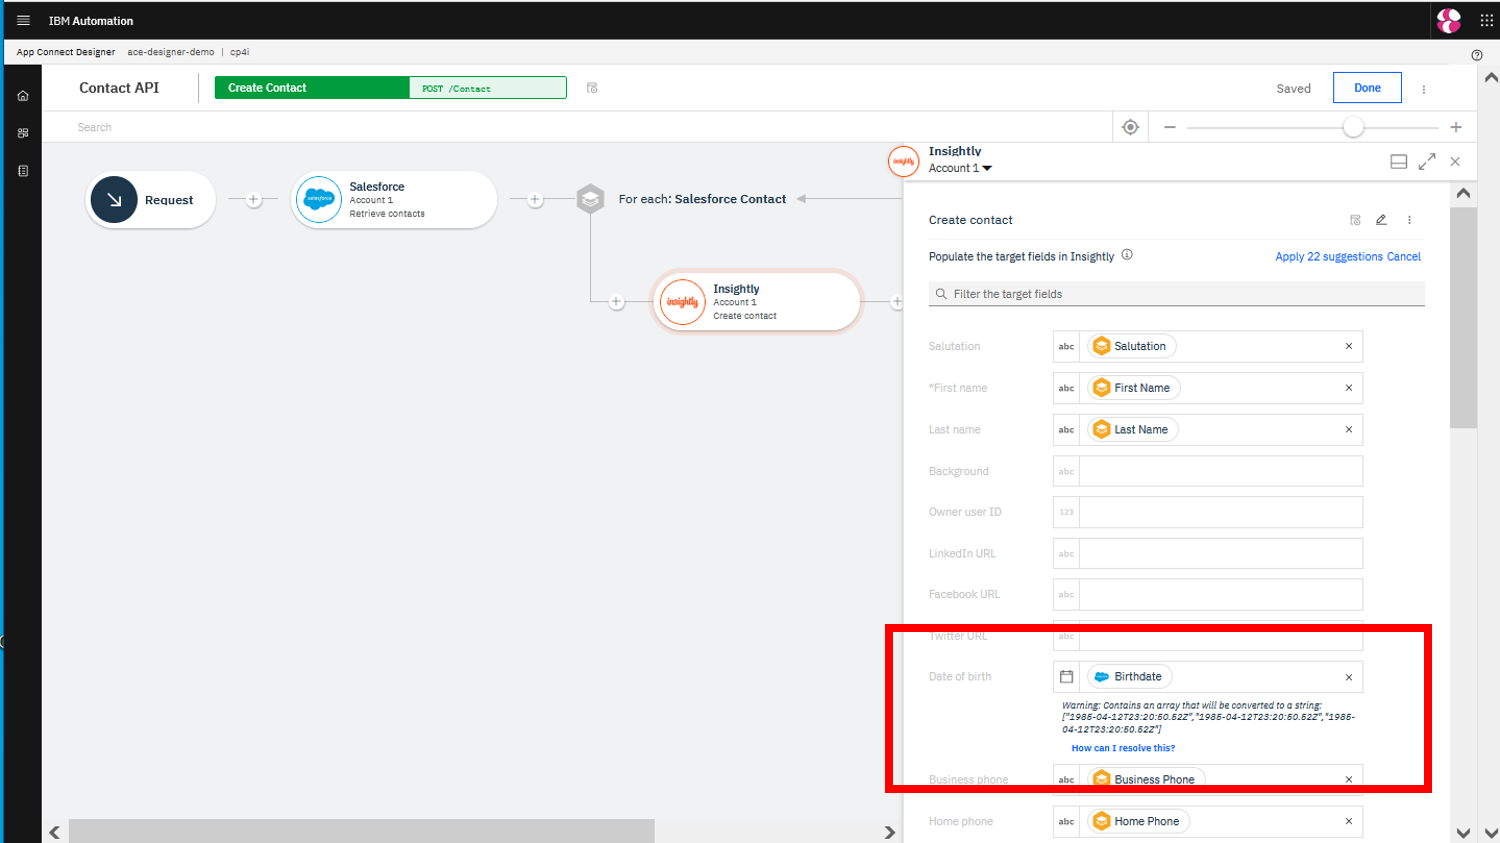
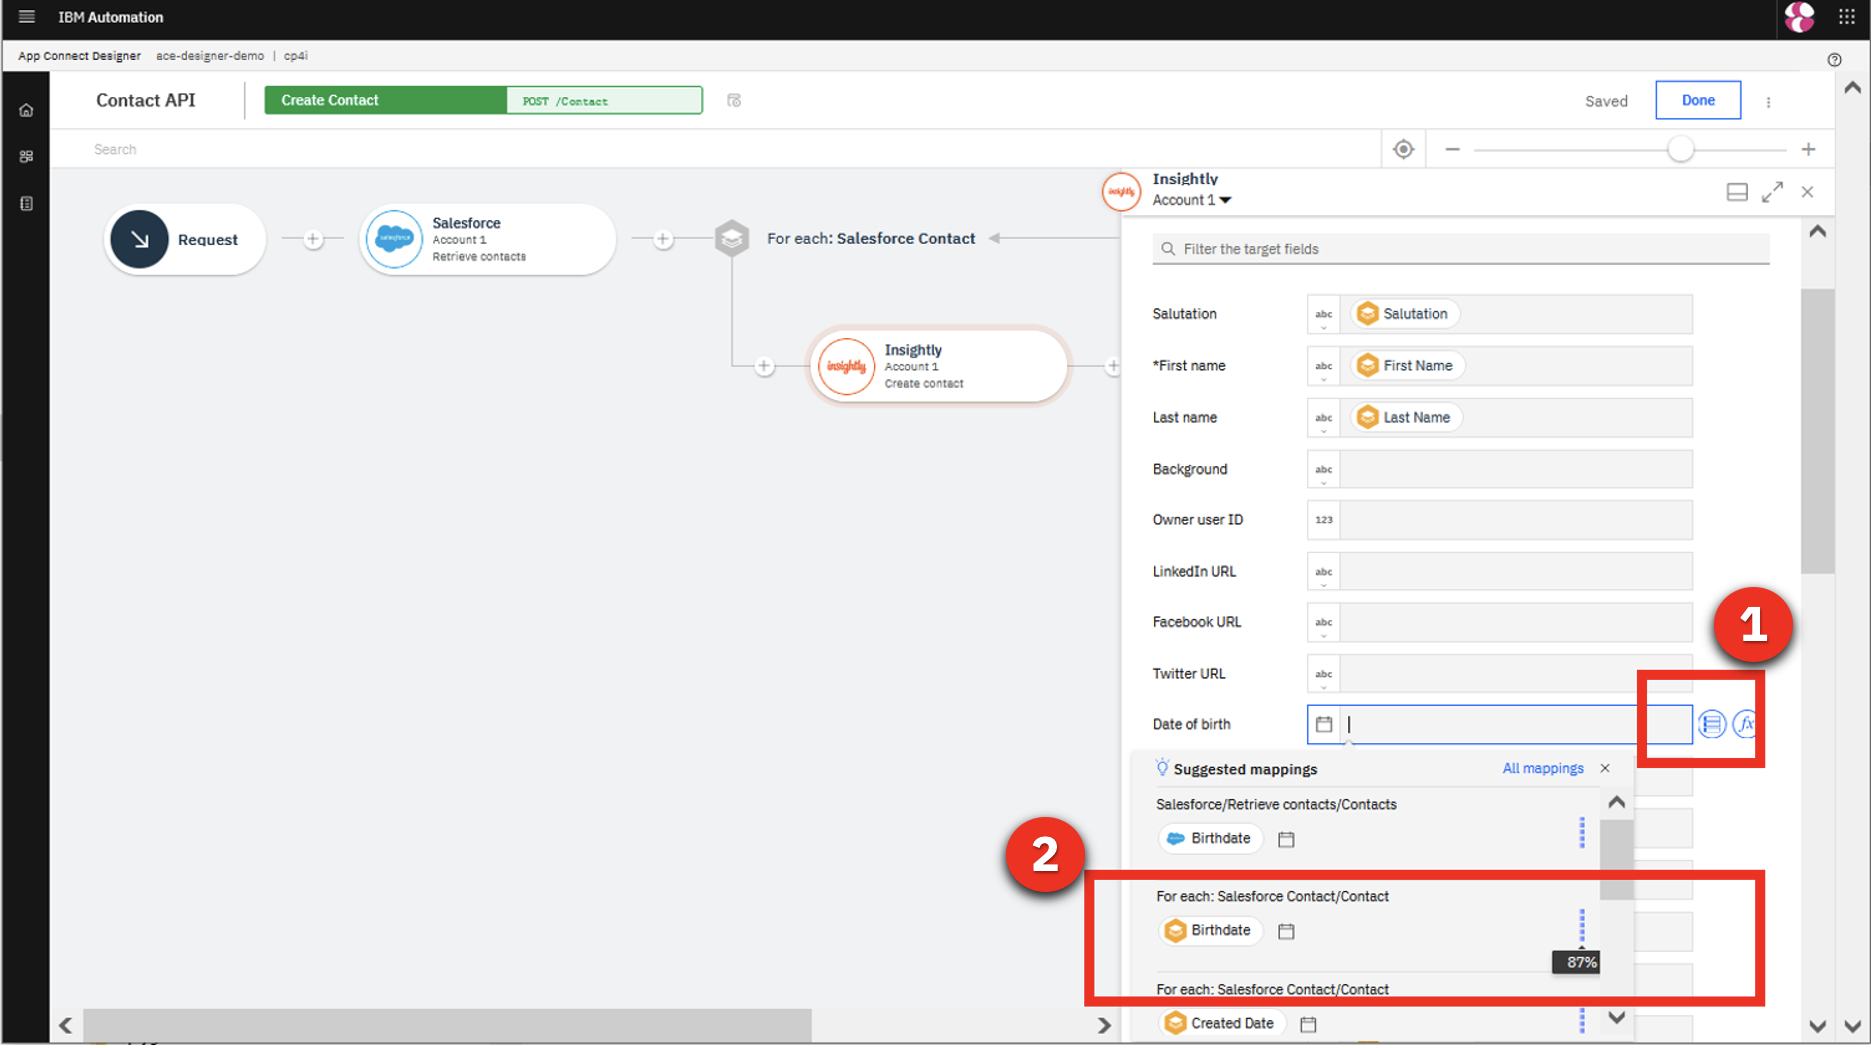
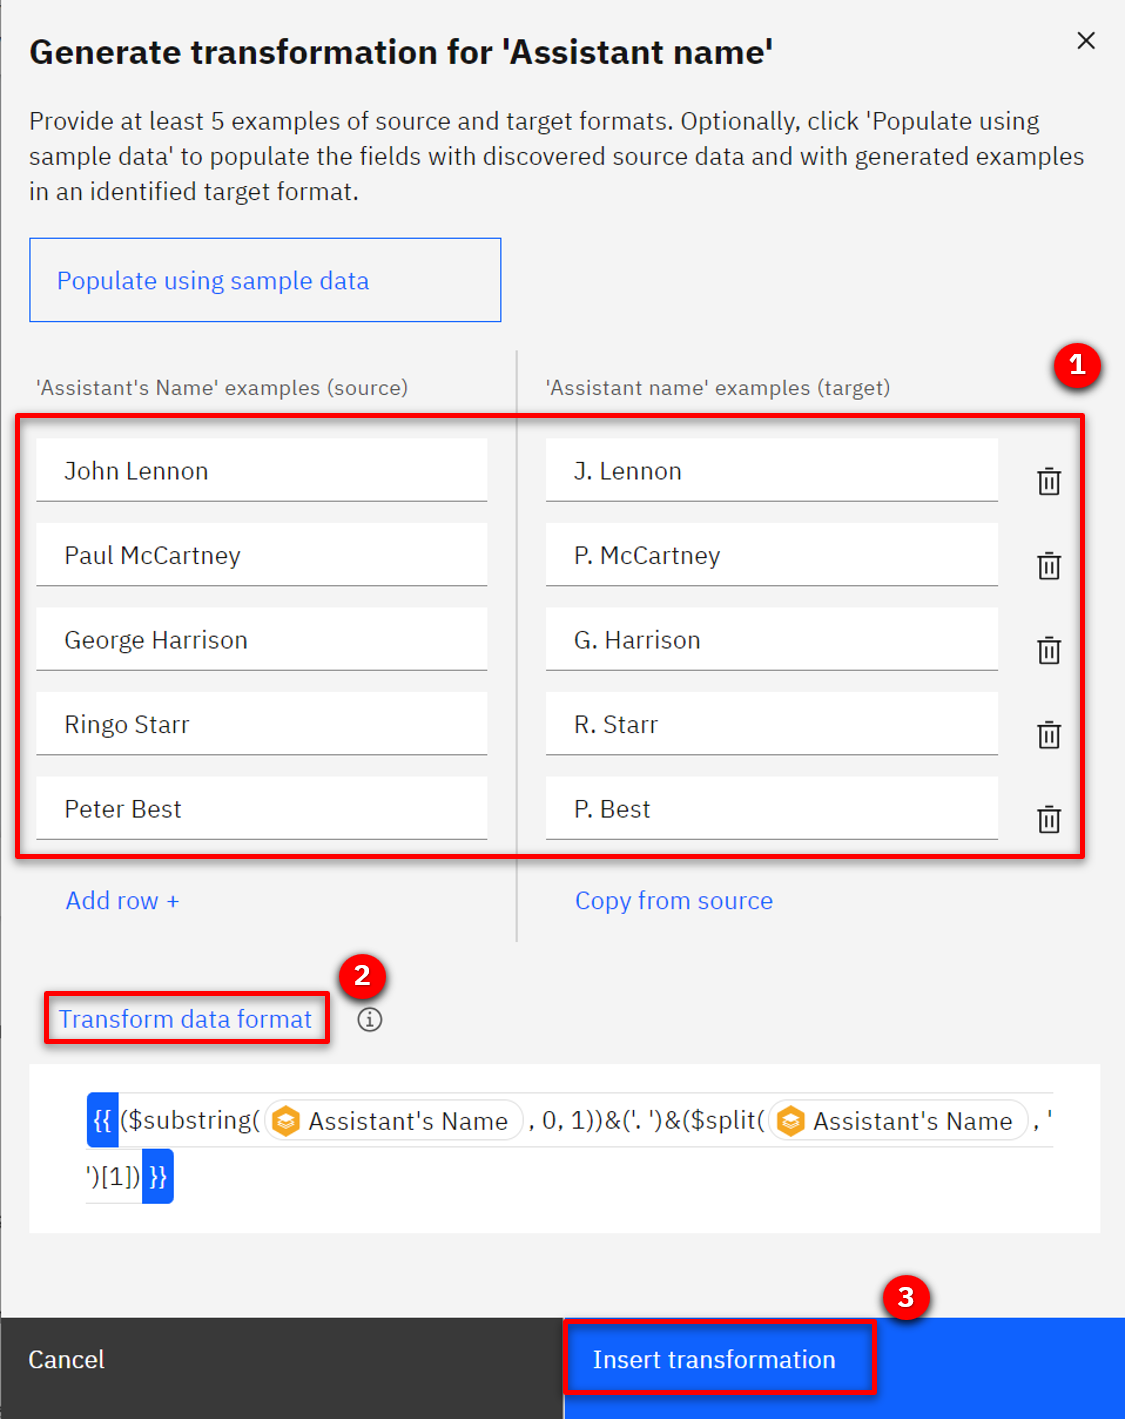
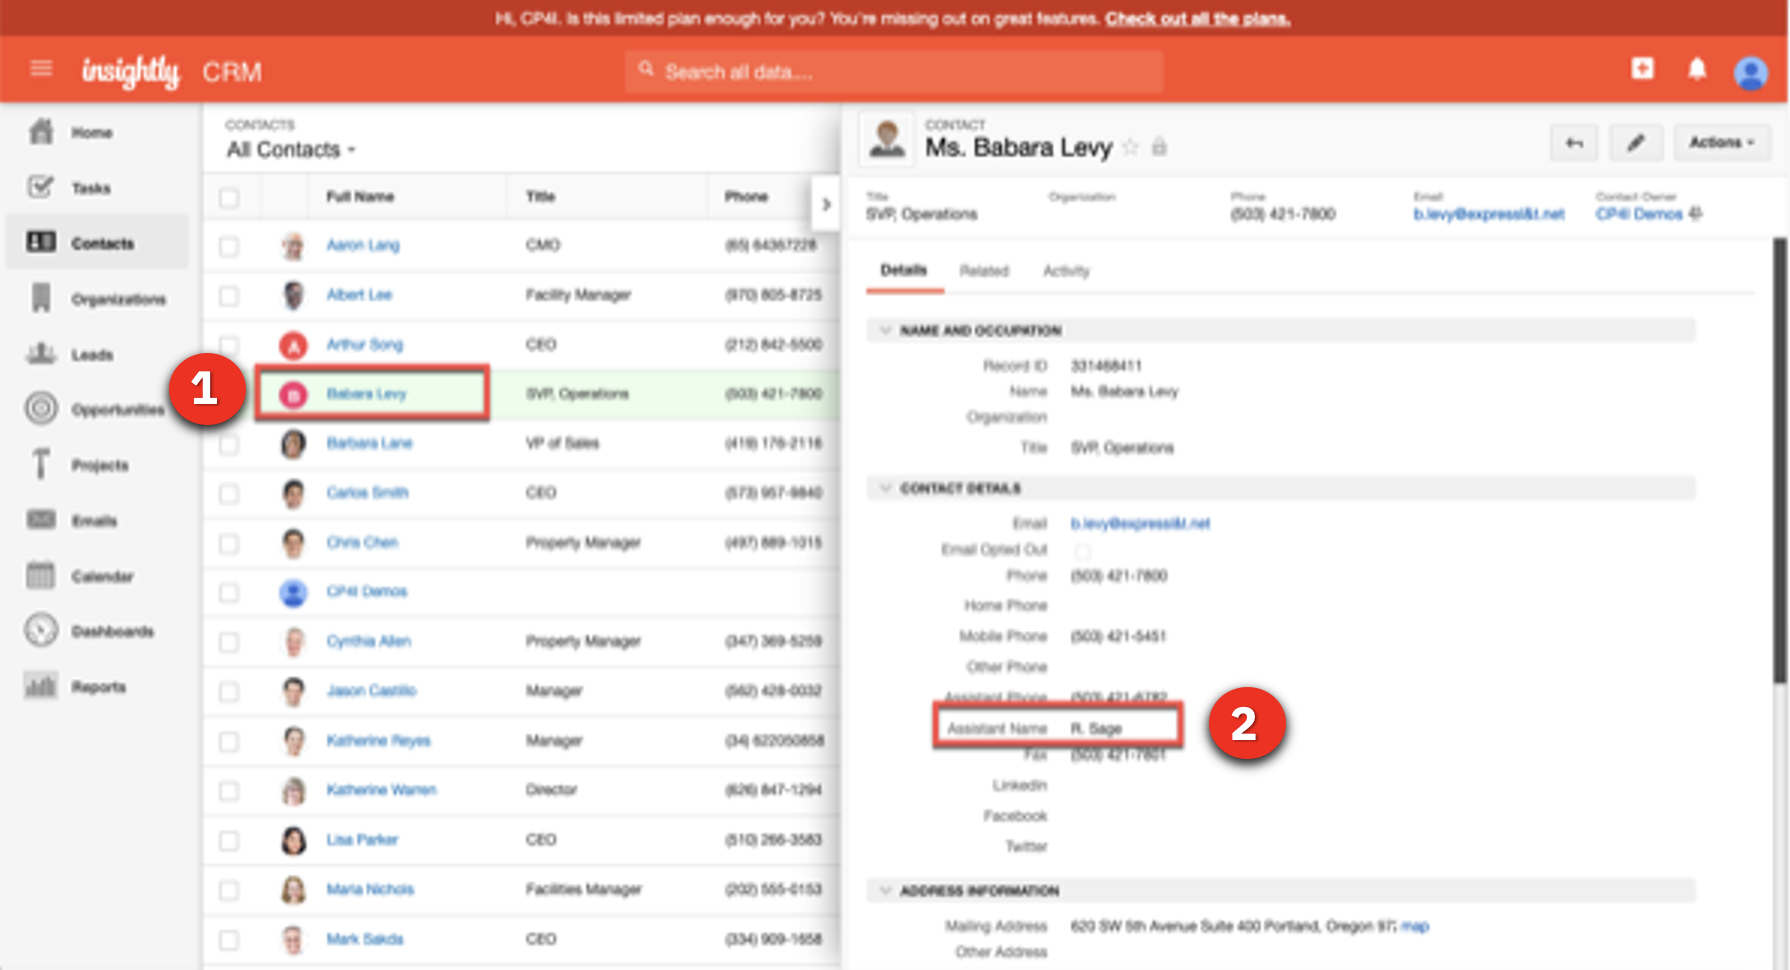
Let’s explore it with the ‘Assistant’s Name’ field. Let’s select “Generate transformation”. The ‘Generate transformation’ panel opens with five blank sources and corresponding target fields that you can use for mapping data formats. We’ll need to provide at least five examples of source and target formats for Cloud Pak for Integration to generate the transformation formula.

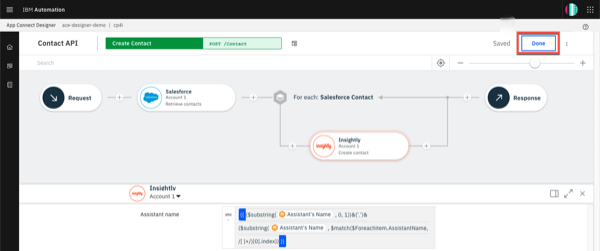
Using Cloud Pak for Integration and the Mapping Assist capability, we were able to easily create a data sync between two CRM solutions without needing to write any code.
Action 4.4.1 On the Assistant name field, click the Assistant’s Name mapping (1) and select Transform data format (2).
Action 4.4.2 On the Generate transformation dialog, enter John Lennon as the first source name, and enter J. Lennon under ‘Assistant name’ examples (target) . Repeat the same steps to include four more assistants’ names using the same transformation format (e.g., Paul McCartney, P. McCartney; George Harrison, G. Harrison; Ringo Starr, R. Starr; Pete Best, P. Best) (1). Click Generate transformation (2), and click Insert transformation (3).
Action 4.4.3 Click Done .

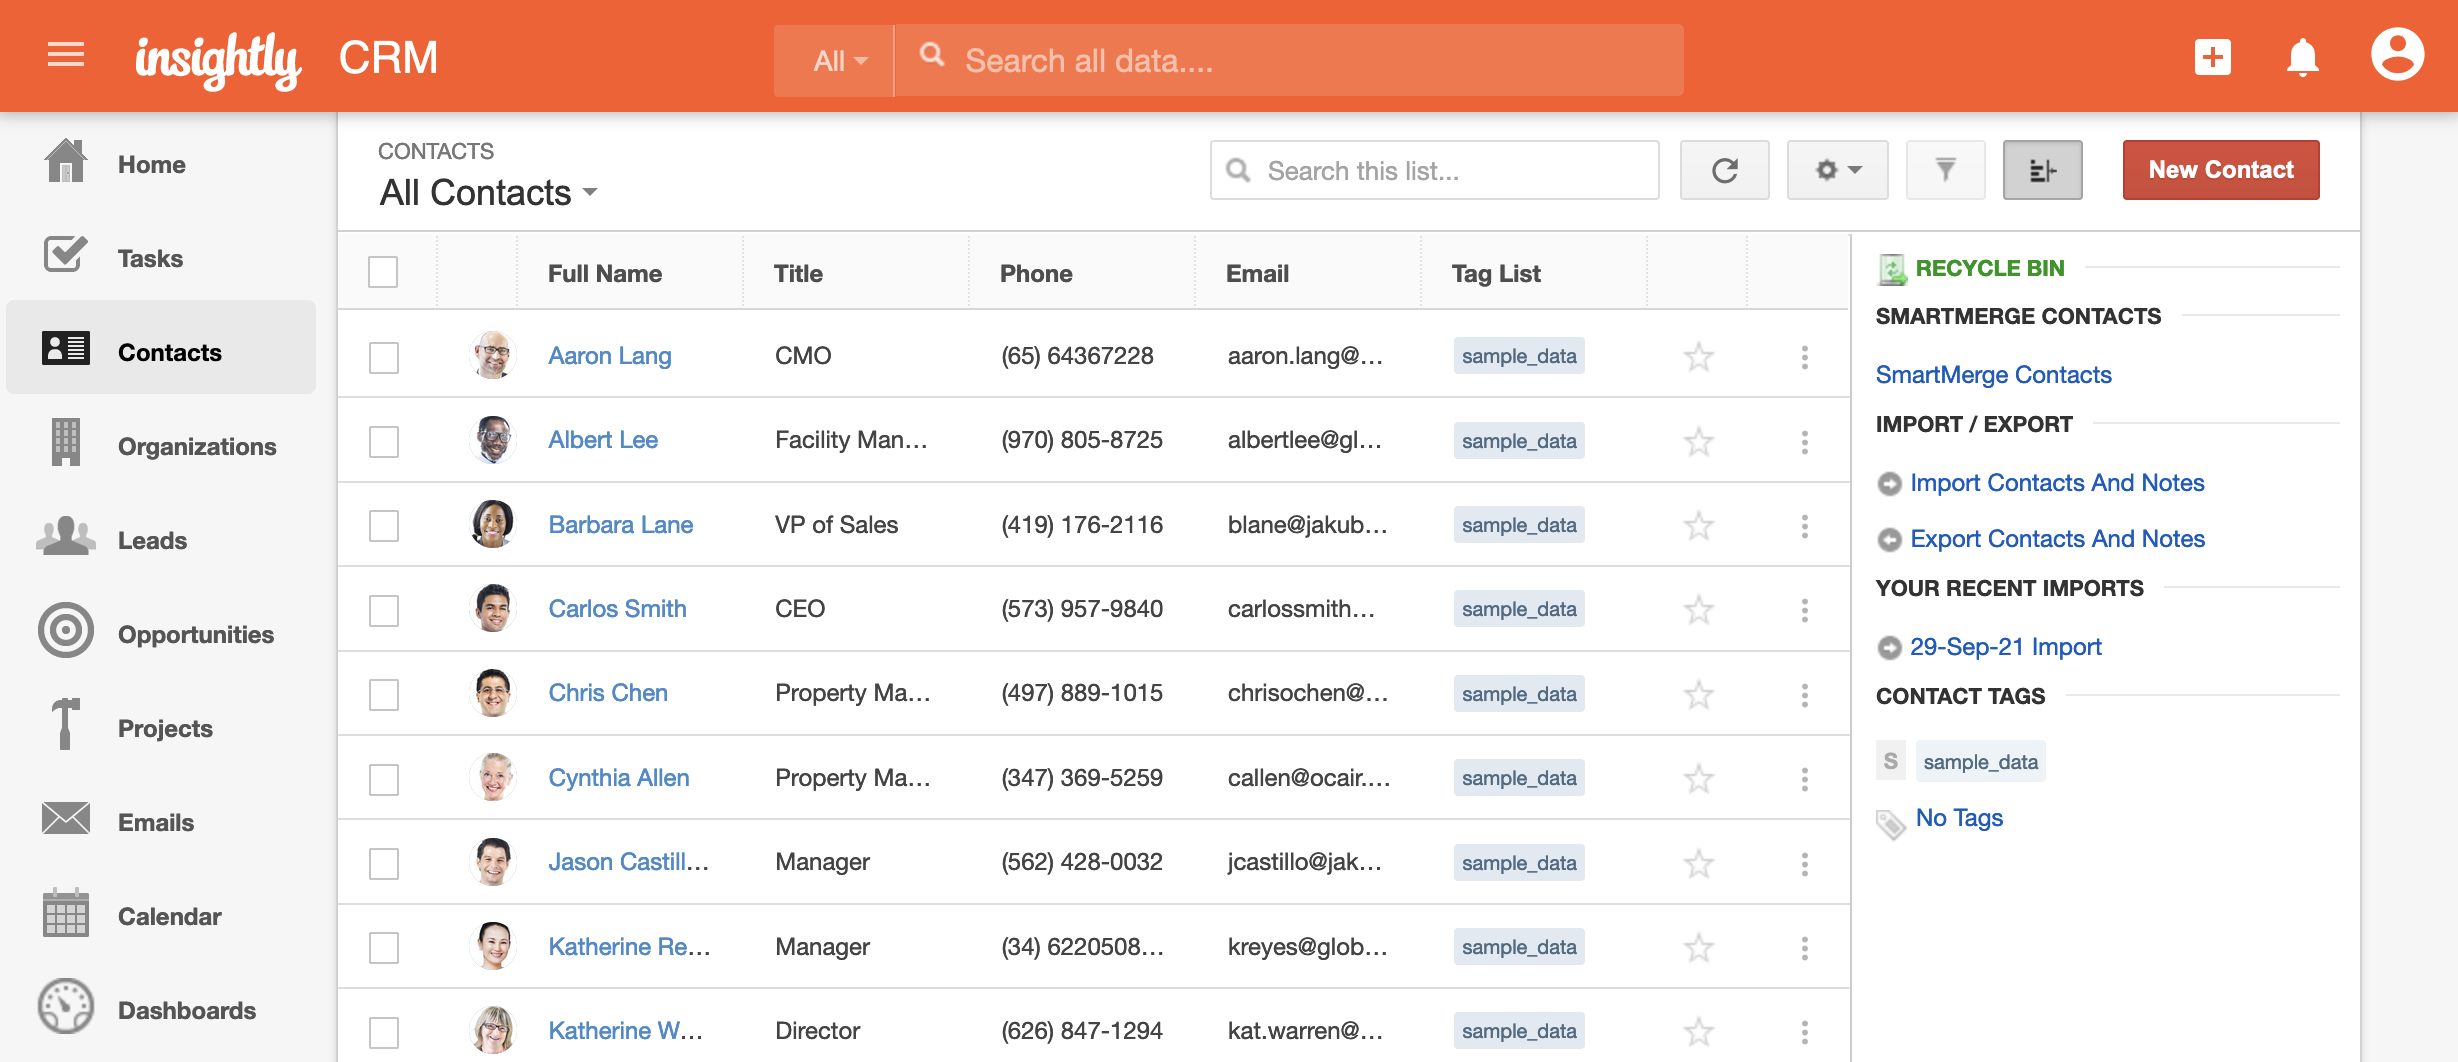
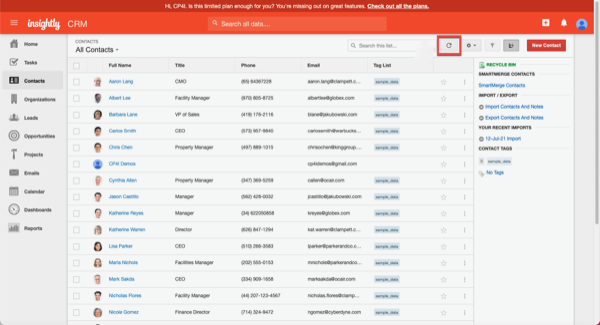
5 - Testing your data sync

5.1 Check the target contacts
Narration Before we test our data sync flow, let’s check the contacts that we have available. Let’s open our pre-created Insightly CRM account and see the available contacts before we execute the flow. As you can see, we have approximately 20 pre-created contacts, each with pictures. After the test of our flow, we should have two or three new contacts without pictures.
Action 5.1.1 Open your Insightly home page (1).

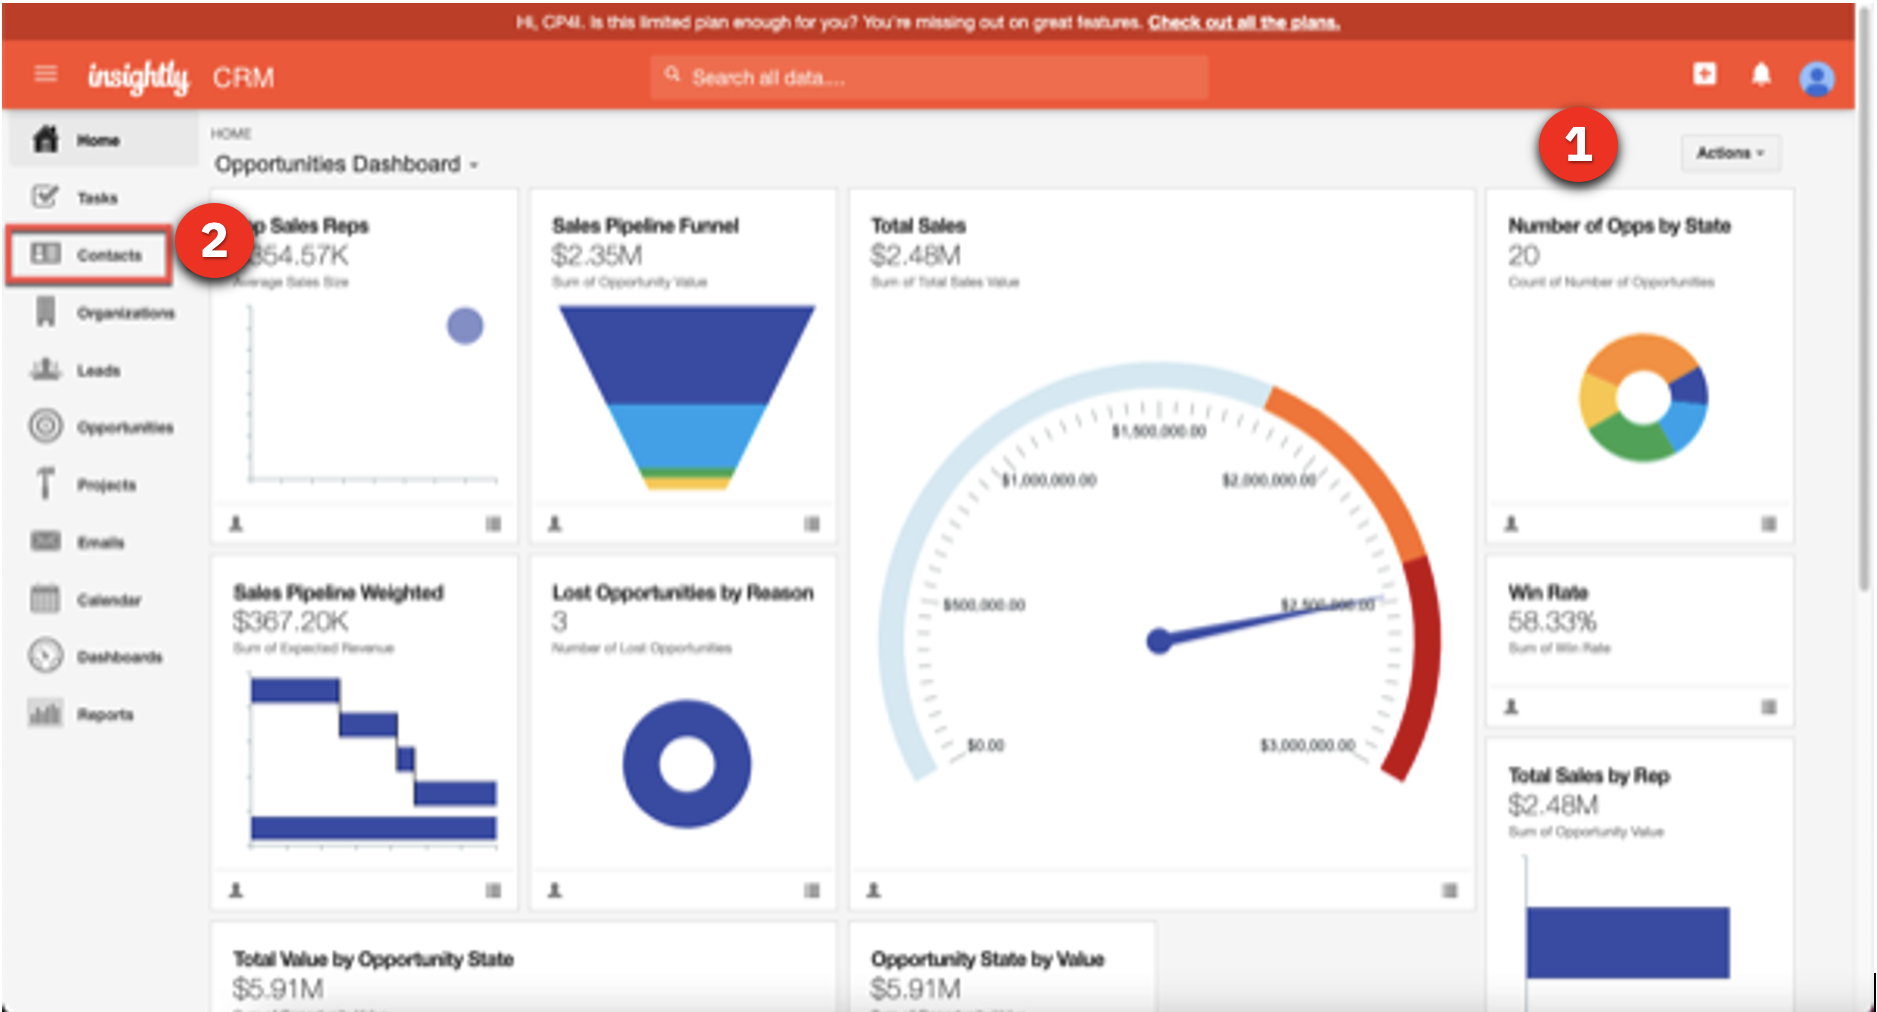
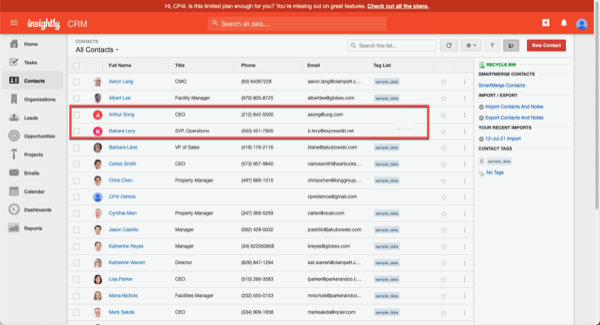
Open the Contacts view (2).
Action 5.1.2 Notice that there are approximately 20 pre-created contacts, each with pictures.
5.2 Test the API
Narration It is time to test our data sync. First, we need to start our flow. Once the flow has started, let’s test it.

Great, our data sync is running.
Action 5.2.1 Go back to Cloud Pak for Integration’s App Connect Designer page. Start your flow.
Action 5.2.2 Open the Test tab (1). Click POST /Contact (2) and open the Try it tab (3).
Action 5.2.3 Scroll down to see the body field, and click Generate (1) to create some dummy body content. Click Send (2), and you should see a 201 Created response (3).
5.3 Check the data sync
Narration Now let’s check our new contacts. We should have at least two new contacts. Let’s refresh the ‘Contacts’ page, and here are our new contacts. Let’s check the contact to see the new ‘Assistant Name’ format.

Great! Everything works as expected.
Action 5.3.1 Go back to Insightly’s Contacts page and refresh the page.
Action 5.3.2 Explore the new contacts (without the sample_data tags).
Action 5.3.3 Click one of the contacts without a picture (1), and show the new format of Assistant Name based on the function we defined in the flow (2).

Summary

As we mentioned in the beginning, data mapping is difficult, time-consuming, and error-prone. In this demo, we showed how AI-powered Mapping Assist can alleviate these issues.

We auto-mapped all the fields where the matching confidence was at least 80%. Mapping Assist learns from your decisions about selected mappings, and shows these as top suggestions when a similar source and target mapping is attempted in the future – further reducing your mapping efforts.

We also generated a data transformation by providing examples of source and target data when fields do not have the same format. AI was used to determine the pattern and generate the transformation.

Using AI-powered Mapping Assist reduced the development time and eliminated errors as ACME Retail successfully integrated the new customer contacts from their business acquisition.

Thank you for attending this presentation.