Discovering Data
To protect sensitive data, you must know where it exists in your enterprise. Guardium Data Protection (GDP) provides tools that you can use to discover and report on databases and find sensitive data. In this part of the lab, we will perform the following tasks:
-
Discover sensitive data
-
Refine the discovery results
-
Verify that the PCI Cardholder Sensitive Objects group is updated
Discovering Sensitive Data
In this task, we will discover sensitive data on a data server by using predefined rule templates. In Guardium, you can modify existing rules or even create new ones, but that process is beyond the scope of this course.
-
Log in to the collector (C200) graphical user console as user
labadminwith passwordP@ssw0rd. -
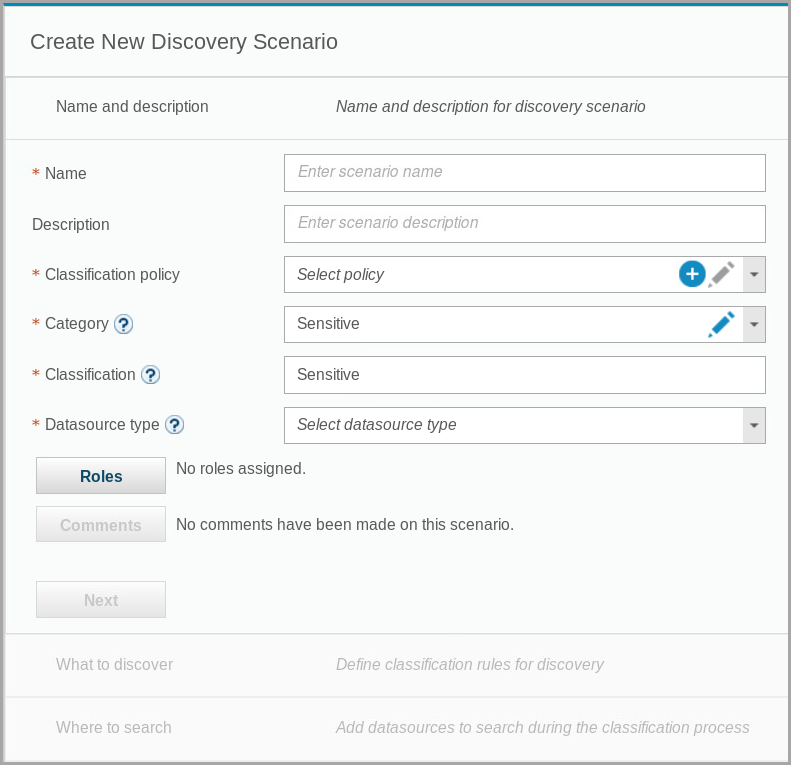
In the navigation menu, click Discover > Classification > Discover Sensitive Data.

- To add a scenario, click Create
-
For name, enter
Lab Discovery. -
For Classification policy, select PCI [template].
A classification policy based on the PCI template is automatically created.
- For Category, select PCI.

-
Close the warning
-
For Classification, enter Credit Card.
-
For Datasource type, select Relational (SQL).

Note that a copy of the PCI template was created with five rules.
- To define the classification rules for discovery, click Next.

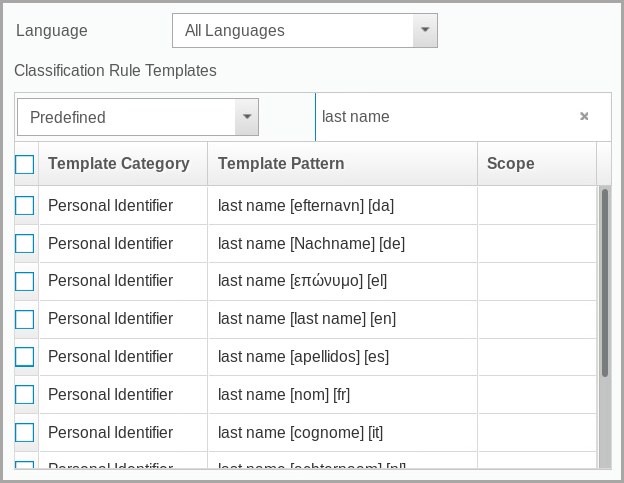
Because they are part of the PCI template, the classification rules for different types of credit cards are already populated
When a rule name begins with guardium://CREDIT_CARD and there is a valid credit card number pattern in the Search Expression box, the classification policy uses the Luhn algorithm, which is a widely used algorithm for validating identification numbers such as credit card numbers. It also uses standard pattern matching.
In the available classification rule templates list, templates for universal patterns, such as credit card numbers are displayed.

-
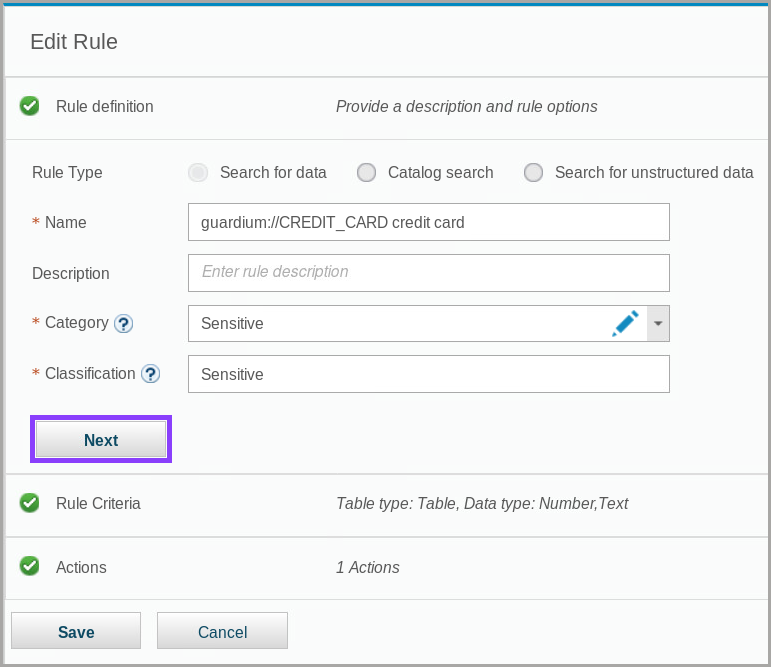
Now you can see what a rule consists of. You will not create or modify rules, only view existing rules. In the Selected Classification Rules table, select the first classification rule, guardium://CREDIT_CARD credit card.
-
Click Edit
-
To view the rule criteria, click Next.
You can see the details of the rule criteria, such as the regular expression that is used to search for credit card numbers and the types of objects (tables, views) where the search occurs.
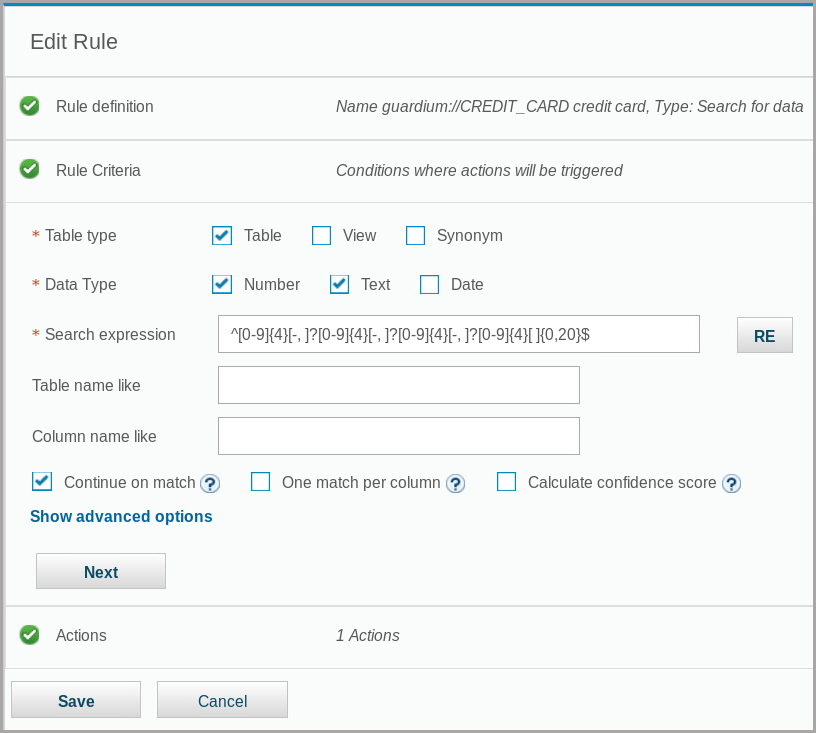
- To view the actions associated with this rule, click Next.

The PCI template provides an action, which is to add the objects that the search finds to the group PCI Cardholder Sensitive objects.
-
Click Save
-
Scroll down and click Save

Hint: To save space, click the divider (mini chevron) to minimize the Discovery Scenarios section.
- To expand the Where to search section, click Expand

In this section, you choose where the search for sensitive data runs. You can choose one or more datasources, or groups of datasources, as targets.
- In the Available datasources table, select the raptor_DB2_DB2INST1 datasource and click Move Right

-
To open the Run discovery section, click Next
-
To run the discovery, click Run Now.

The progress changes to WAITING and then to RUNNING

The process may take several minutes to complete. When the process is complete, the Review report section shows a summary of the results.

- To expand the Review report section, click Next.

Notice how the report shows schema, table, and column information for discovered sensitive data, and the rule that the entry triggered.
Refining the Discovery Results
Now, you refine the results to exclude false positives that do not hold sensitive data. For the purposes of this lab, you assume that the table named CC1 is a test table that does not include sensitive data.
- In the Review report section, click the Filter field, type
cc1, and press Enter.

The report entries are filtered to show four entries, which correspond to table named CC1.
- To select all of the results, select the checkbox next to Catalog.

- From the Add to Group menu, select Add to Group of Tables to Exclude.

- Click New Group

-
For Description, enter
Lab skip objects. -
Click Save
-
Close the informational message.

-
To complete the group selection and close the Select Exclude Group dialog, click OK.
-
Close the Success dialog.
-
In the What to discover section, click Expand.

-
In the Selected Classification Rules section, select the guardium://CREDIT_CARD credit card rule and click Edit
-
To view the Rule Criteria section, click Expand.
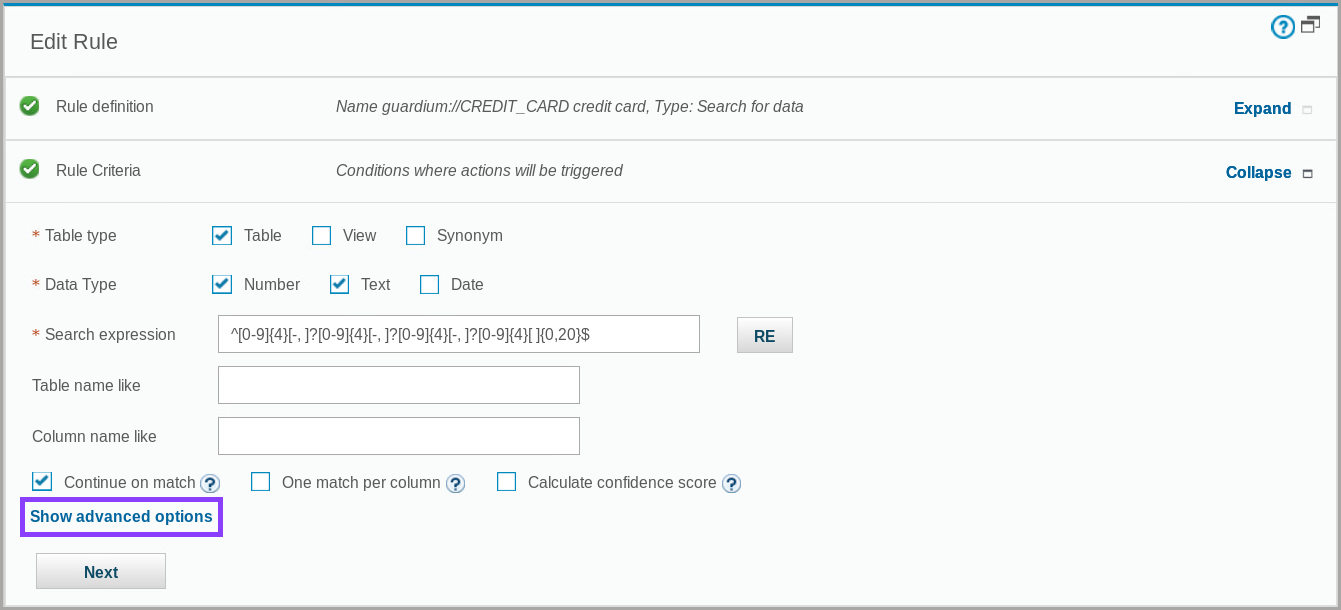
- To edit the advanced options, click Show advanced options.

-
For Exclude Table, select
Lab skip objects. -
To save the rule, scroll down and click Save.
-
Scroll down and expand the Run discovery section.
-
Click Run Now
After the discovery scenario runs, the pane shows 12 matches found rather than 13.

Verifying that the PCI Cardholder Sensitive Objects group is updated
In this section of the lab, you verify that the sensitive tables that your discovery process finds are added to the appropriate group. This task takes place on the collector (C200).
- Go to Protect > Security Policies > Group Builder.

-
To filter the entries, in the Filter field, type
pci. -
Select the PCI Cardholder Sensitive objects group

Take note that there are now five members in the group.
- To view how this group is used, scroll to the right.

Green checkmarks in the Used in discovery scenario and Used in query columns indicate that this group is used in at least one discovery scenario and one query. The gray checkmarks in the Used in policy column indicate that the group is used in a policy that is not active.
- From the Actions menu, select View details.

The dialog shows that the group is associated with your discovery. You can also view which queries this group is associated with.
-
Close the PCICardholder Sensitive objects dialog.
-
To view group members, select the group and click Edit
-
Click the Members tab.
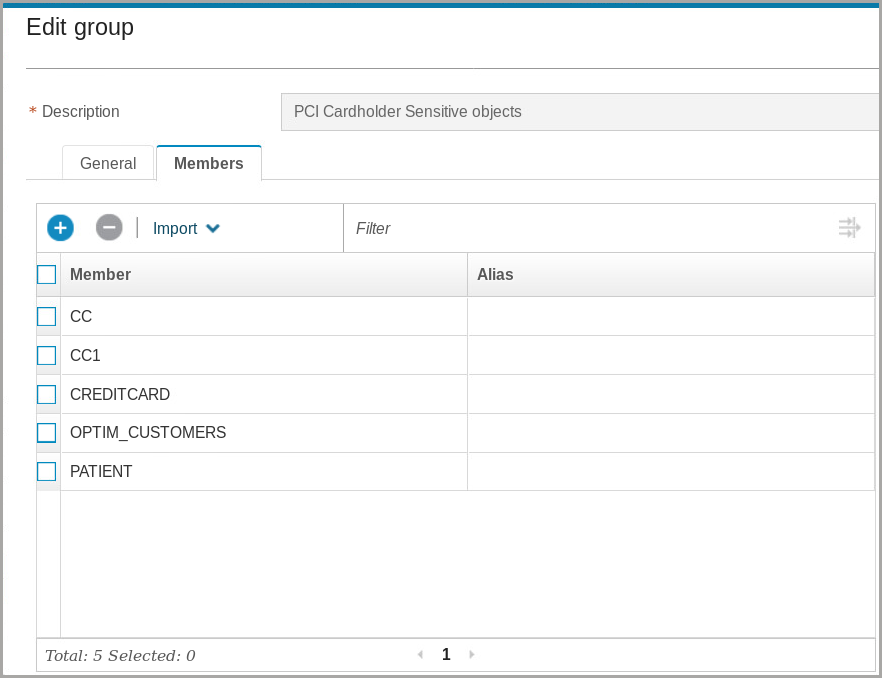
You should see the group members, which were added by the data discovery process.
- Scroll down and close the Edit group dialog.
In this lab, we learned how to use the following functionality from Guardium Data Protection:
- Discover sensitive data
- Refine the discovery results
- Verify that information is updated
Continue onward to Lab 204