Deploy an AI model
Deploy an AI model
- To learn how to deploy a generative AI model, continue to Deploy a generative AI model
- To learn how to deploy a predictive AI model, continue to Deploy a predictive AI model
Deploy a generative AI model
In this lab, you will promote a generative AI model to a deployment space and deploy it. Watsonx uses deployment spaces to organize models and model-related assets for validation and production access. Deploying the model allows it to be accessed via REST API for further testing.
Create a deployment space
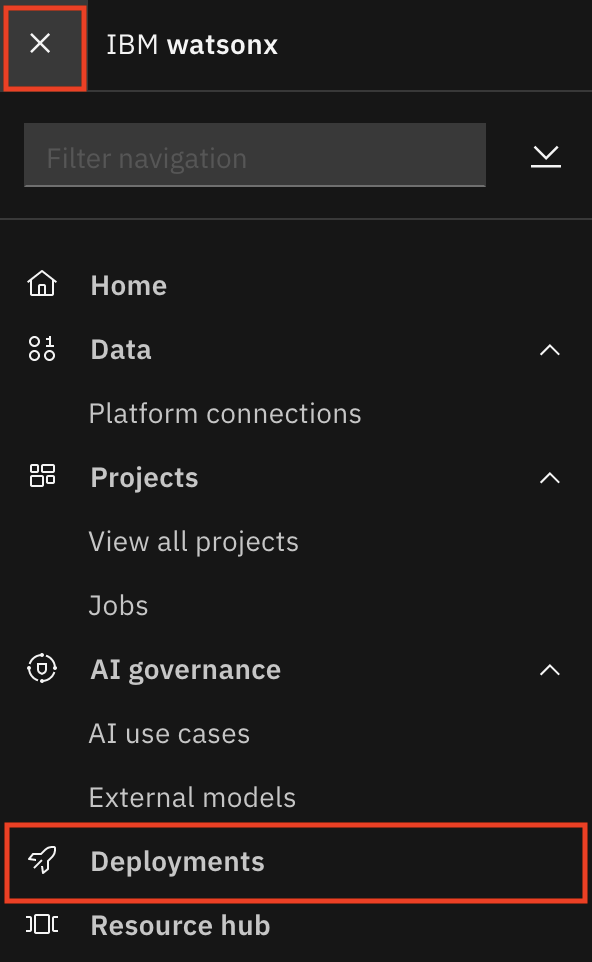
- In the IBM watsonx platform, click on the Navigation Menu in the upper left to expand it. Locate and click on Deployments.
-
Click on the New deployment space button.
-
In the Create a deployment space window fill out the information below and then press the Create button:
- Name: Give your deployment space a name that includes some identifying information, the purpose it will be used for and include "testing" to denote this as a space for testing (ex.
<your initials or unique string> - Claim summary testing). - Description:
Test the candidate claim summary model - Deployment stage: From the dropdown, click on Testing from the list. Designating the deployment stage will ensure that the models deployed in this space will appear in the correct phase of the lifecycle map in the AI use case.
- Select storage service: Ensure that the Select storage service dropdown is correctly set to the object storage service you are using for this lab.
- Select machine learning service: Ensure that the Select machine learning service dropdown is correctly set to the machine learning service you are using for this lab.
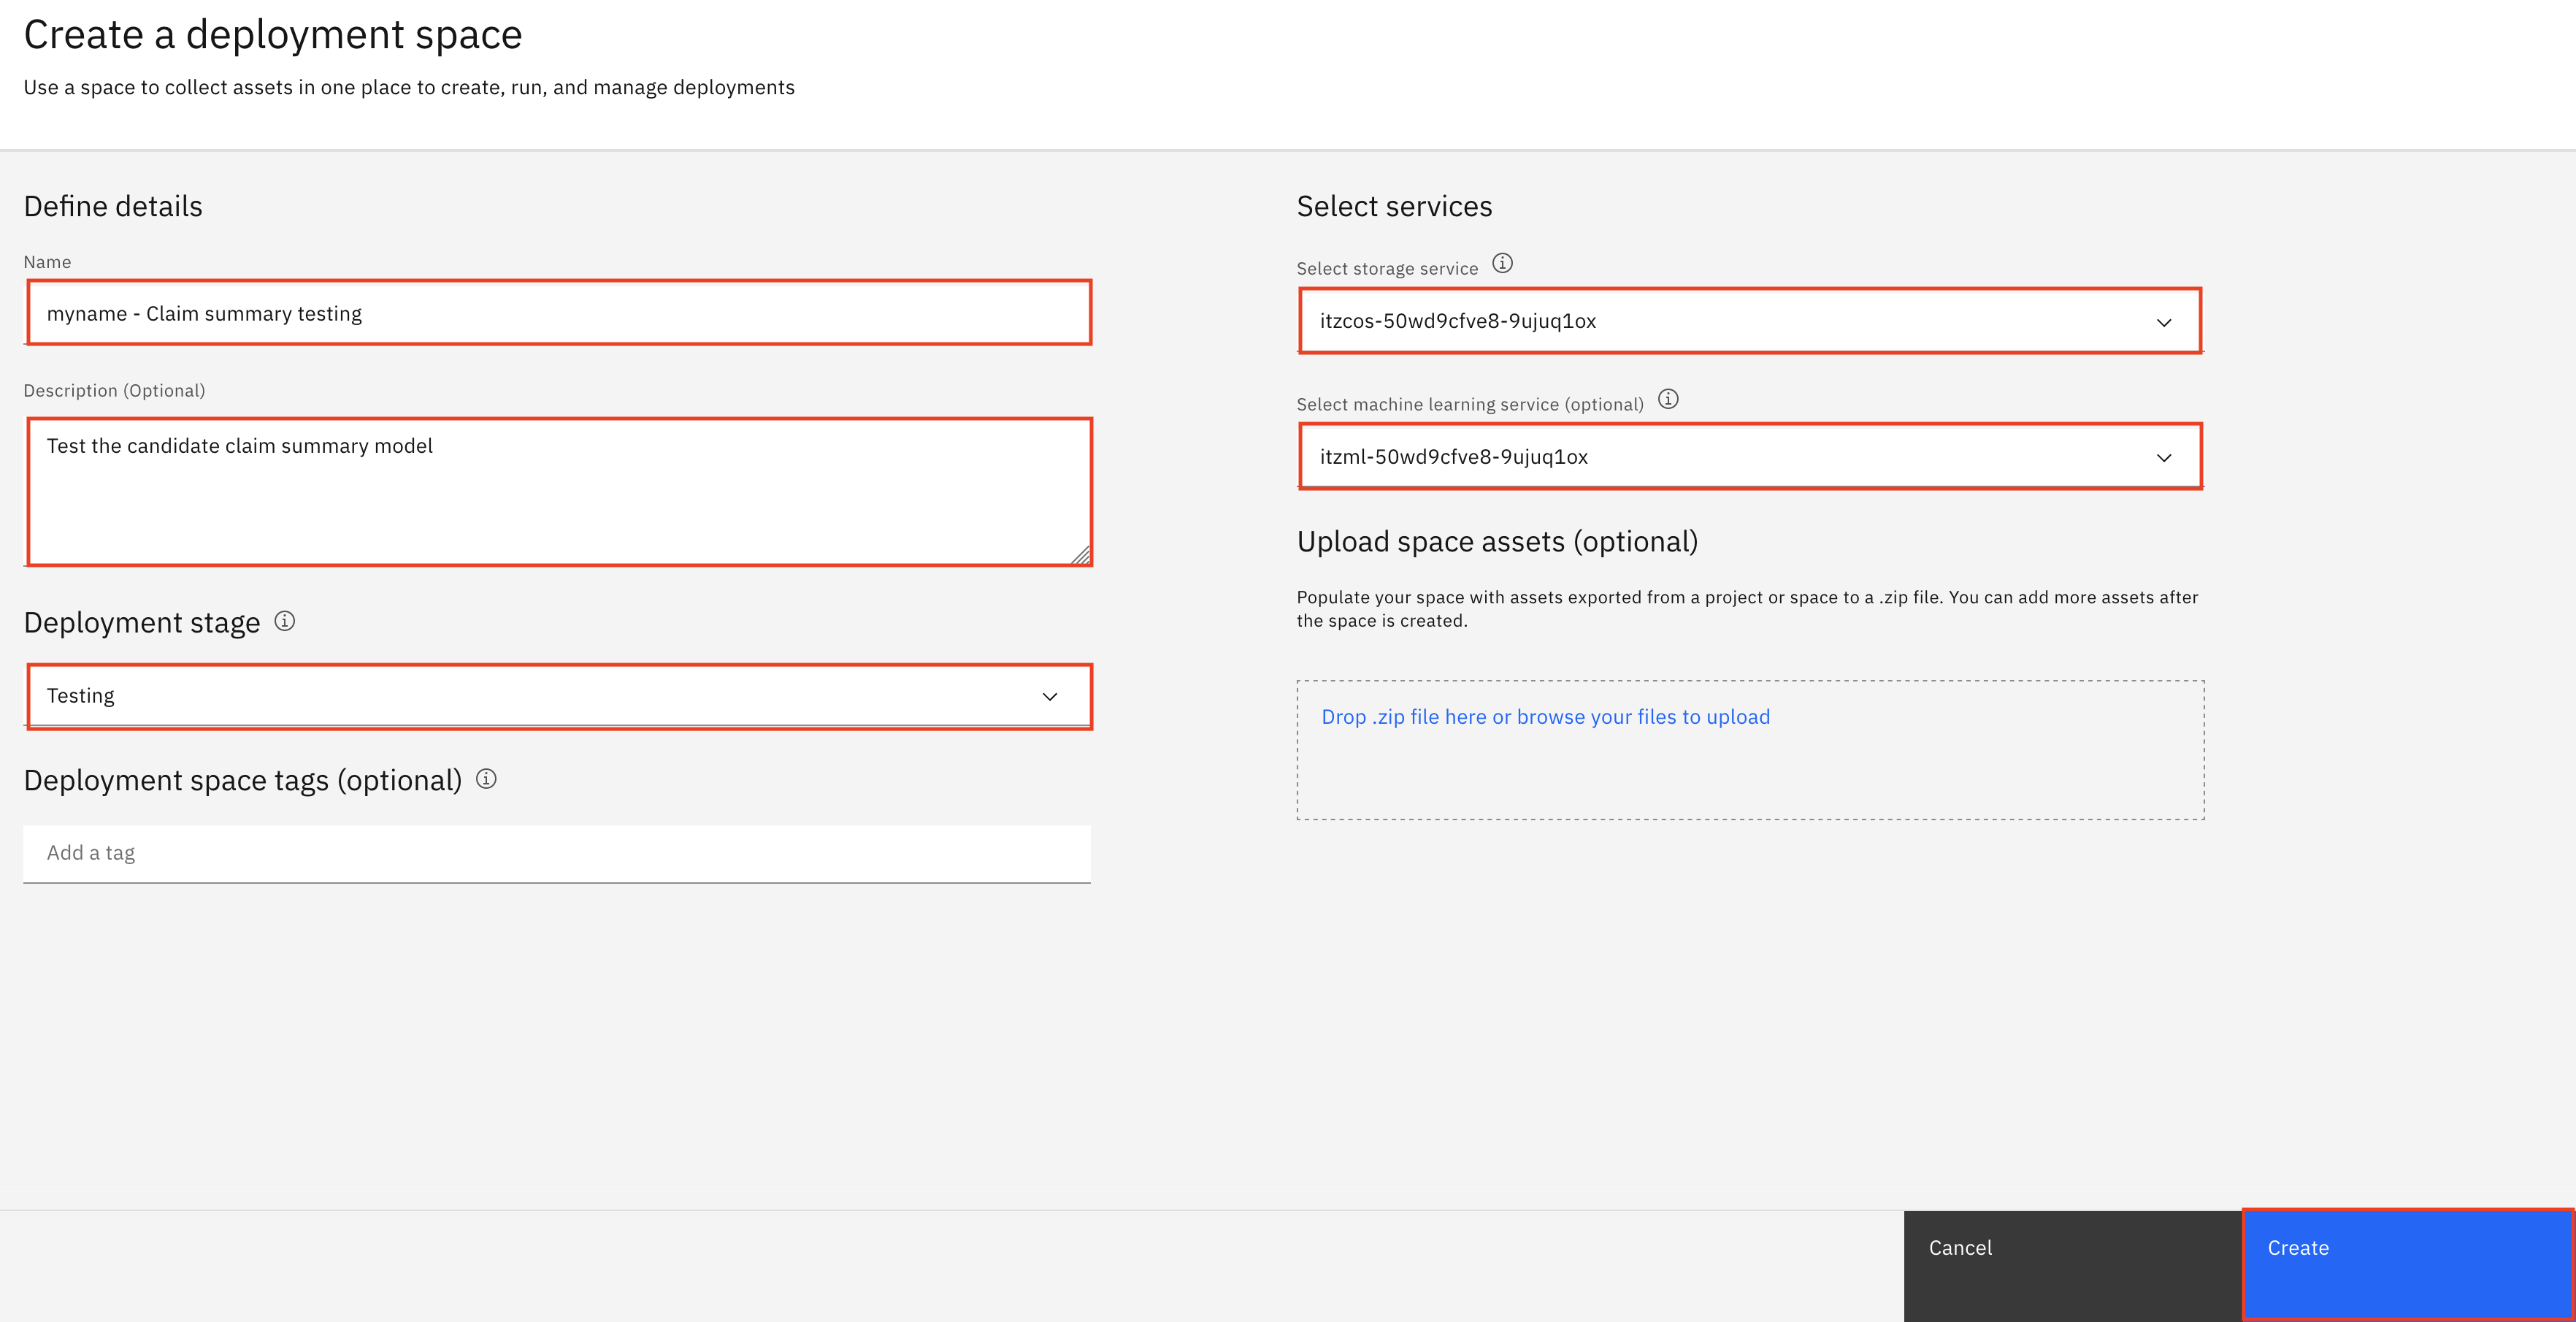
- When the space has been created, click Close to return to the list of spaces.
You have successfully created a deployment space.
Promote the model to the space
- In the IBM watsonx platform, click on the Navigation Menu in the upper left to expand it. Locate the Projects section of the menu, expanding it if necessary, and click on View all projects.

- Select your generative AI project that you created in lab 103 (ex.
<your initials or unique string> - Auto claim summary).
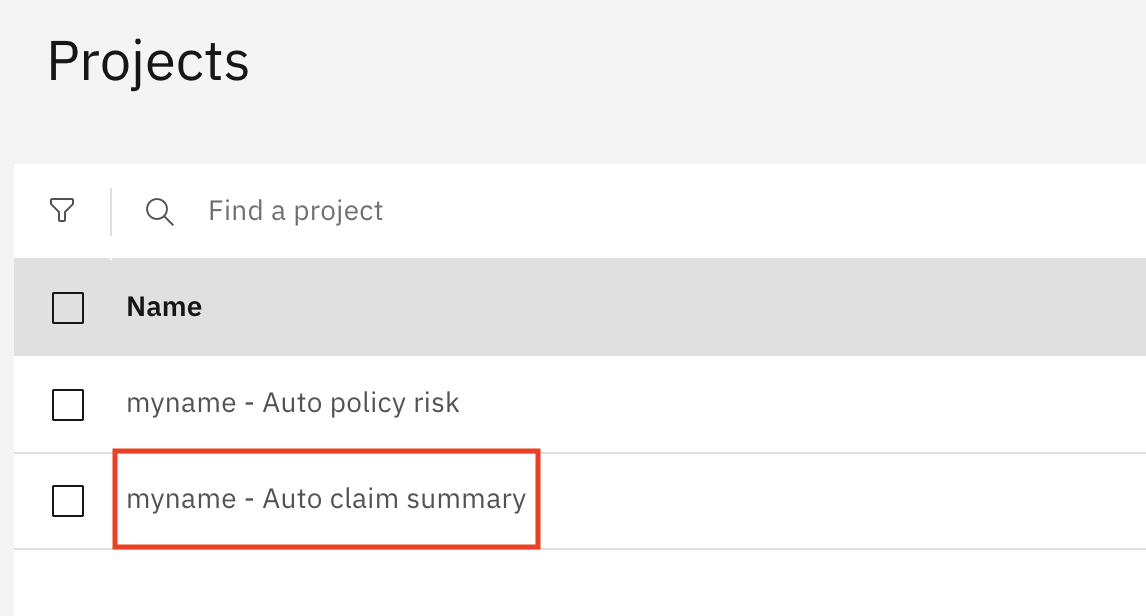
- Click on the Assets tab of the project. From the list of assets, locate the Insurance claim summarization entry and click on the three dots to the right to expand the context menu. Click on Promote to space from the menu.

- Click on the Target space dropdown, and click on the space you created in the previous step. Check the box to the left of Go to the space after promoting the prompt template. Click the Promote button.

You have successfully promoted the generative AI model to the deployment space.
Create a deployment
The model has been promoted to the space, but cannot be accessed by application developers until it has been deployed. Deployment spaces can contain different types of assets, including the models themselves, as well as data used in batch processing jobs. Spaces are also fully governed, allowing administrators to provide different levels of access for different stakeholders.
-
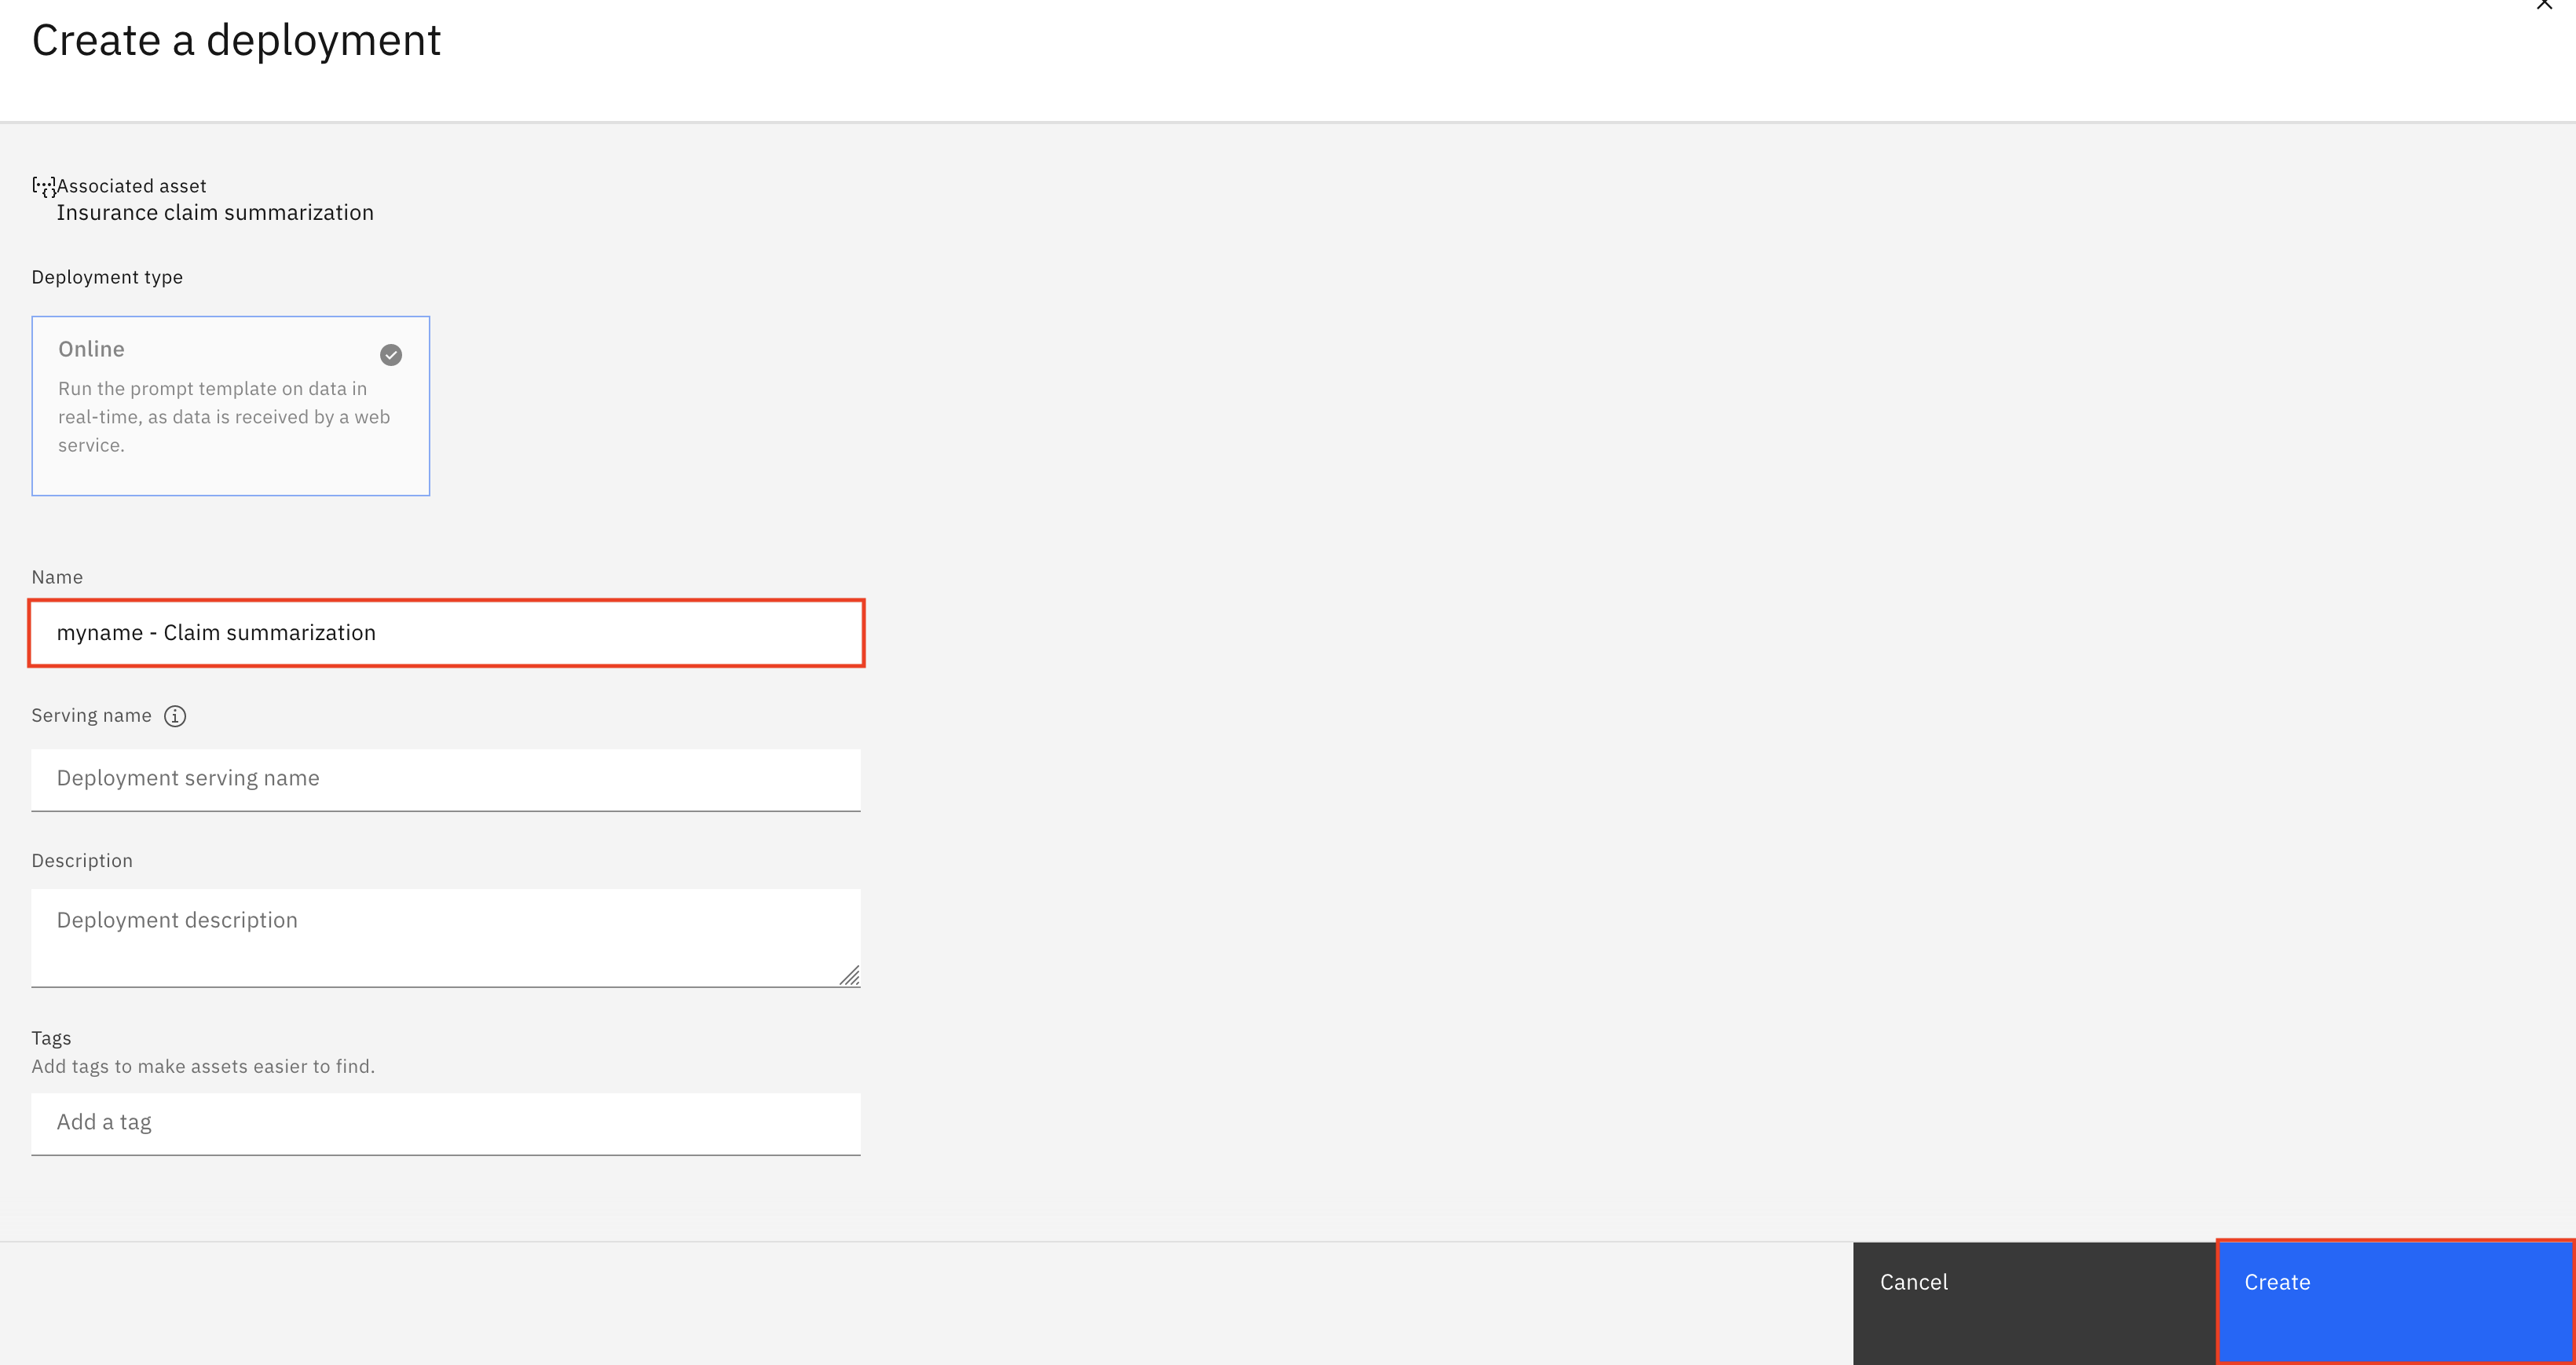
Click the New deployment button.
-
Give your deployed model a name that includes some identifying information and the purpose it will be used for (ex.
<your initials or unique string> - Claim summarization). Click the Create button.
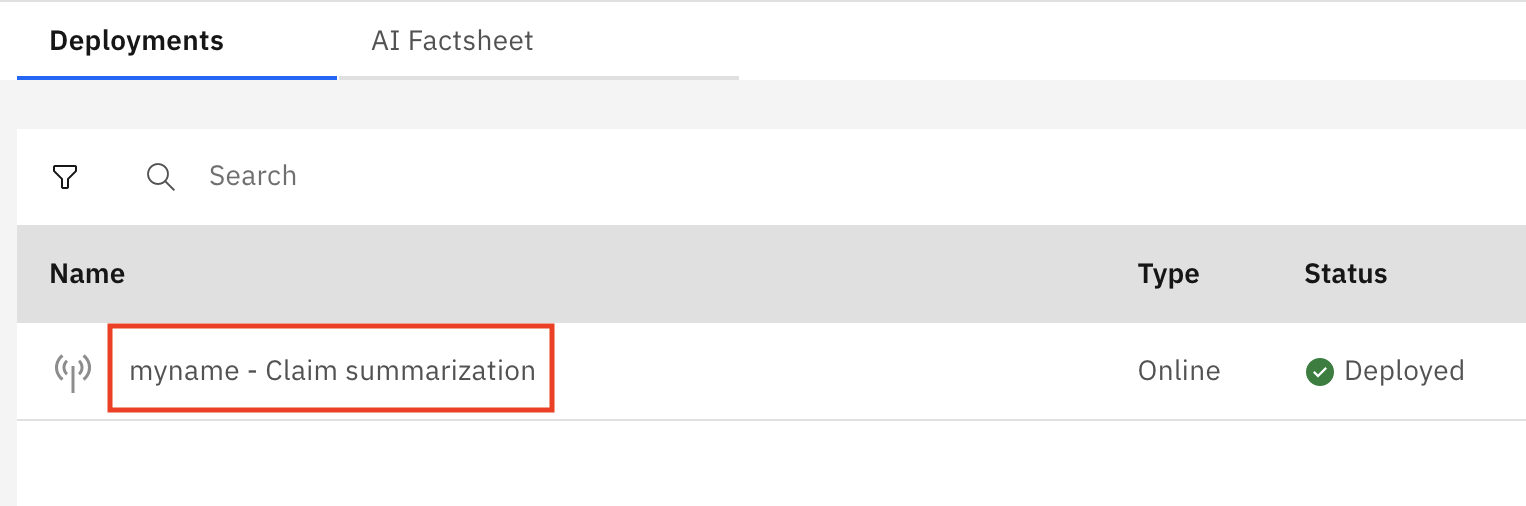
When the deployment is finished, the Status in the displayed table will change to Deployed.
You have successfully created a deployment.
View the deployment details and lifecycle changes
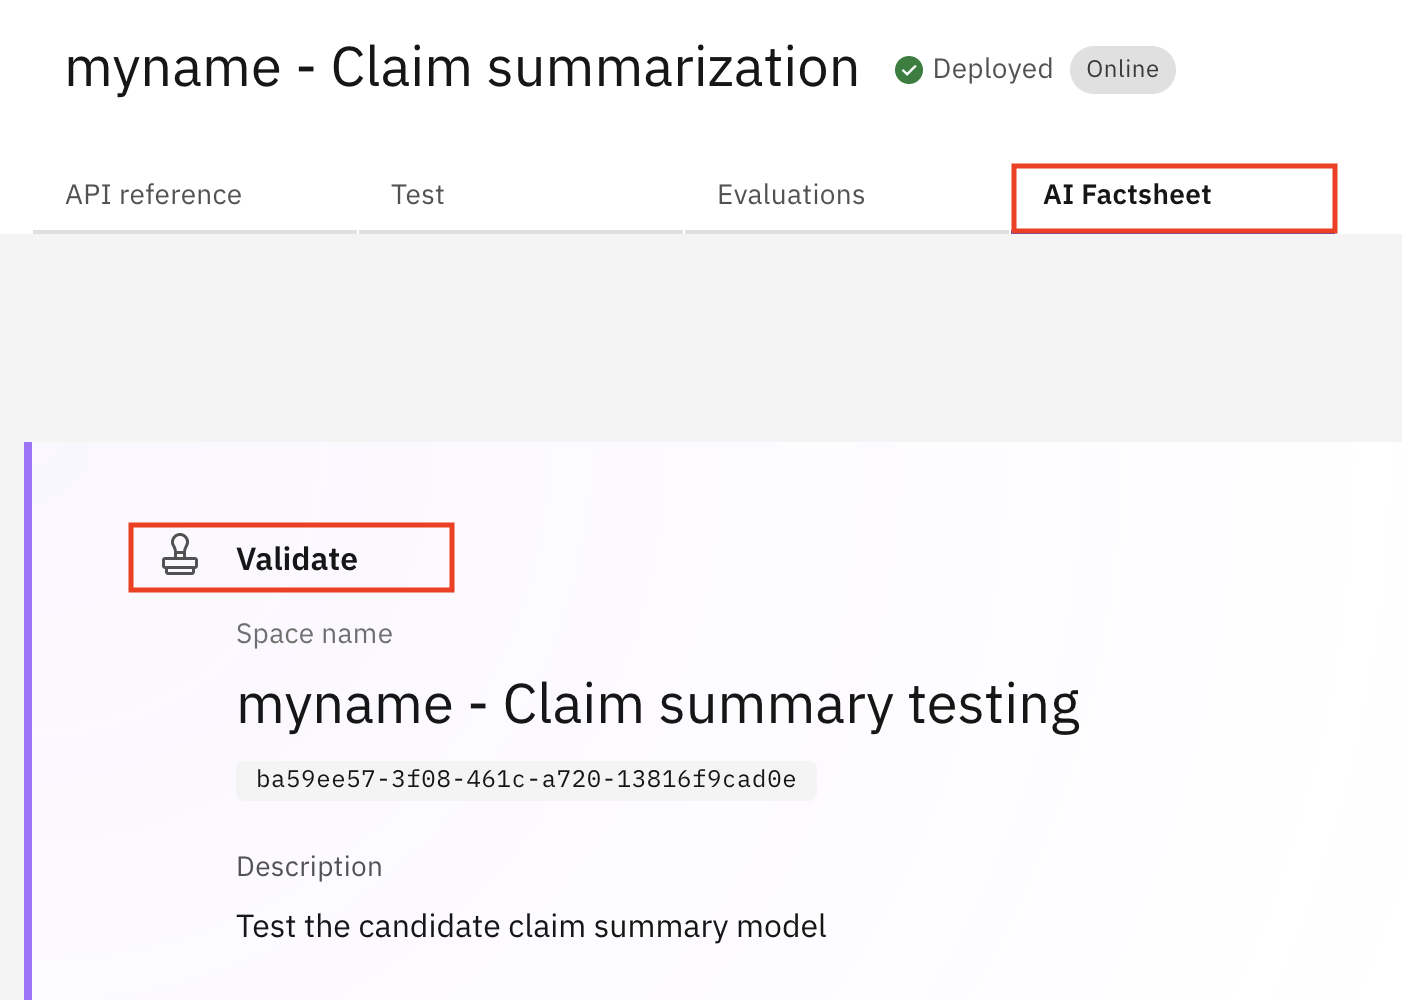
- Click on the new deployment from the list of deployments.
Note that the API reference tab contains useful information for application developers looking to integrate the model into their apps, including code snippets and endpoint links.
- Click on the AI Factsheet tab. Note that the tab shows that the model has progressed to the Validate stage of the model lifecycle.
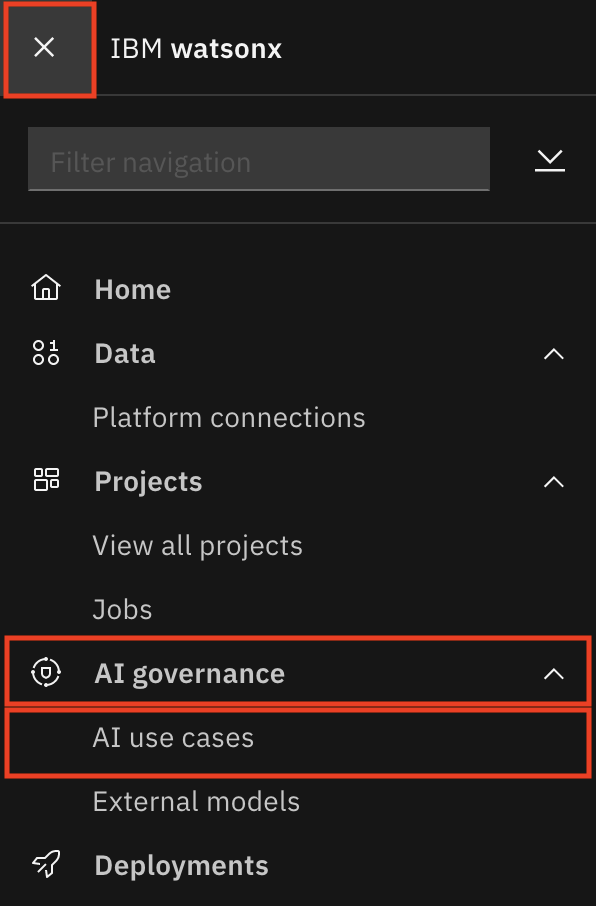
- Click on the Navigation Menu in the upper left to expand it. Locate the AI governance section of the menu, expanding it if necessary, and click on AI use cases.
- Select the AI use case you created in lab 102 (ex.
<your initials or unique string> - Claim summarization) and click on the Lifecycle tab to view the lifecycle graph for this model's use case, which will reflect the same progress on the AI Factsheet. Note that there is now an entry for the model in the Validate section of the model lifecycle view, with a badge showing that an evaluation is pending.
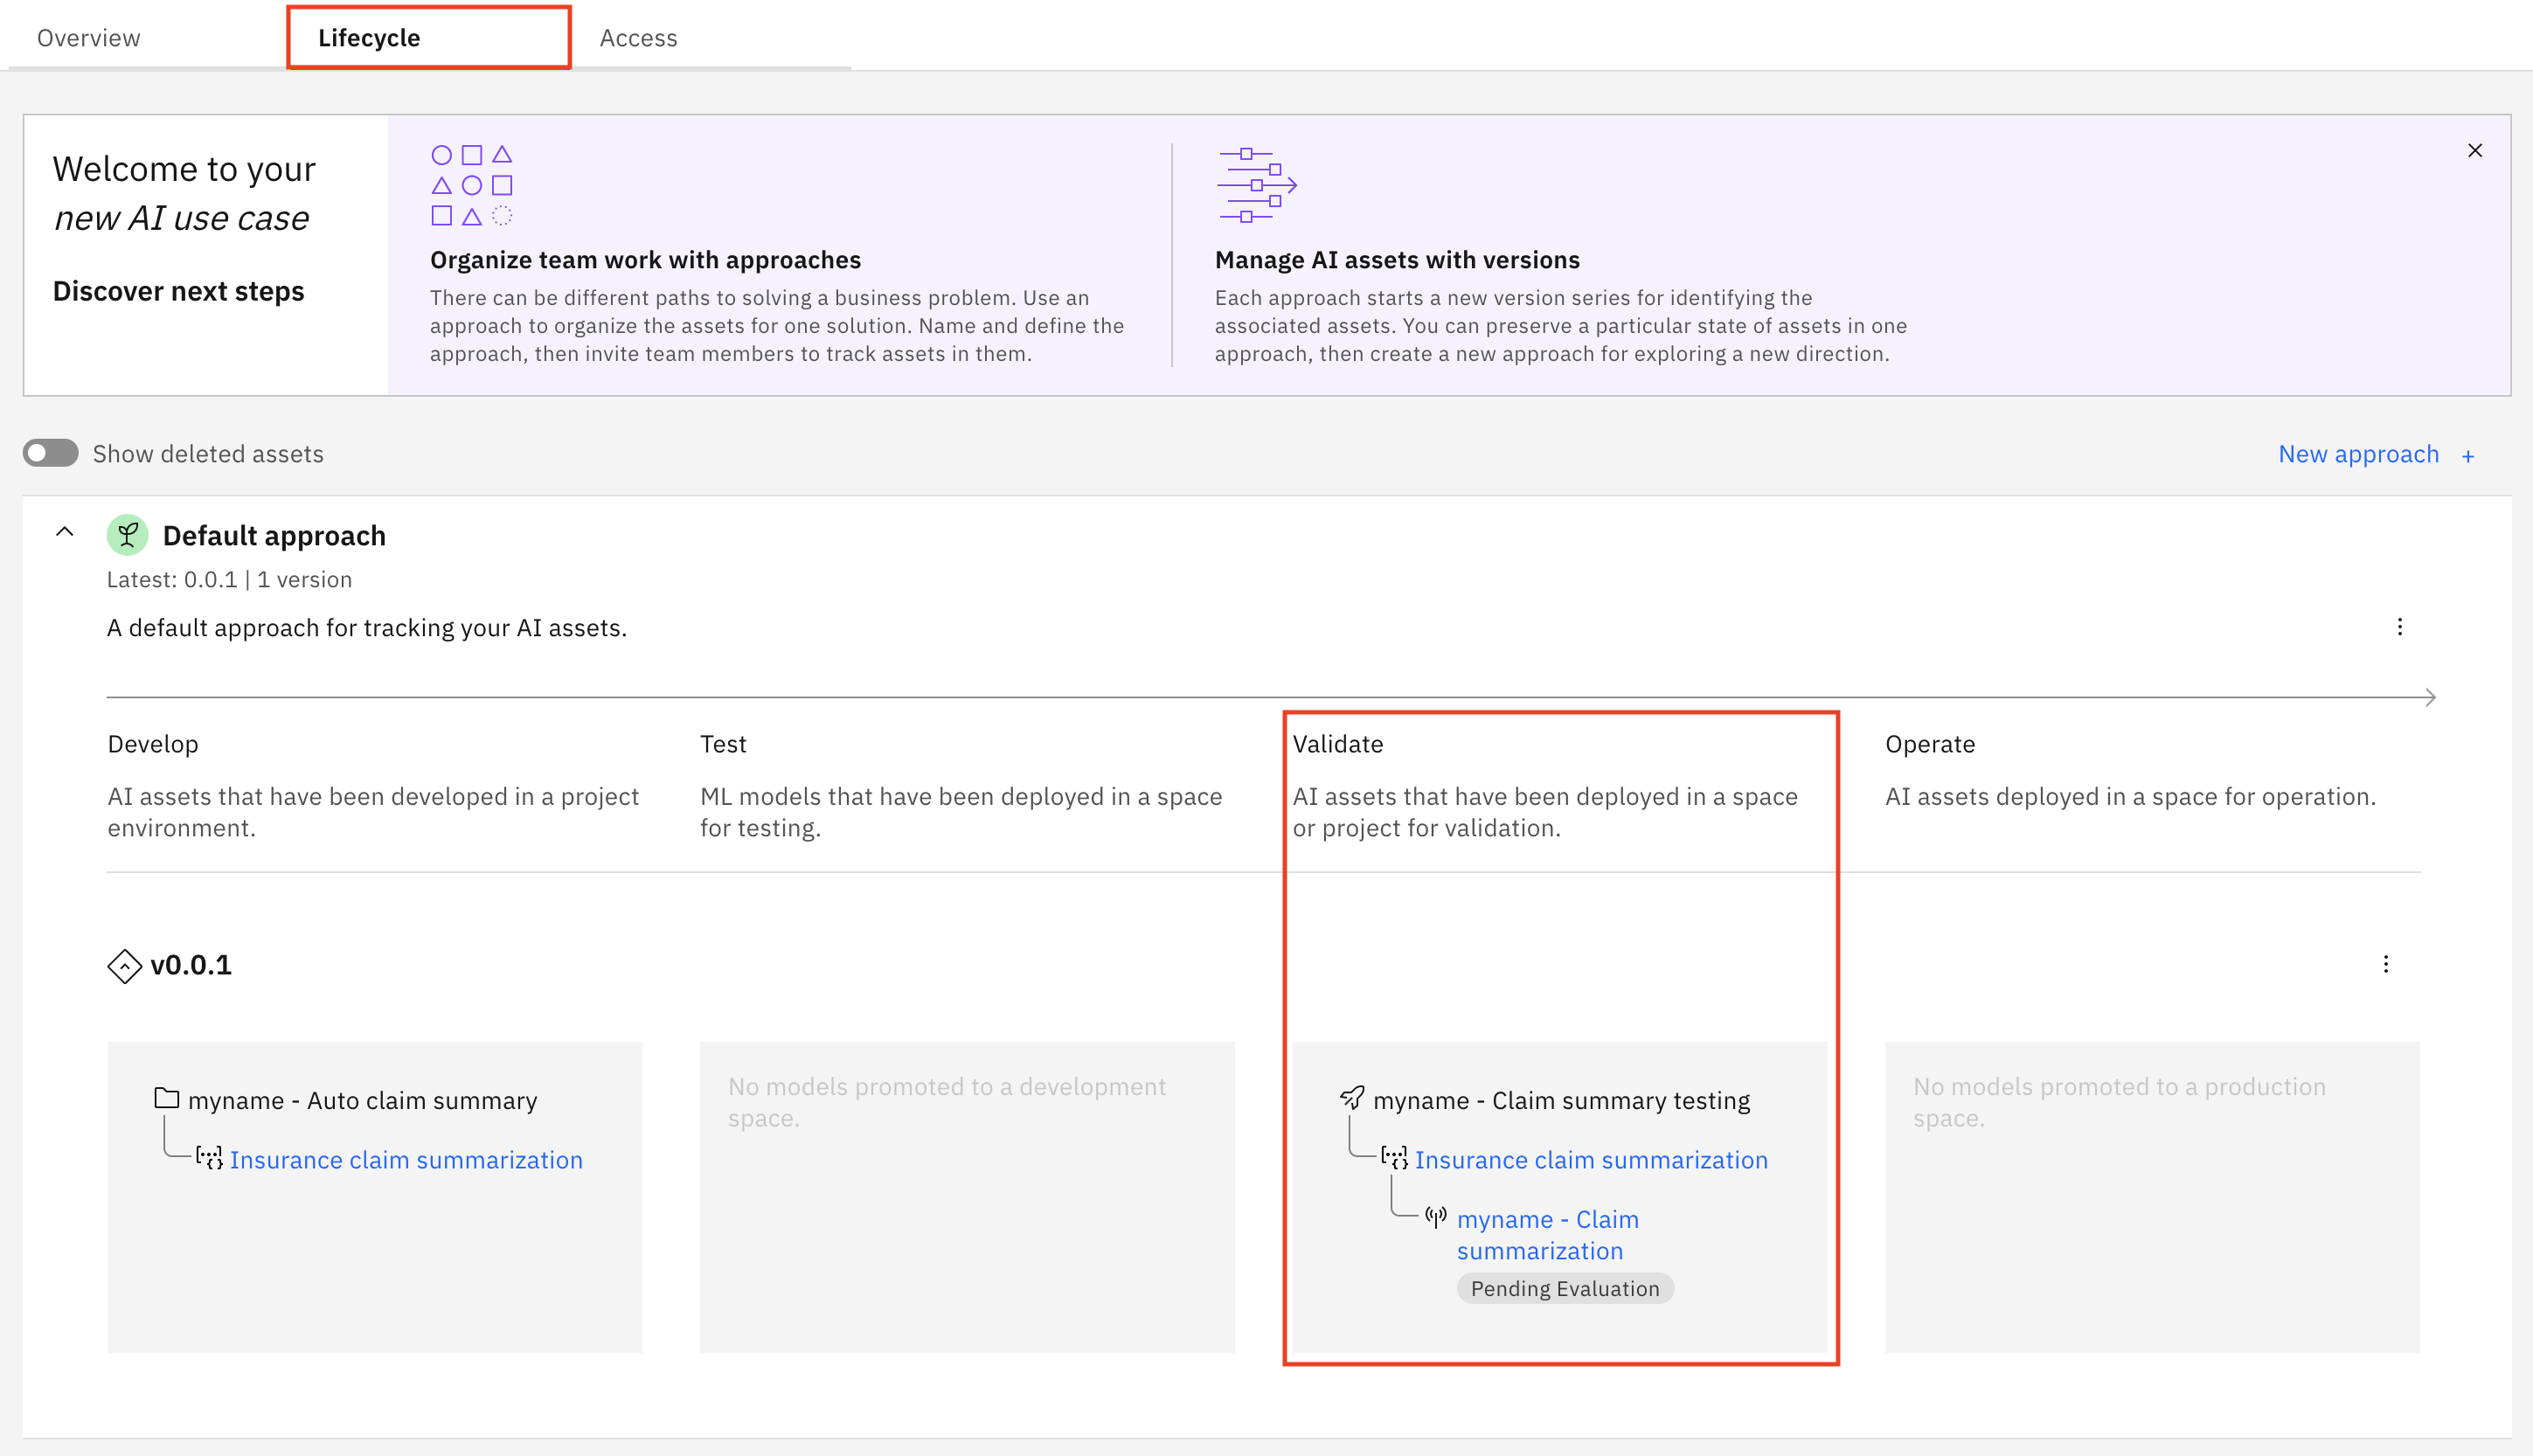
You have successfully viewed the deployment details for your new deployment and progressed the generative AI model to the Validate stage of the model lifecycle.
Congratulations, you've reached the end of lab 105 for deploying a generative AI model.
Click, lab 106 to start next lab.
Deploy a predictive AI model
In this lab, you will promote a predictive AI model to a deployment space and deploy it. Watsonx uses deployment spaces to organize models and model-related assets for validation and production access. Deploying the model allows it to be accessed via REST API for further testing.
Create a deployment space and promote the model to the space
- In the IBM watsonx platform, click on the Navigation Menu in the upper left to expand it. Locate the Projects section of the menu, expanding it if necessary, and click on View all projects.
- Select your predictive AI project that you created in lab 103 (ex.
<your initials or unique string> - Auto policy risk).

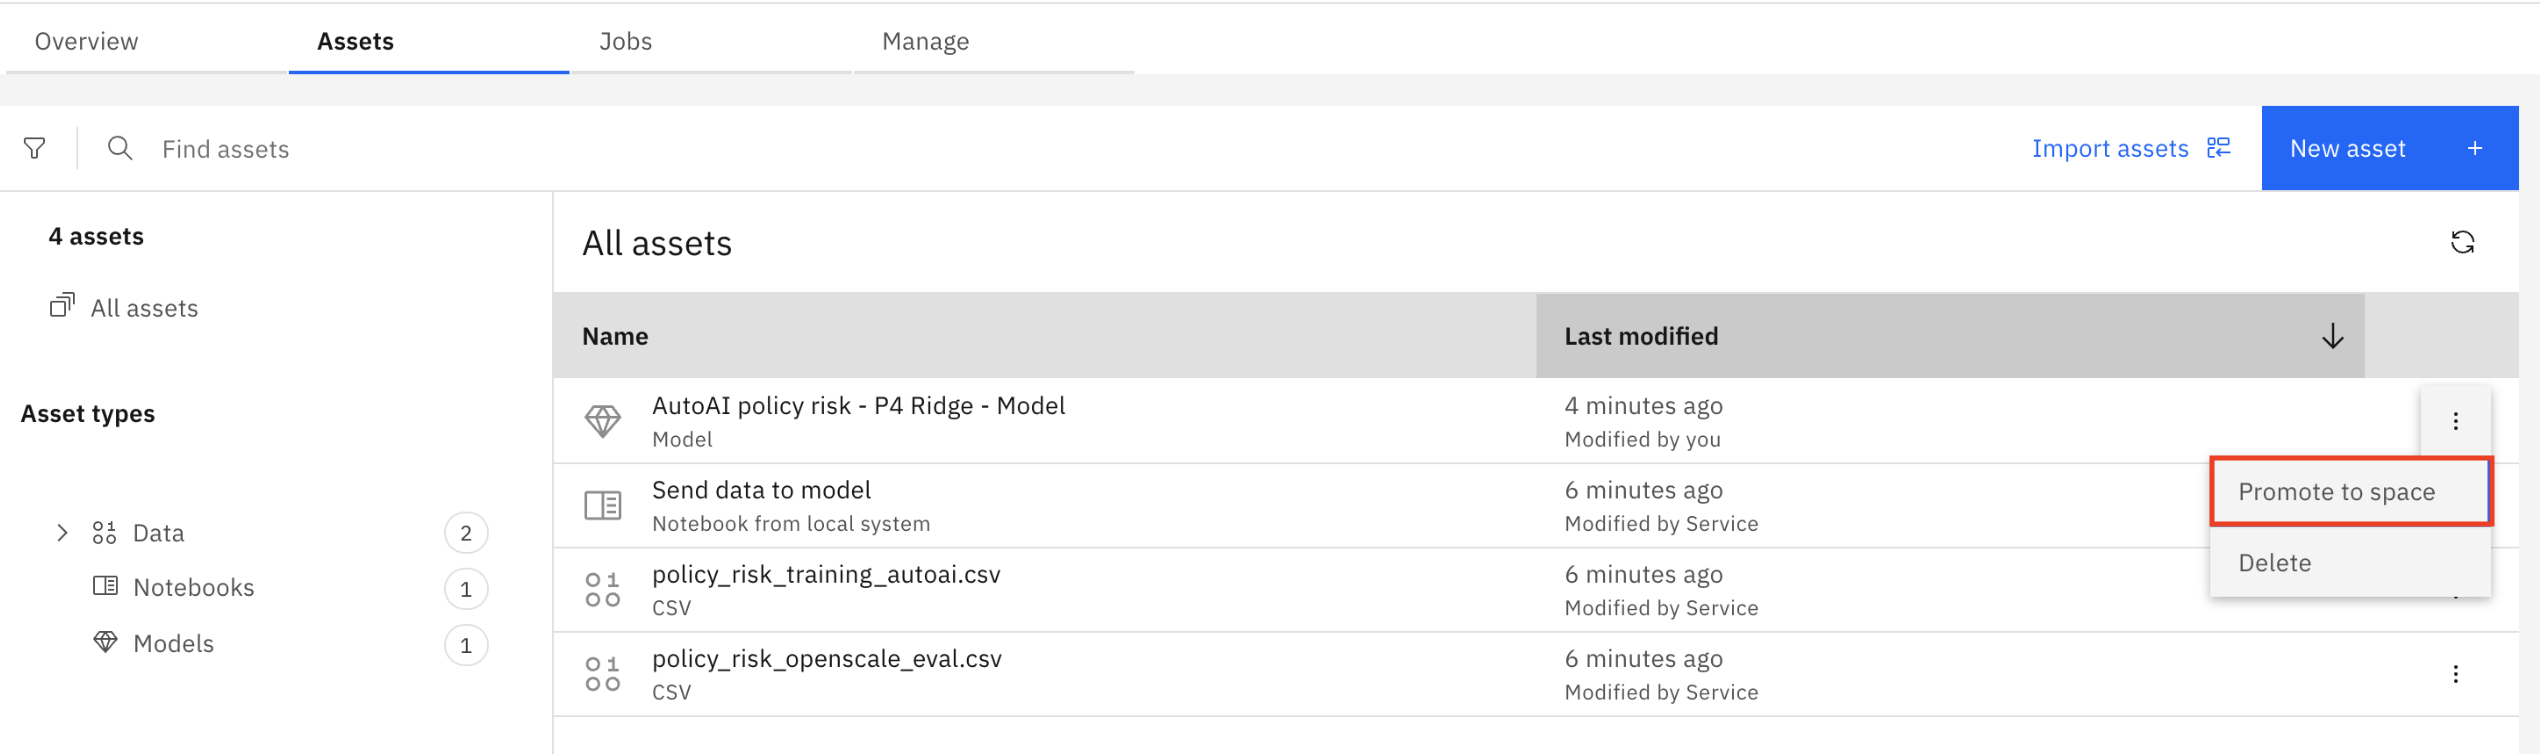
- Click on the Assets tab of the project. From the list of assets, locate the AutoAI policy risk - P4 Ridge - Model entry and click on the three dots to the right to expand the context menu. Click on Promote to space from the menu.
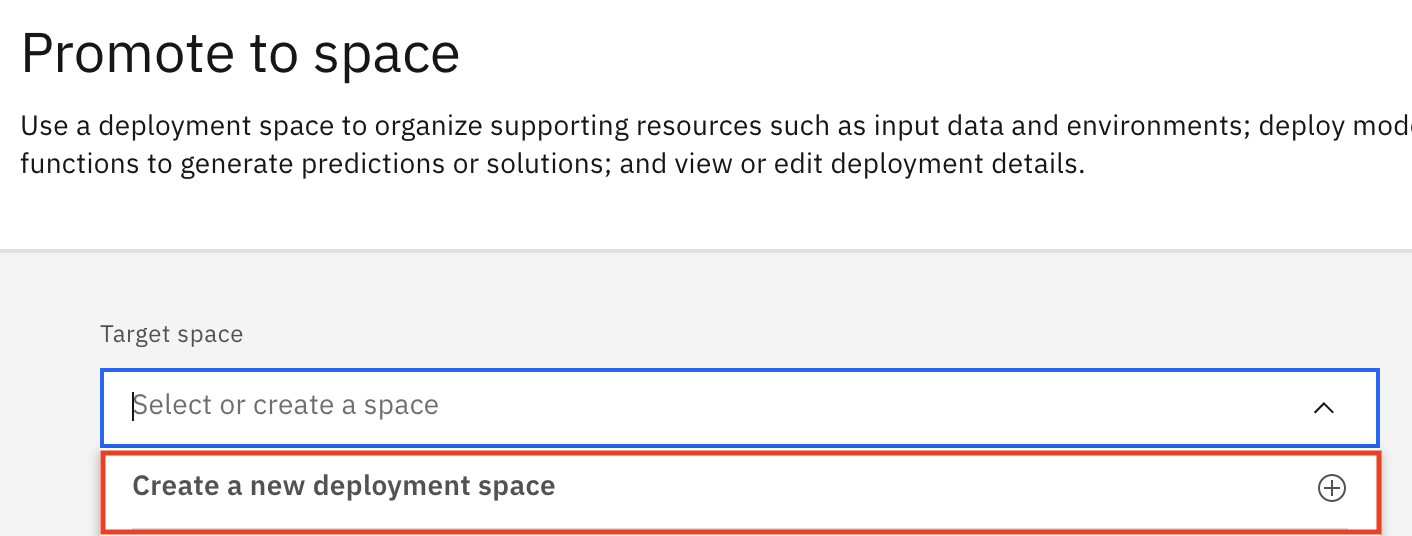
- Click on the Target space dropdown, then click on Create a new deployment space option from the list. The Create a deployment space window will open.
- In the Create a deployment space window fill out the information below and then press the Create button:
- Name: Give your deployment space a name that includes some identifying information, the purpose it will be used for and include "testing" to denote this as a space for testing (ex.
<your initials or unique string> - Policy risk testing). - Description:
Test the candidate policy risk model - Deployment stage: From the dropdown, click on Testing from the list. Designating the deployment stage will ensure that the models deployed in this space will appear in the correct phase of the lifecycle map in the AI use case.
- Select storage service: Ensure that the Select storage service dropdown is correctly set to the object storage service you are using for this lab.
- Select machine learning service: Ensure that the Select machine learning service dropdown is correctly set to the machine learning service you are using for this lab.

-
When the space has been created, click Close to return to the Promote to space window.
-
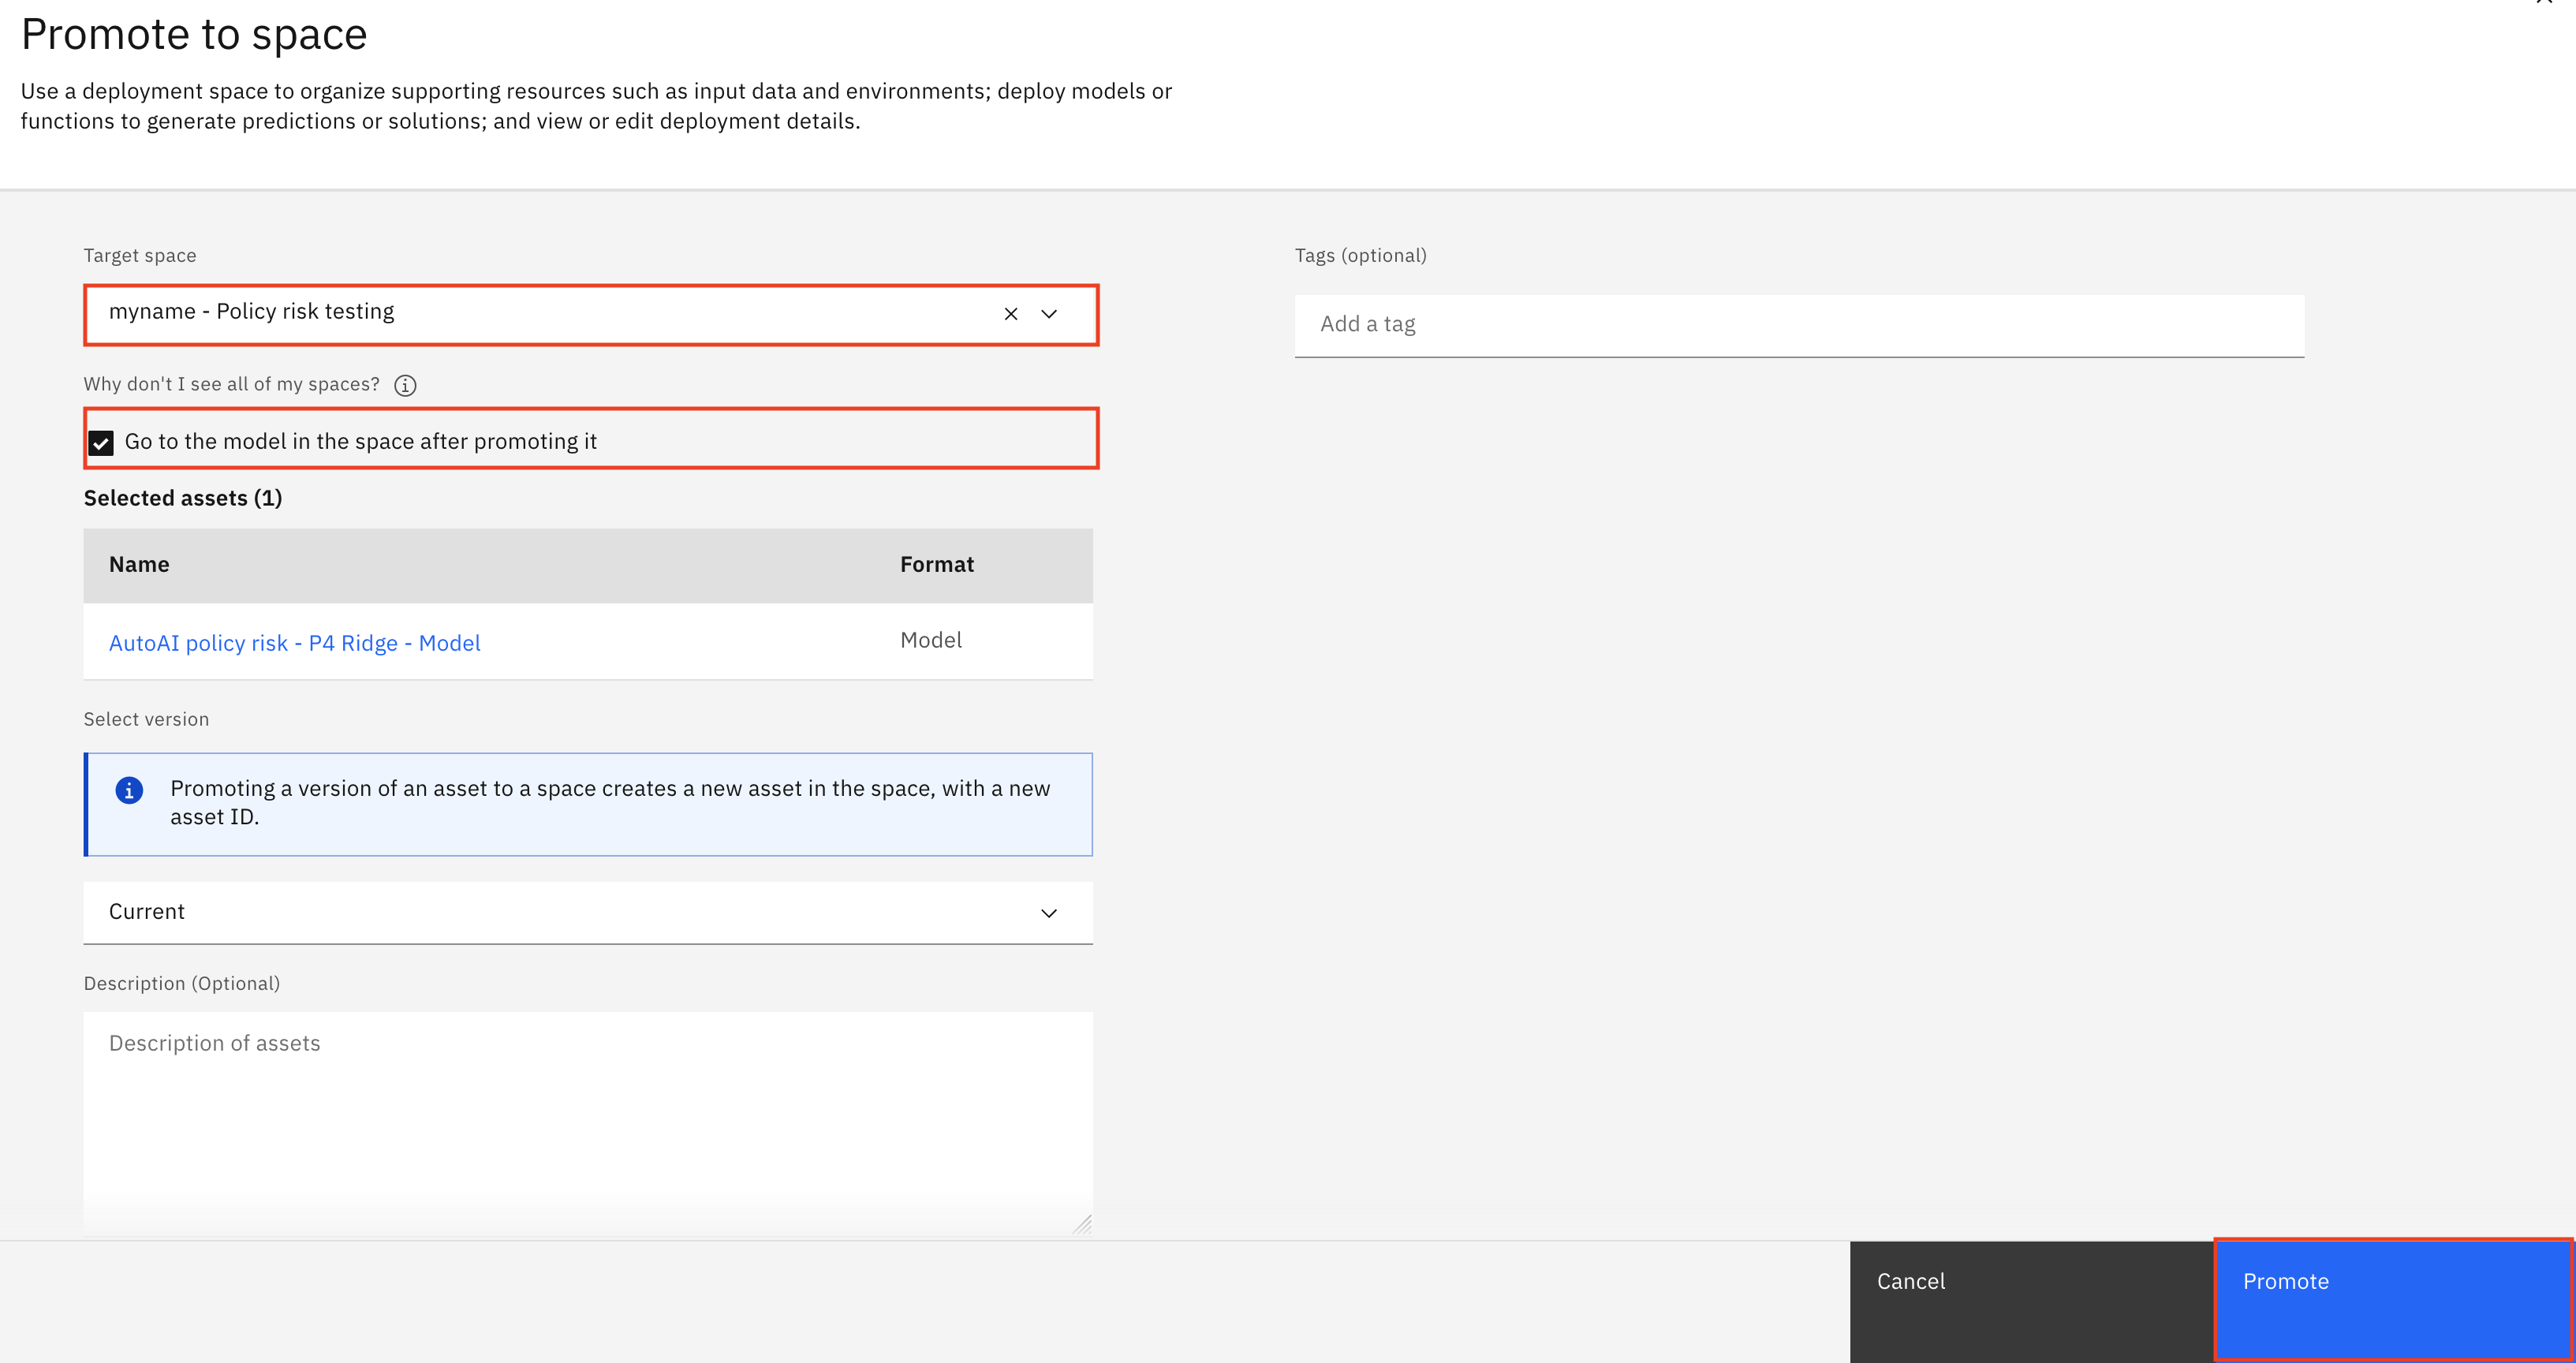
Check the box to the left of Go to the space after promoting the prompt template. Click the Promote button.
You have successfully created a deployment space and promoted the predictive AI model to the deployment space.
Create a deployment
The model has been promoted to the space, but cannot be accessed by application developers until it has been deployed. Deployment spaces can contain different types of assets, including the models themselves, as well as data used in batch processing jobs. Spaces are also fully governed, allowing administrators to provide different levels of access for different stakeholders.
-
Click the New deployment button.
-
Ensure that the Online tile is selected. This deployment type will allow for REST API access. Give your deployed model a name that includes some identifying information and the purpose it will be used for (ex.
<your initials or unique string> - Policy risk testing). Click the Create button.

When the deployment is finished, the Status in the displayed table will change to Deployed.
You have successfully created a deployment.
View the deployment details and lifecycle changes
- Click on the new deployment from the list of deployments.

Note the details provided on the API Reference tab include direct URLs to the model, as well as code snippets in a variety of programming languages that allow application developers to seamlessly include the model in their apps. The Test tab allows for direct testing of the model using either uploaded CSV files or JSON input.
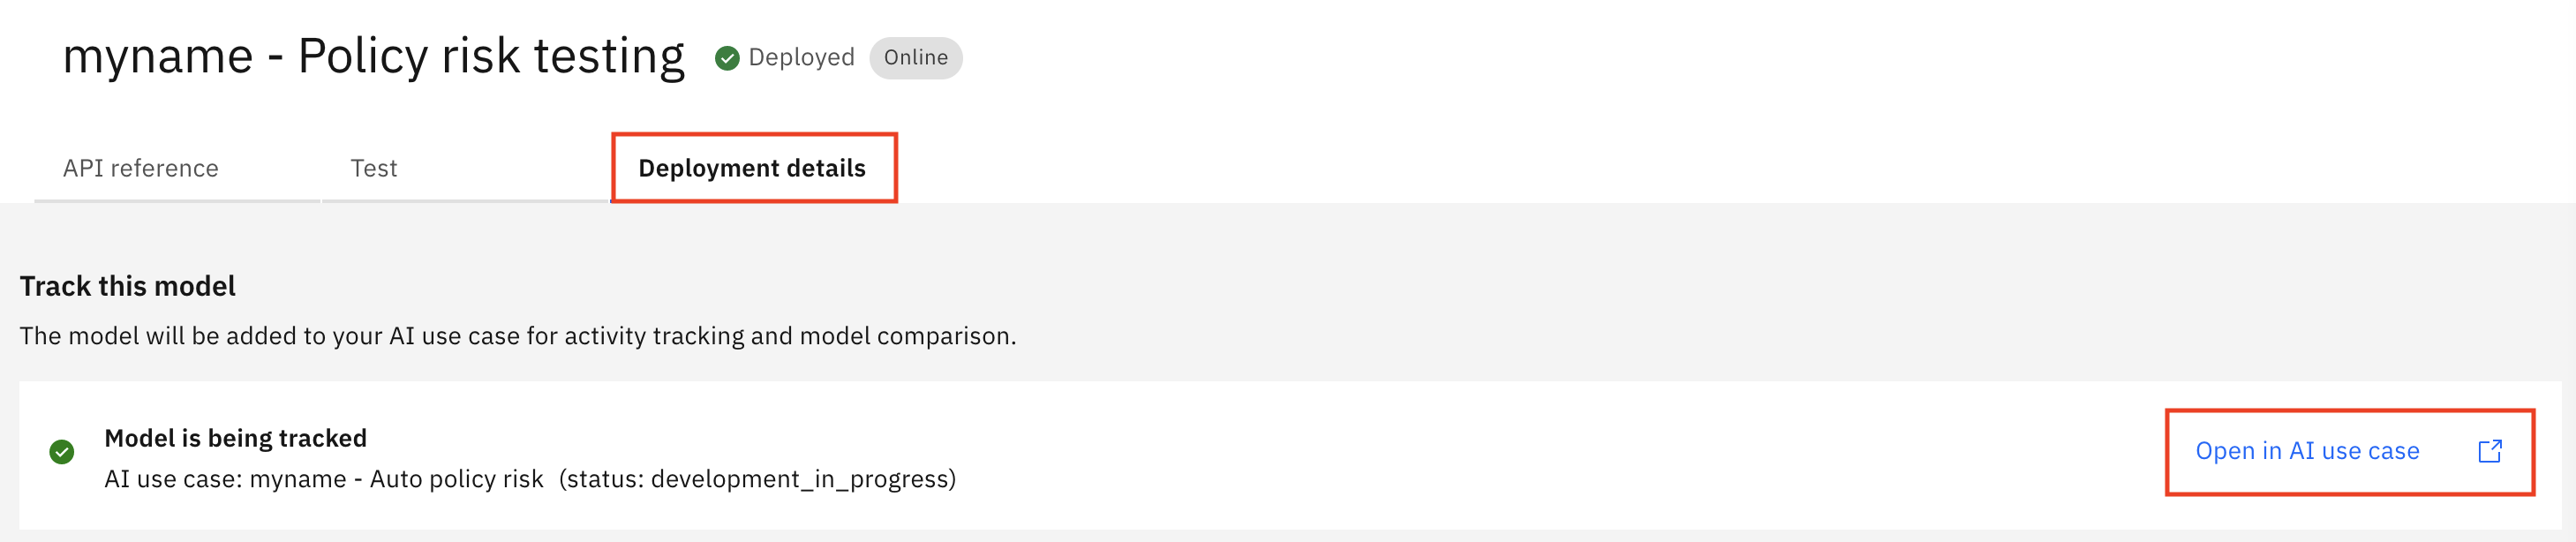
- Click on the Deployment details tab. Note that, in the Track this model section of the screen, the model tracking has carried over from the tracking established in the project. Click on the Open in AI use case button.
- Click on the Lifecycle tab to view the lifecycle graph for this model's use case. Note that there is now an entry for the model in the Test section of the model lifecycle view, with a badge showing that an evaluation is pending. In this stage, the model connection can be tested by application developers as well as the data science teams to ensure that it's functioning properly and accessible. The next step will be to validate that the model is making fair, accurate decisions.

You have successfully viewed the deployment details for your new deployment and progressed the predicitve AI model to the Test stage of the model lifecycle.
Congratulations, you've reached the end of lab 105 for deploying a predictive AI model.
Click, lab 106 to start next lab.