106: Governing Virtual Data
Watson Query can integrate with Watson Knowledge Catalog to govern the virtual data that is published to a governed catalog. This section is optional for technical sellers and business partners that are interested in learning how to govern virtualized data in Watson Query using the data governance features of Watson Knowledge Catalog. This section uses a very simple masking example based on column names using the Redaction masking method, to demonstrate the integration between the two services with the least amount of setup and configuration. It does not use the advanced data privacy masking methods that are defined in the Create Data Protection Rules section of this Data governance lab above.
Provision a Watson Knowledge Catalog Service
Before you proceed, you must have a Watson Knowledge Catalog service provisioned in the same cloud account, and cloud region where your Watson Query service is provisioned. If not, go to the Provision the Services step of the Getting started section of the Data fabric lab and follow the instructions to provision one.
1. Create Service Authorizations
In order for Watson Query to publish to a governed catalog and enforce Watson Knowledge Catalog data protection rules, a service to service authorization has to be created in your IBM Cloud account using Identify and Access Management (IAM).

Go to the IBM Cloud Log in page.
-
Enter your IBM Id.
-
Select the Continue button.
When prompted, enter your password and any additional authentication requests you are presented with.

-
Select the Manage menu on the toolbar.
-
Select the Access (IAM) menu item.
-
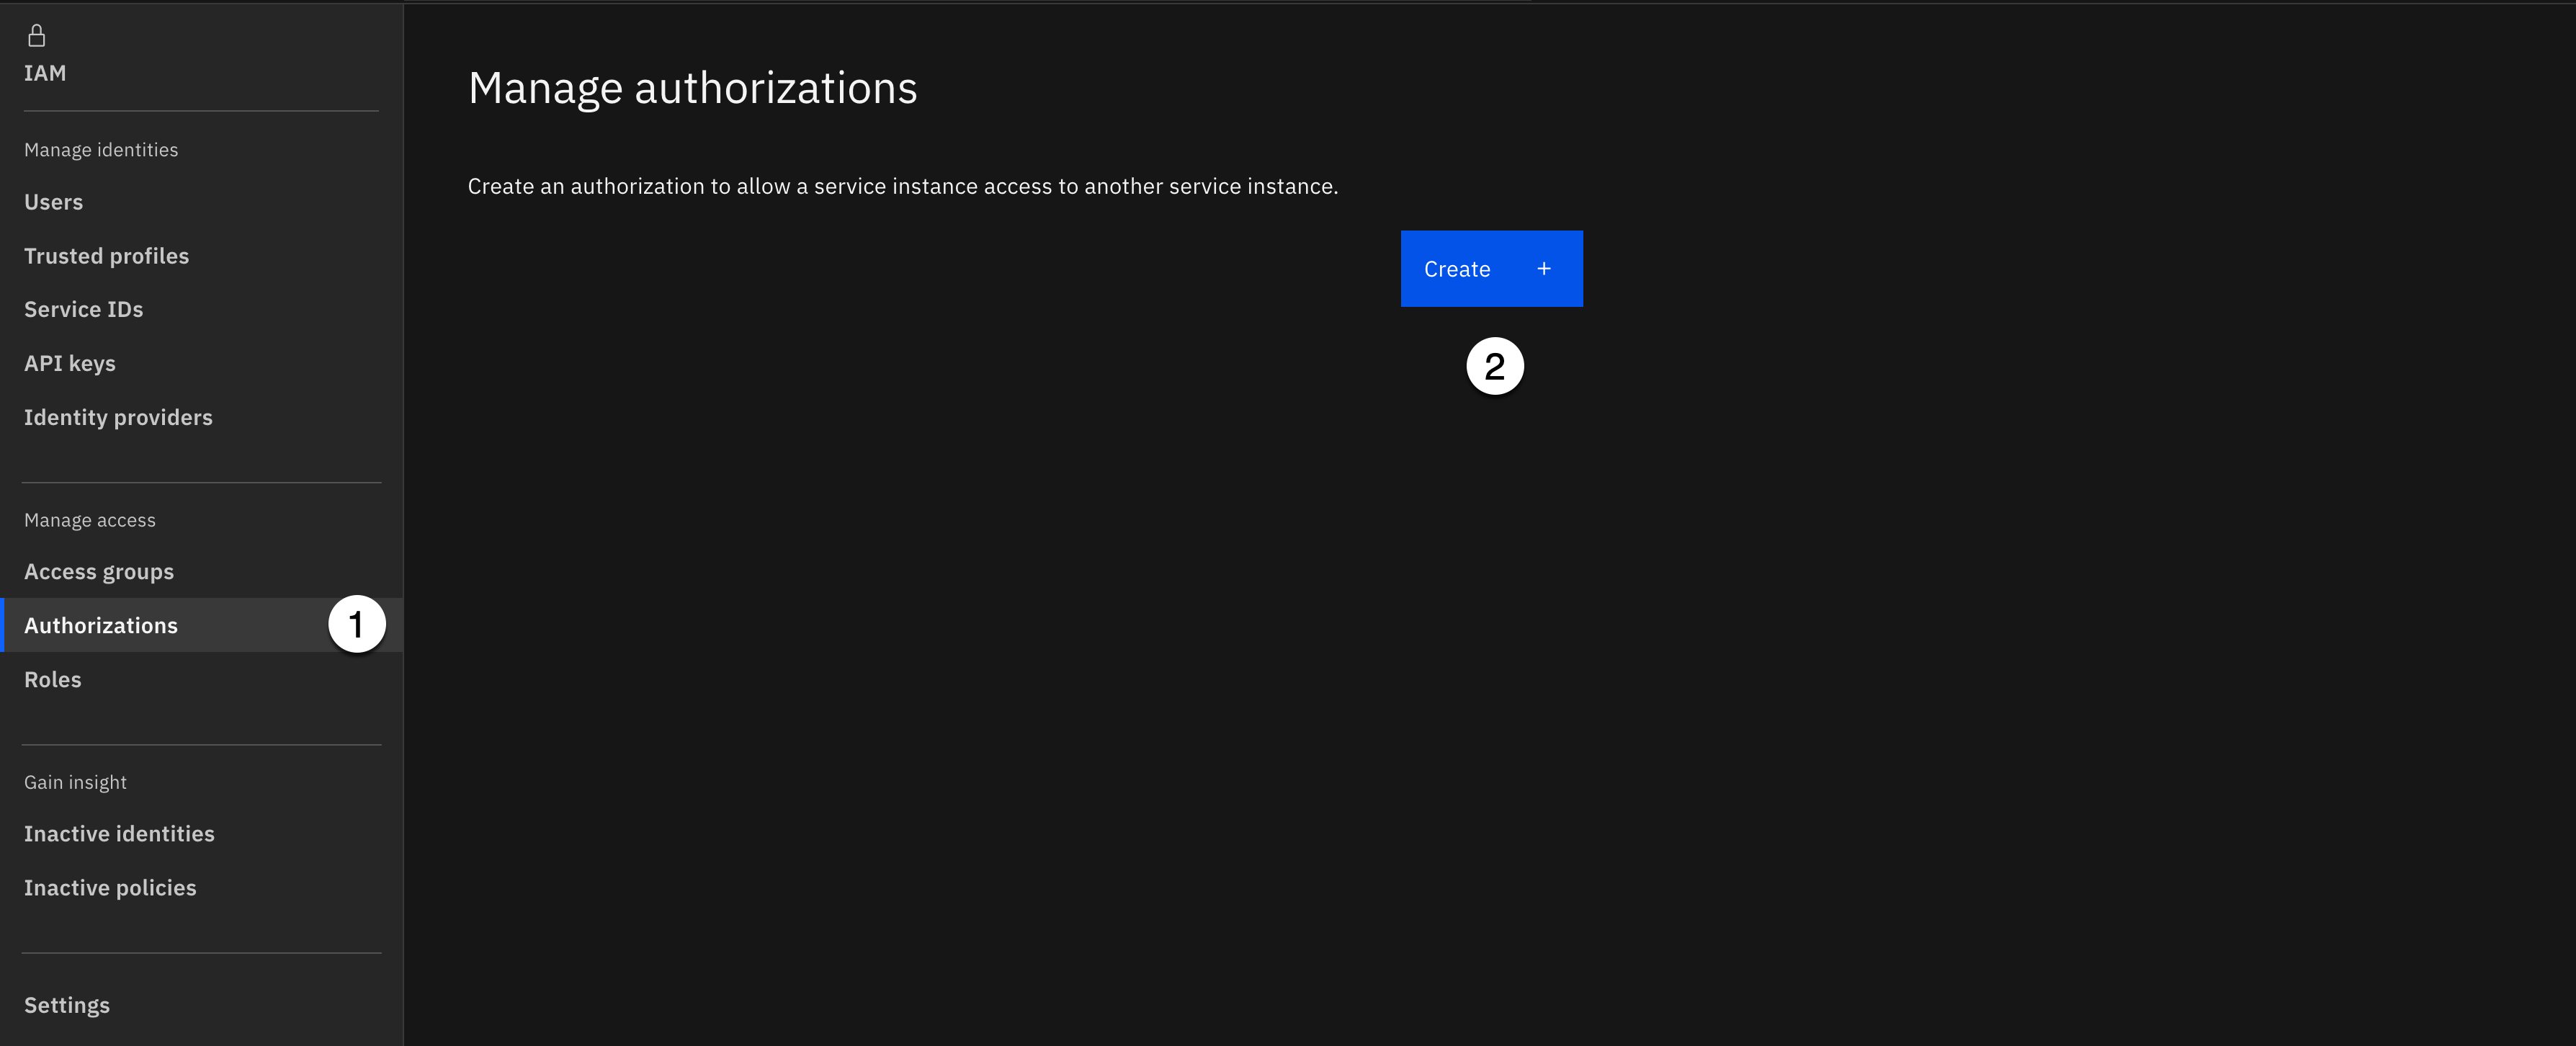
Select the Authorizations menu item from the Manage access section of the menu on the left.
-
Select the Create button.
-
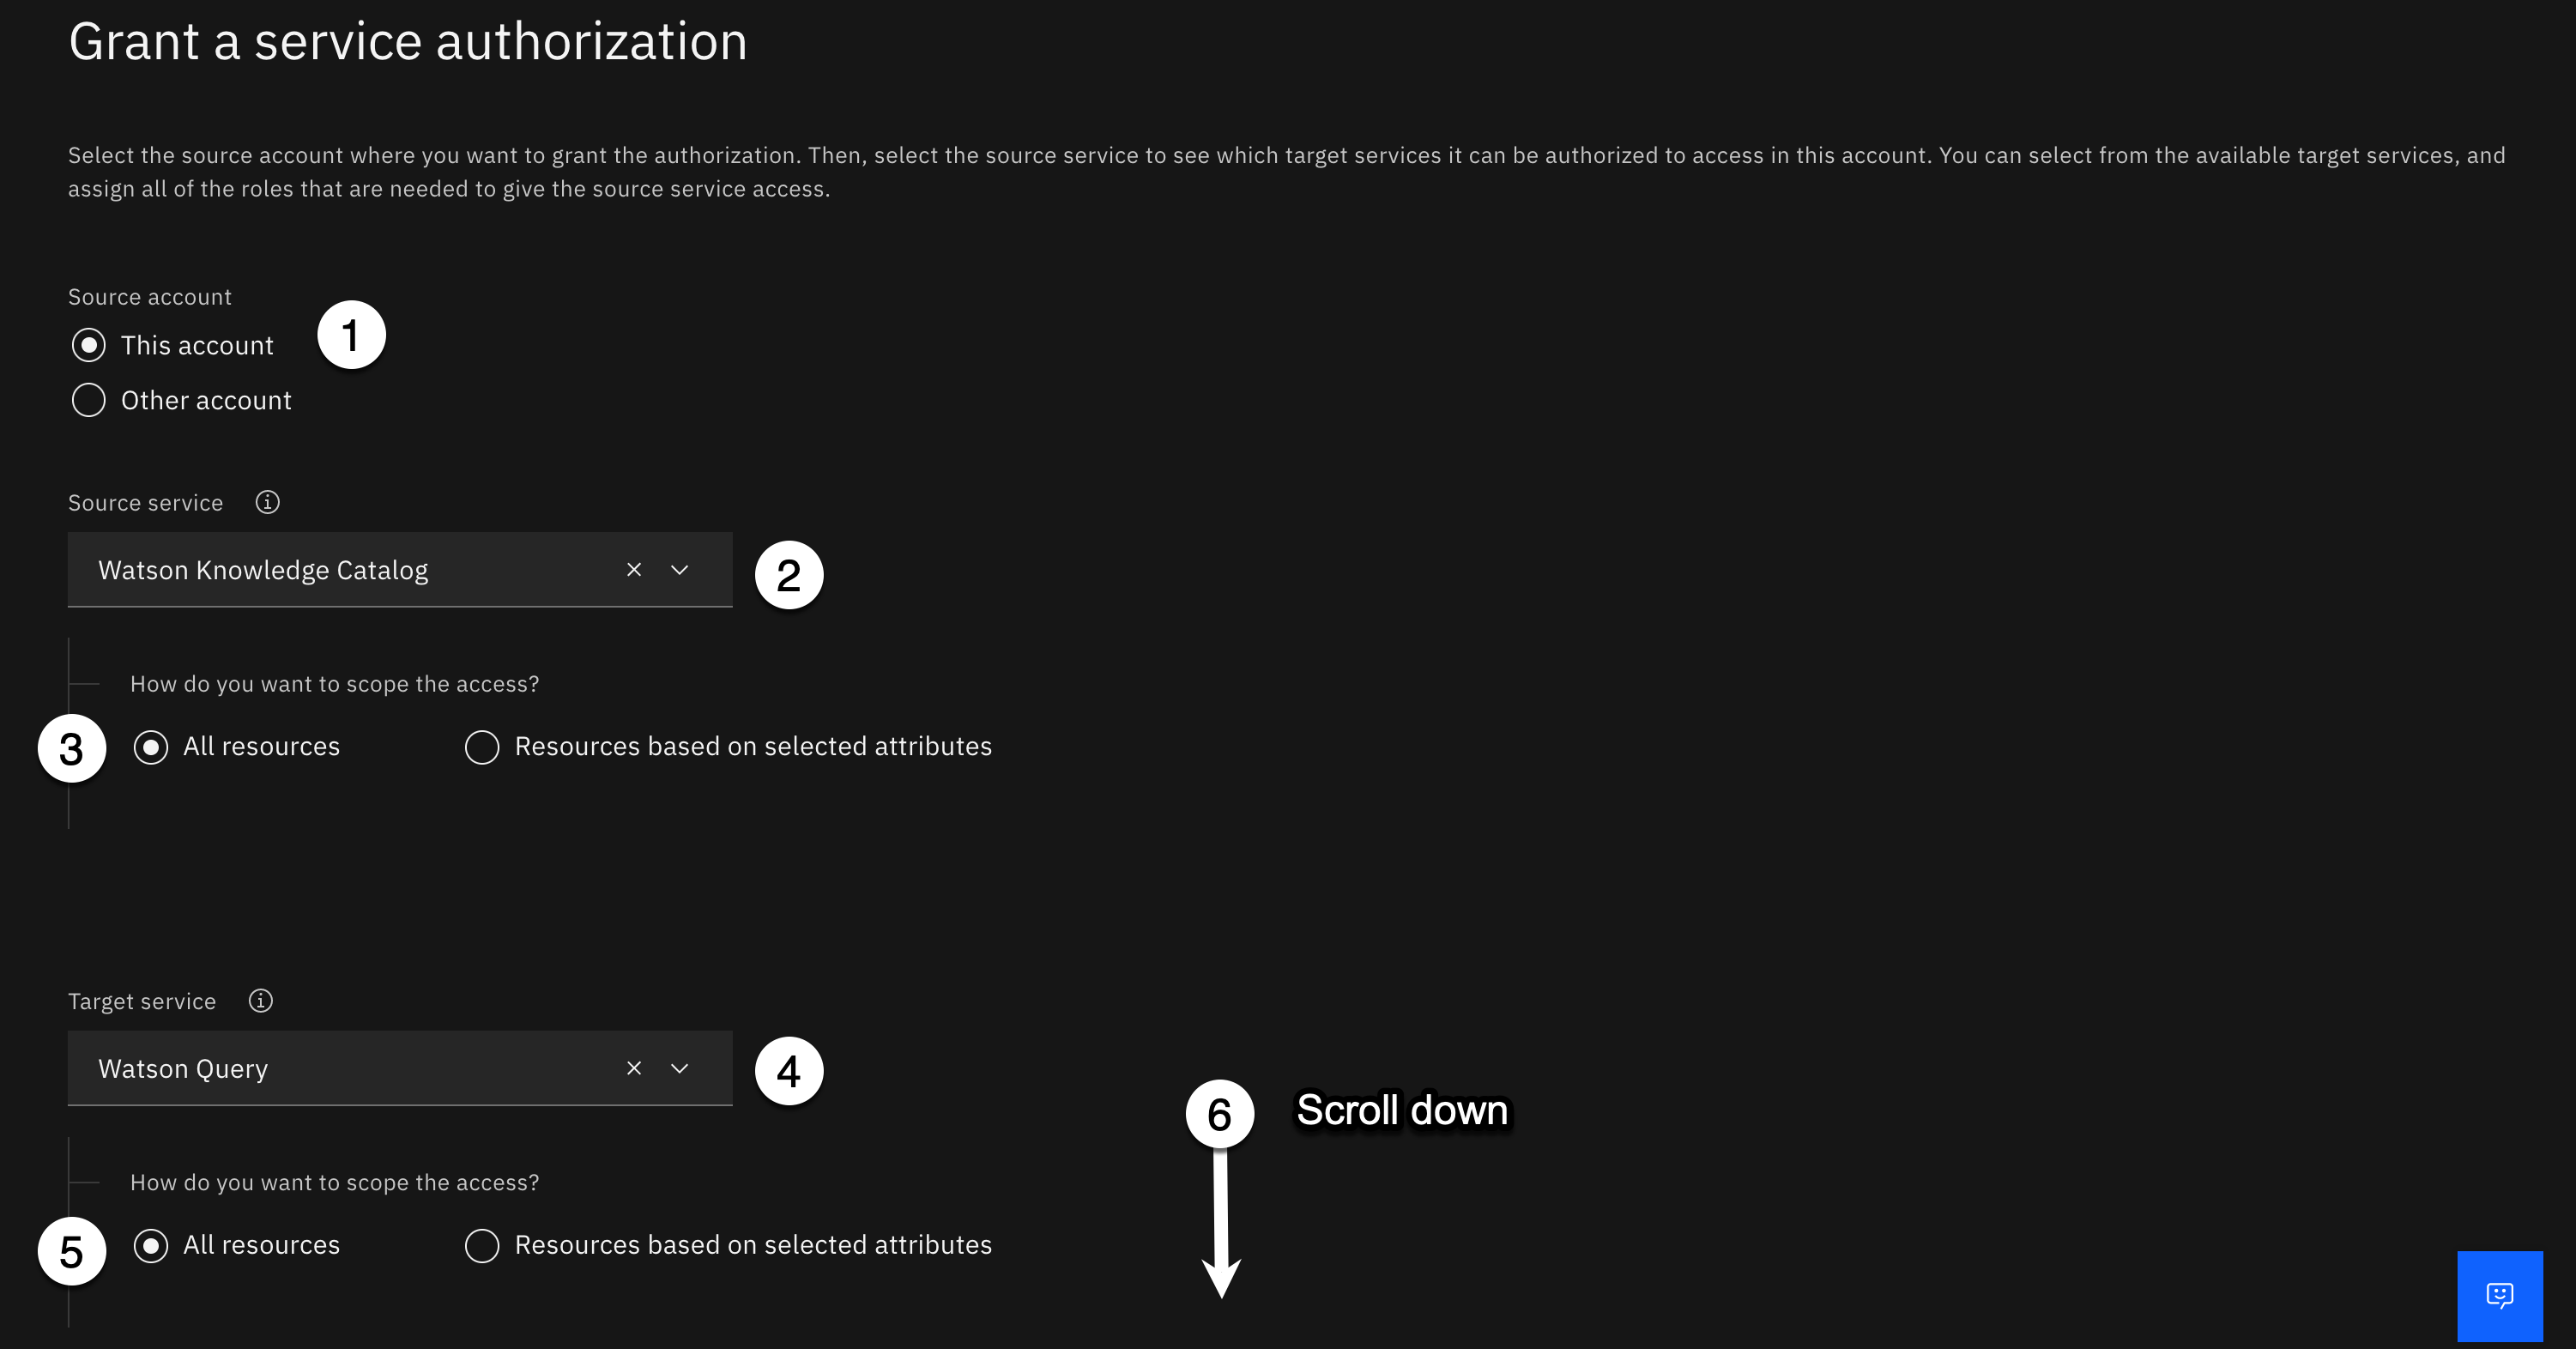
Select This account as the Source account. (It should be selected by default).
-
Using the Source service dropdown, start typing watson know into the search area, select Watson Knowledge Catalog from the service list.
-
Select the All Resources radio button for how you want to scope the source service access.
-
Using the Target service dropdown, select Watson Query from the service list. (It should be the only service listed).
-
Select the All Resources radio button for how you want to scope the target service access.
-
Scroll down to the bottom of the authorizations page.
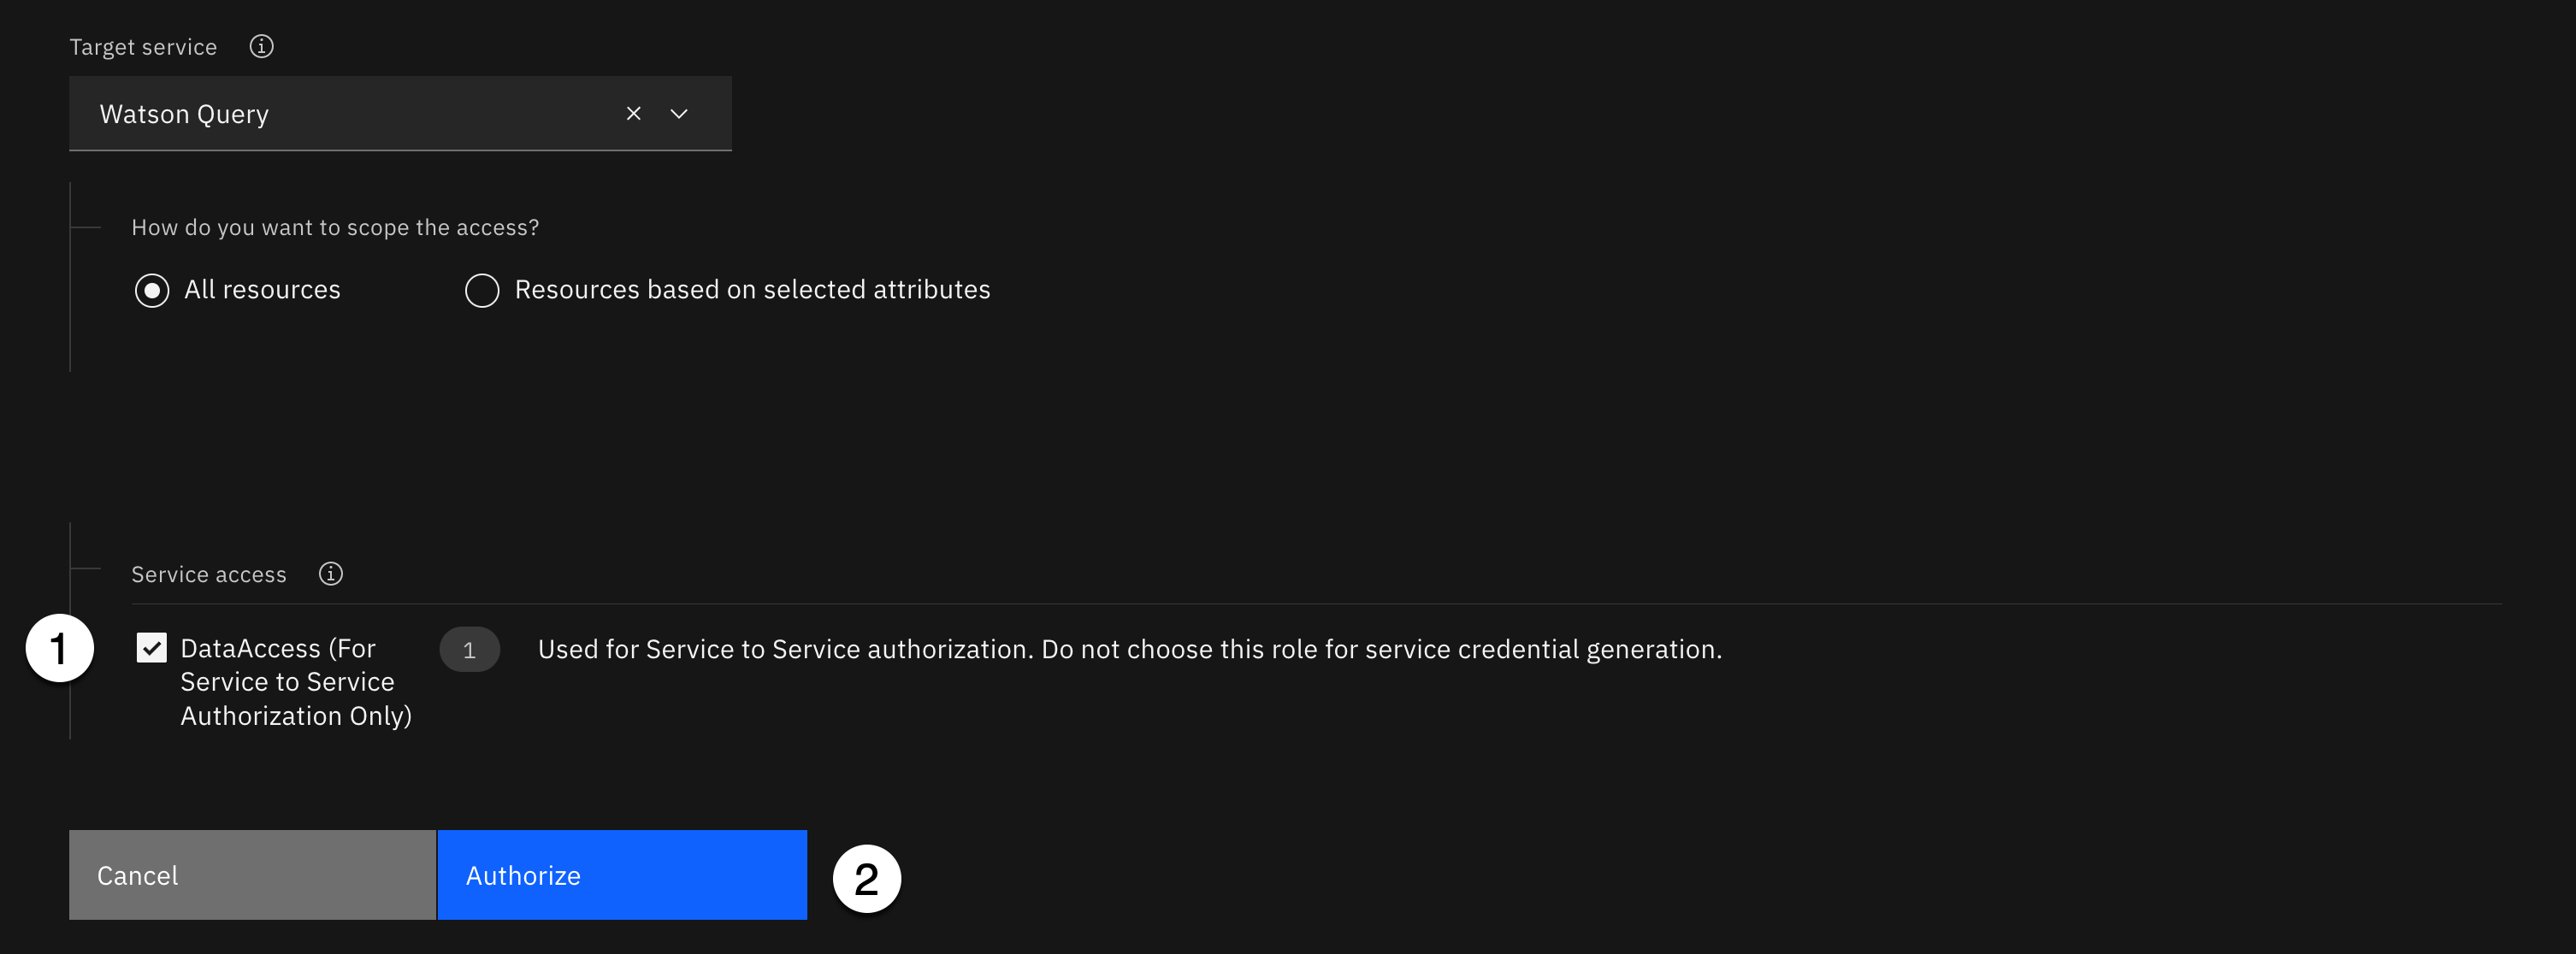
-
Select the checkbox in the Service access section next to DataAccess (For Service to Service Authorization Only).
-
Click the Authorize button.
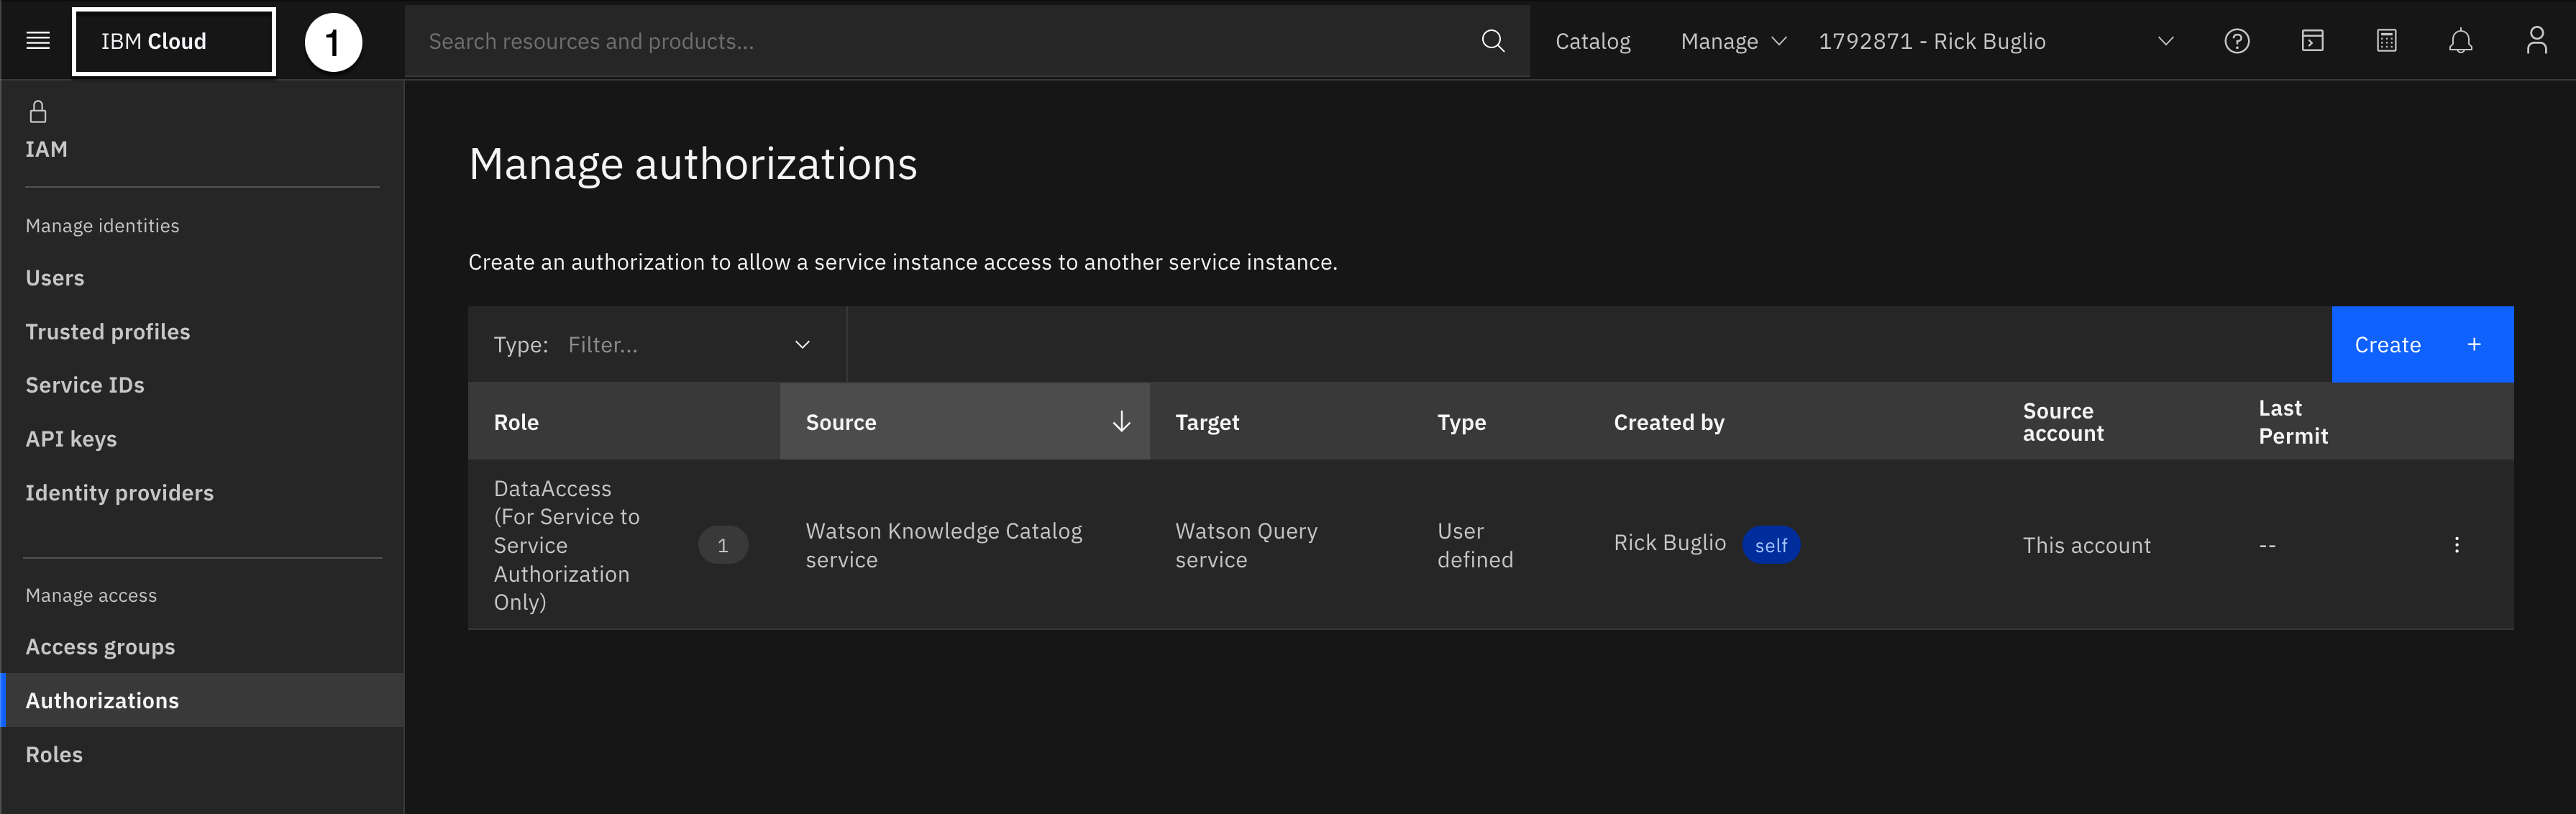
You will see the new service to service authorization in your cloud account in the Manage authorizations table.
- Select the IBM Cloud label in the upper left corner to get back to the home page.
2. Create Governed Catalog
In order to govern virtual data in Watson Query, you will need a governed catalog that is created in the same account that your Watson Query service is deployed. This is a catalog that was created with the Enforce data policies option enabled. You can not use the Platform assets catalog because it is not a governed catalog and it cannot be modified to become one.
If you have done the Data governance technical lab, you should have a governed catalog created in your account. If not, you can use an existing governed catalog, in the same account and region that your Watson Query service is deployed, or create a new governed catalog.
If you need to create a governed catalog, go to the Create the Catalog section of this lab for instructions on how to create one.
3. Create Data Protection Rule
In this step, you will create a data protection rule to protect sensitive credit card information in the CUSTOMER virtual data asset, by using the Redaction masking method, so the values are not visible to those who do not have the authority to view the information. You will create the data protection rule using Column name as the criteria for the rule condition for columns named: CREDIT_CARD_NUMBER, CREDIT_CARD_CVV and CREDIT_CARD_EXPIRY.

- Select the Navigation menu (the 4 stacked horizontal lines in the upper left corner).
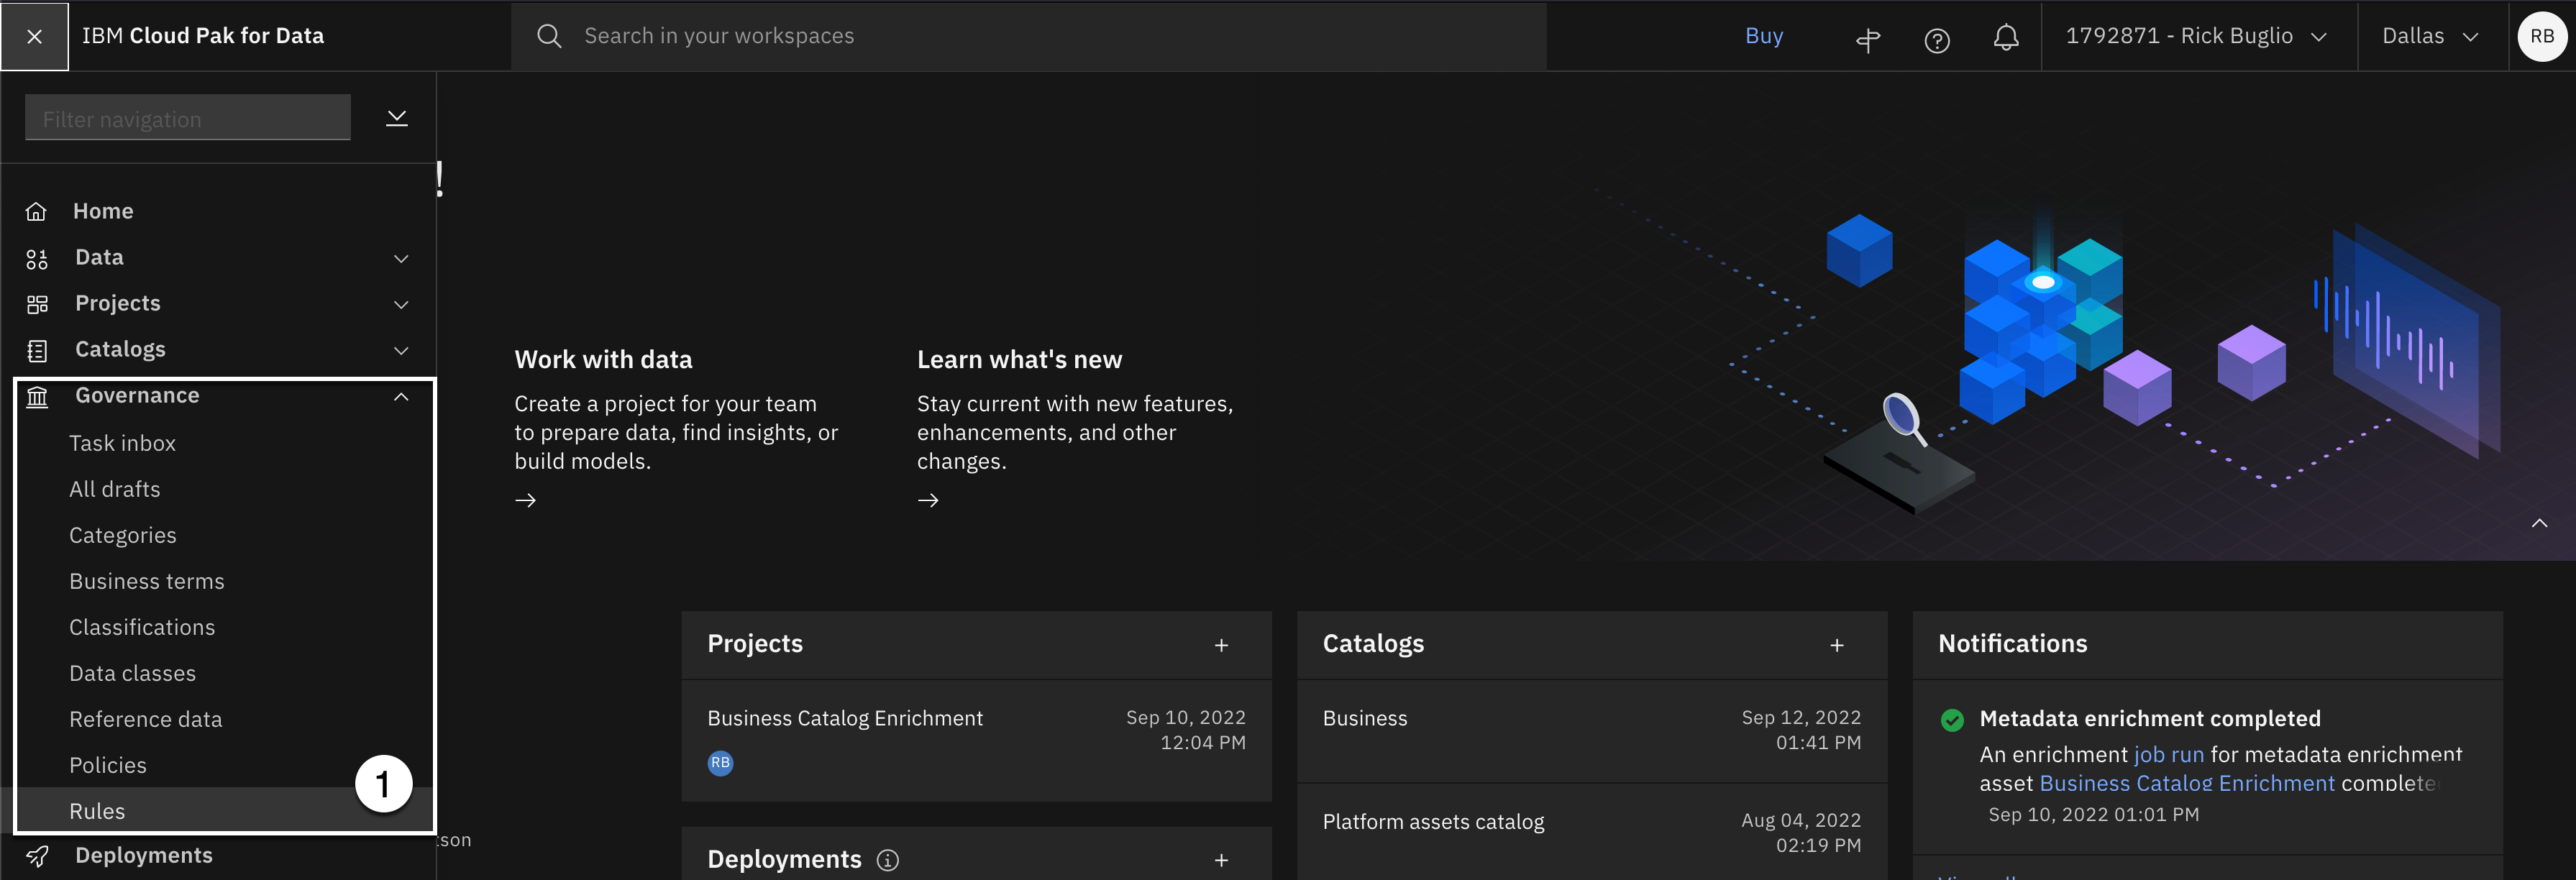
- Select the Governance > Rules menu.

- Using the Add rule dropdown, select New rule.

- Select Data protection rule.

- Select the Next button.
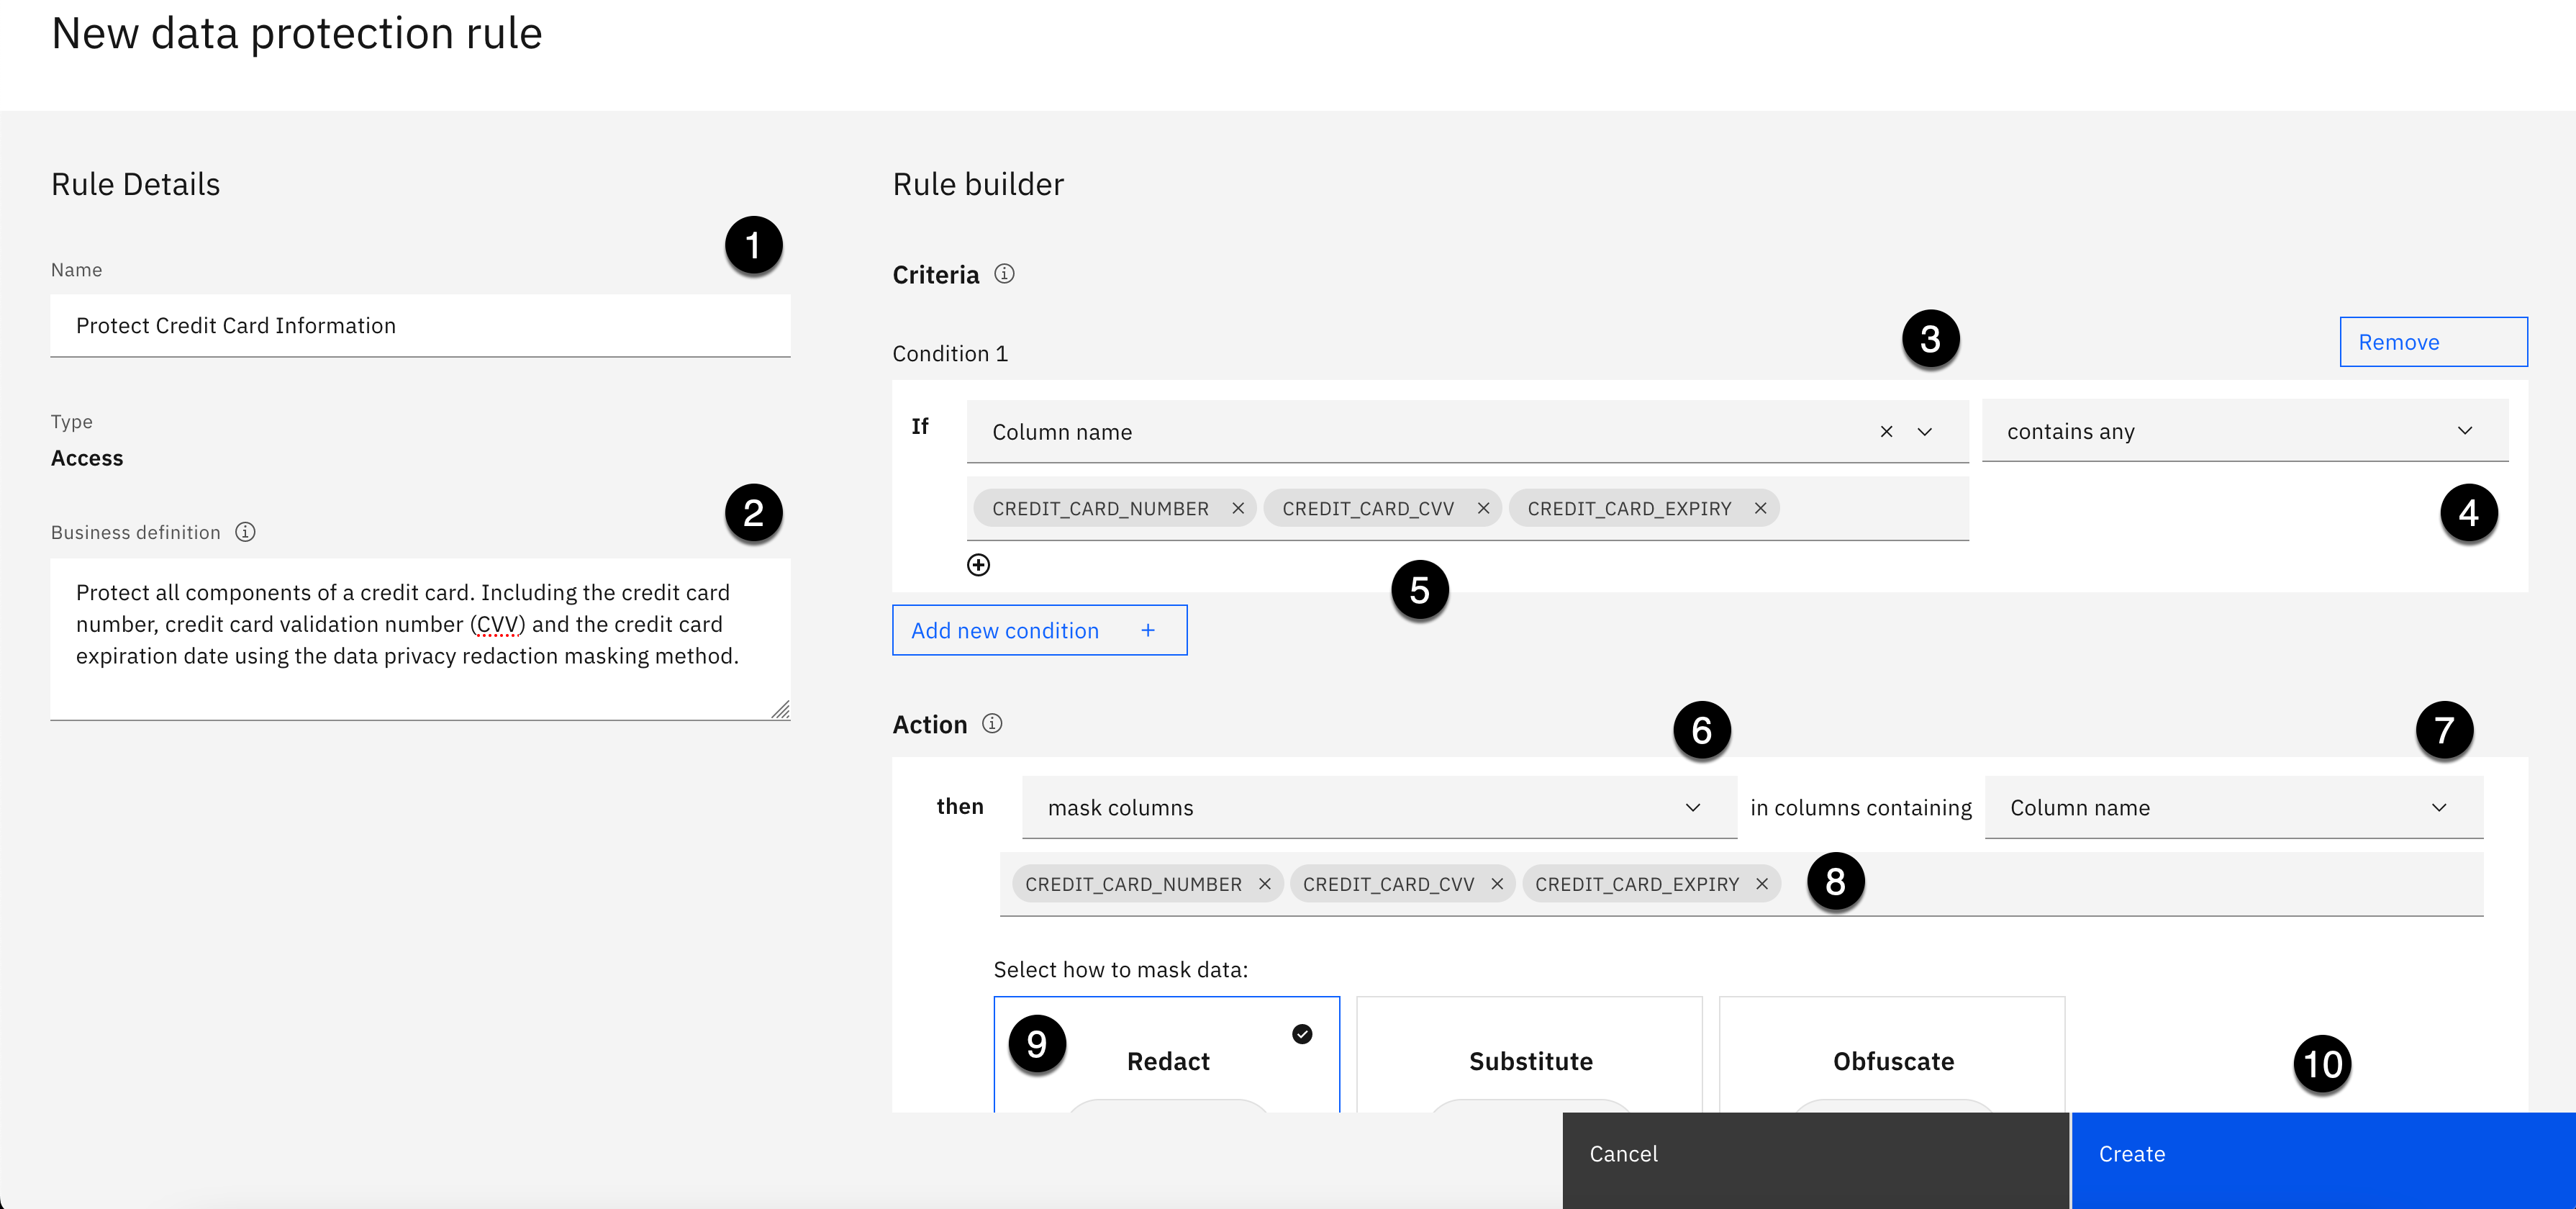
- Copy the text below and paste it into the Name field:
Protect Credit Card Information
- Copy the text below and paste it into the Business definition field:
Protect all components of a credit card. Including the credit card number, credit card validation number (CVV) and the credit card expiration date using the data privacy redaction masking method.
Specify the rule Criteria for Condition 1 as follows:
-
Using the If statement dropdown on the left, select Column name.
-
Using the If statement dropdown on the right, select contains any.
-
Copy the text below and paste it into the Column name field:
CREDIT_CARD_NUMBER, CREDIT_CARD_CVV, CREDIT_CARD_EXPIRY
- Press the Enter or Return key on your keyboard.
Specify the rule Action as follows:
-
Using the then statement Action dropdown on the left, select mask columns.
-
Using the then statement in columns containing dropdown on the right, select Column name.
-
The CREDIT_CARD_NUMBER, CREDIT_CARD_CVV, and CREDIT_CARD_EXPIRY columns will automatically be filled in for you.
-
Select Redact as the masking method in the Select masking method section.
-
Click the Create button.
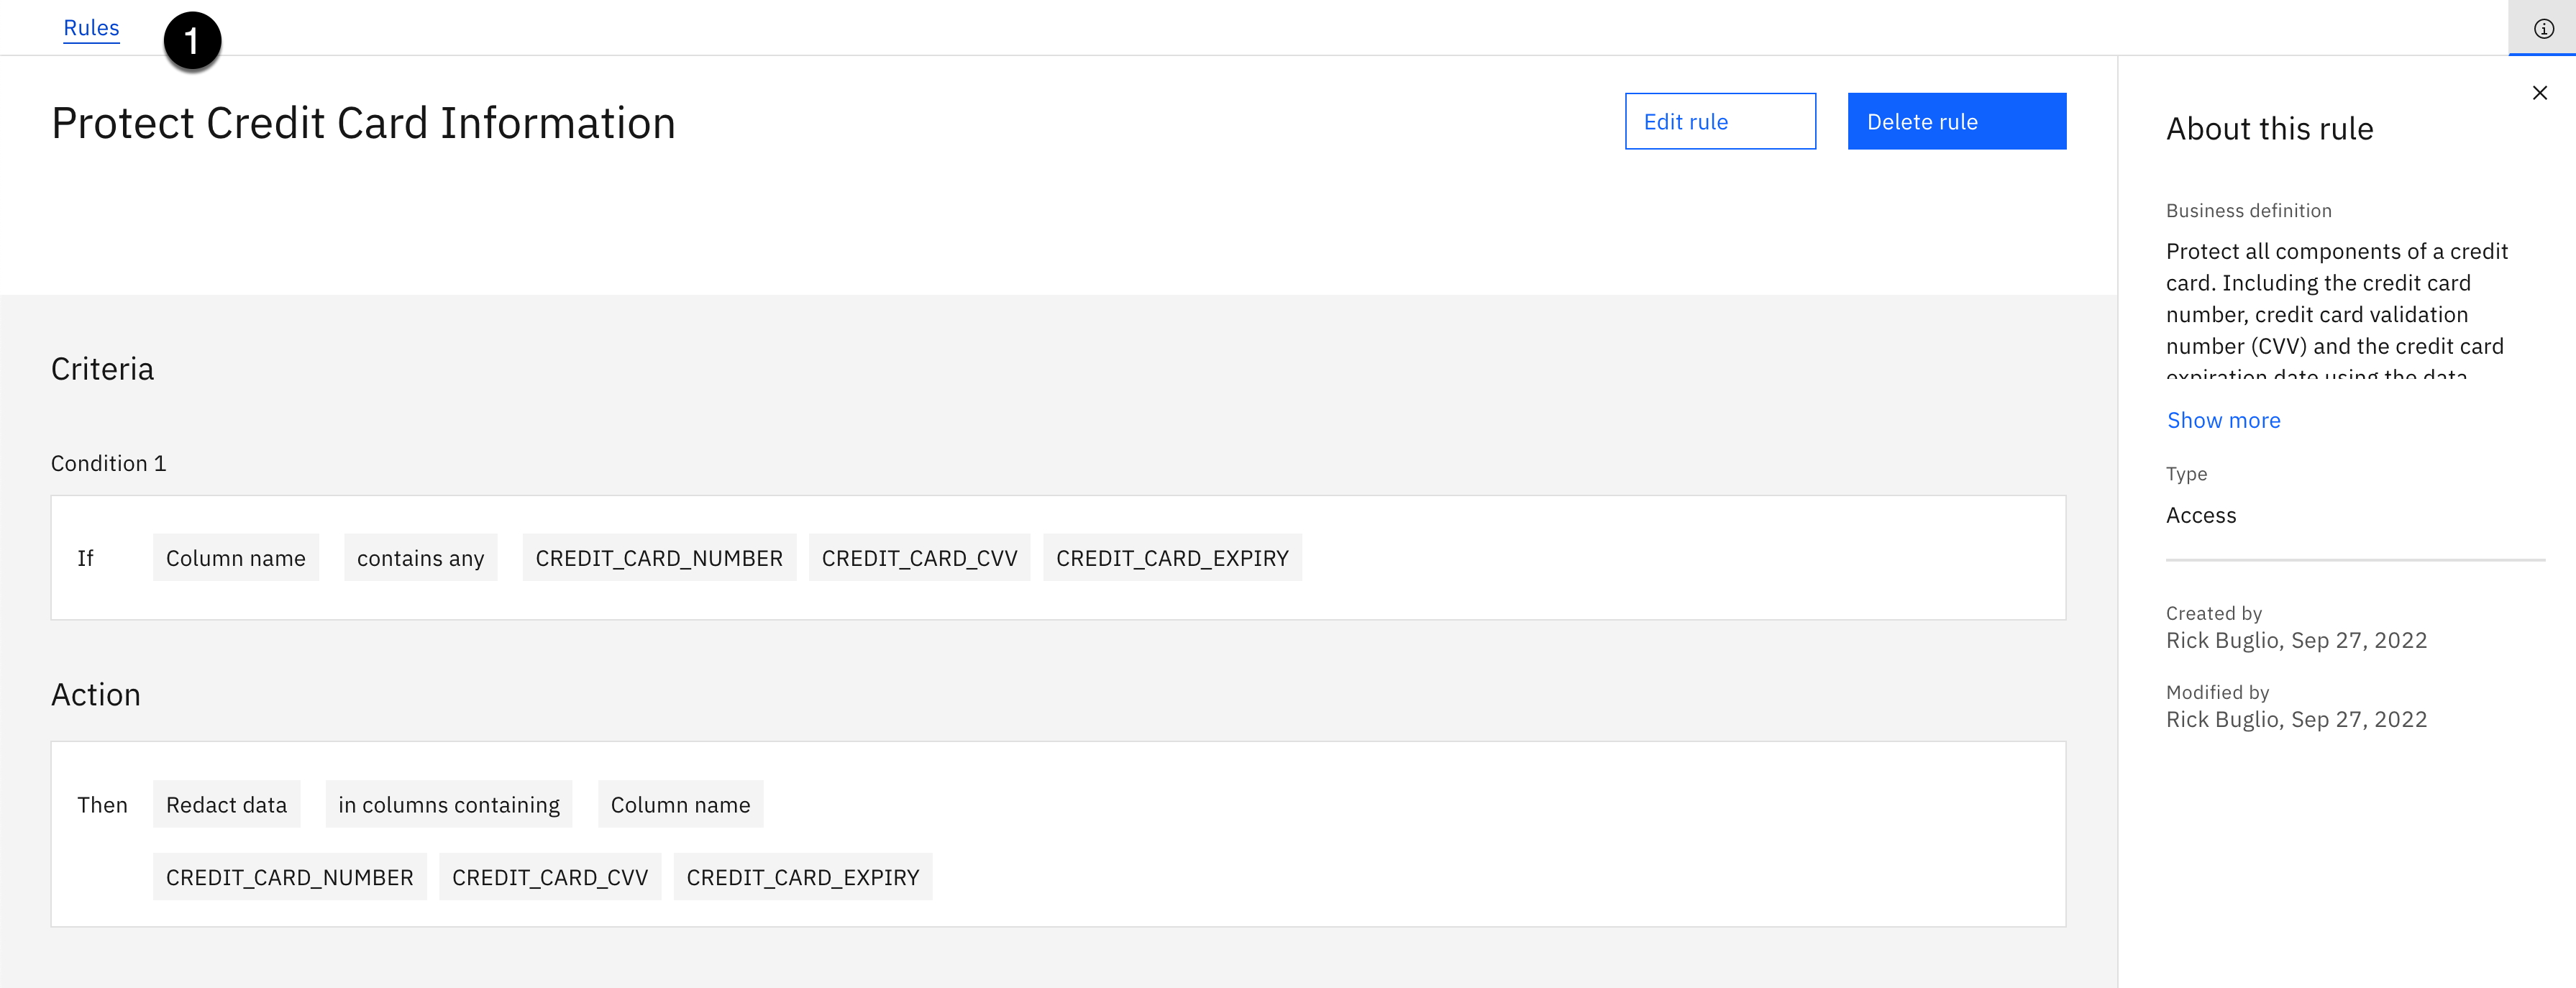
You should see a Successfully created! message and see the new rule created.
- Select the Rules breadcrumb in the upper left corner to return to Rules main page.
Data governance is now setup for Watson Query to use Watson Knowledge Catalog to protect sensitive credit card information.