113: IBM watsonx Code Assistant (WCA) for Z Auto Refactoring
Heads Up! Quiz material will be flagged like this!
Goal
The goal of this lab is to focus on the Refactor phase of the mainframe application modernization lifecycle for z/OS applications. IBM applies new automated refactoring technology to quickly identify the parts of the application to refactor, in the Refactor step of the application modernization journey. Code is then extracted into modular, reusable services via deep functional analysis of the source code. By automating the ”code slicing” process, the accuracy is improved, and the developer time and skill required is reduced. Once the targeted code is extracted into business services, architects and developers can make decisions relative to maintain the code in COBOL or to convert the code to Java.
Auto Refactoring
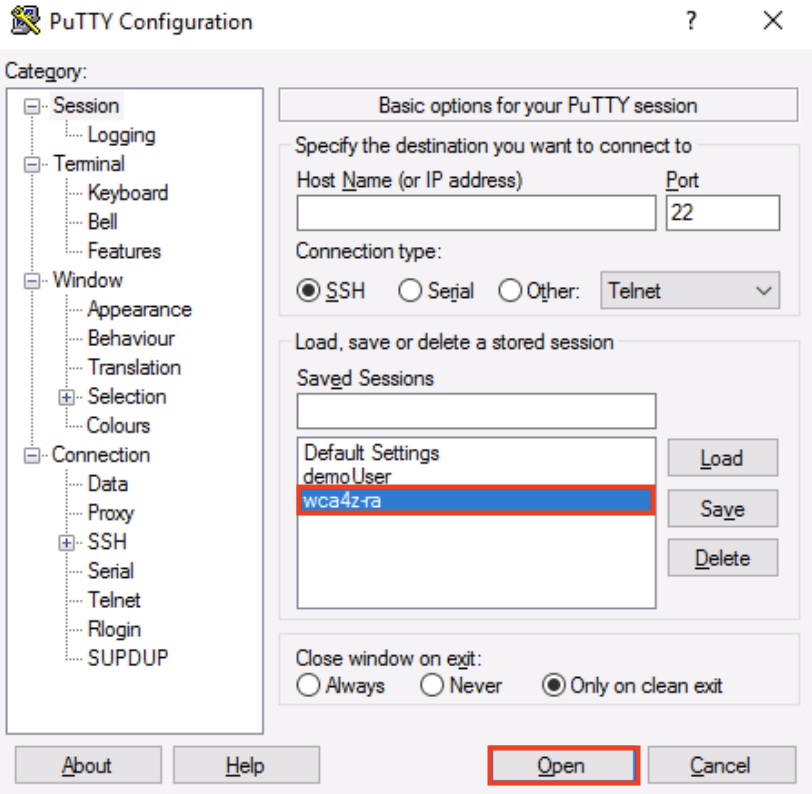
- Open the Putty app from the taskbar at the bottom.

- Select wca4z-ra from the Saved Sessions box (A) and click Open.
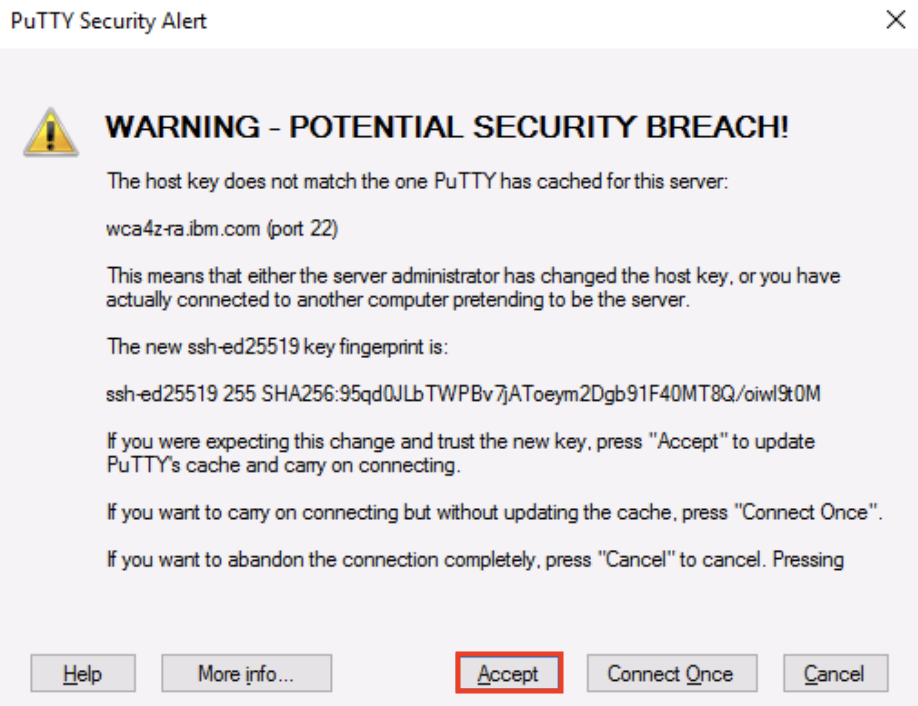
- After clicking Open in the previous step the following warning message will pop-up. Click Accept. This warning will only be displayed once if you do this demo again.
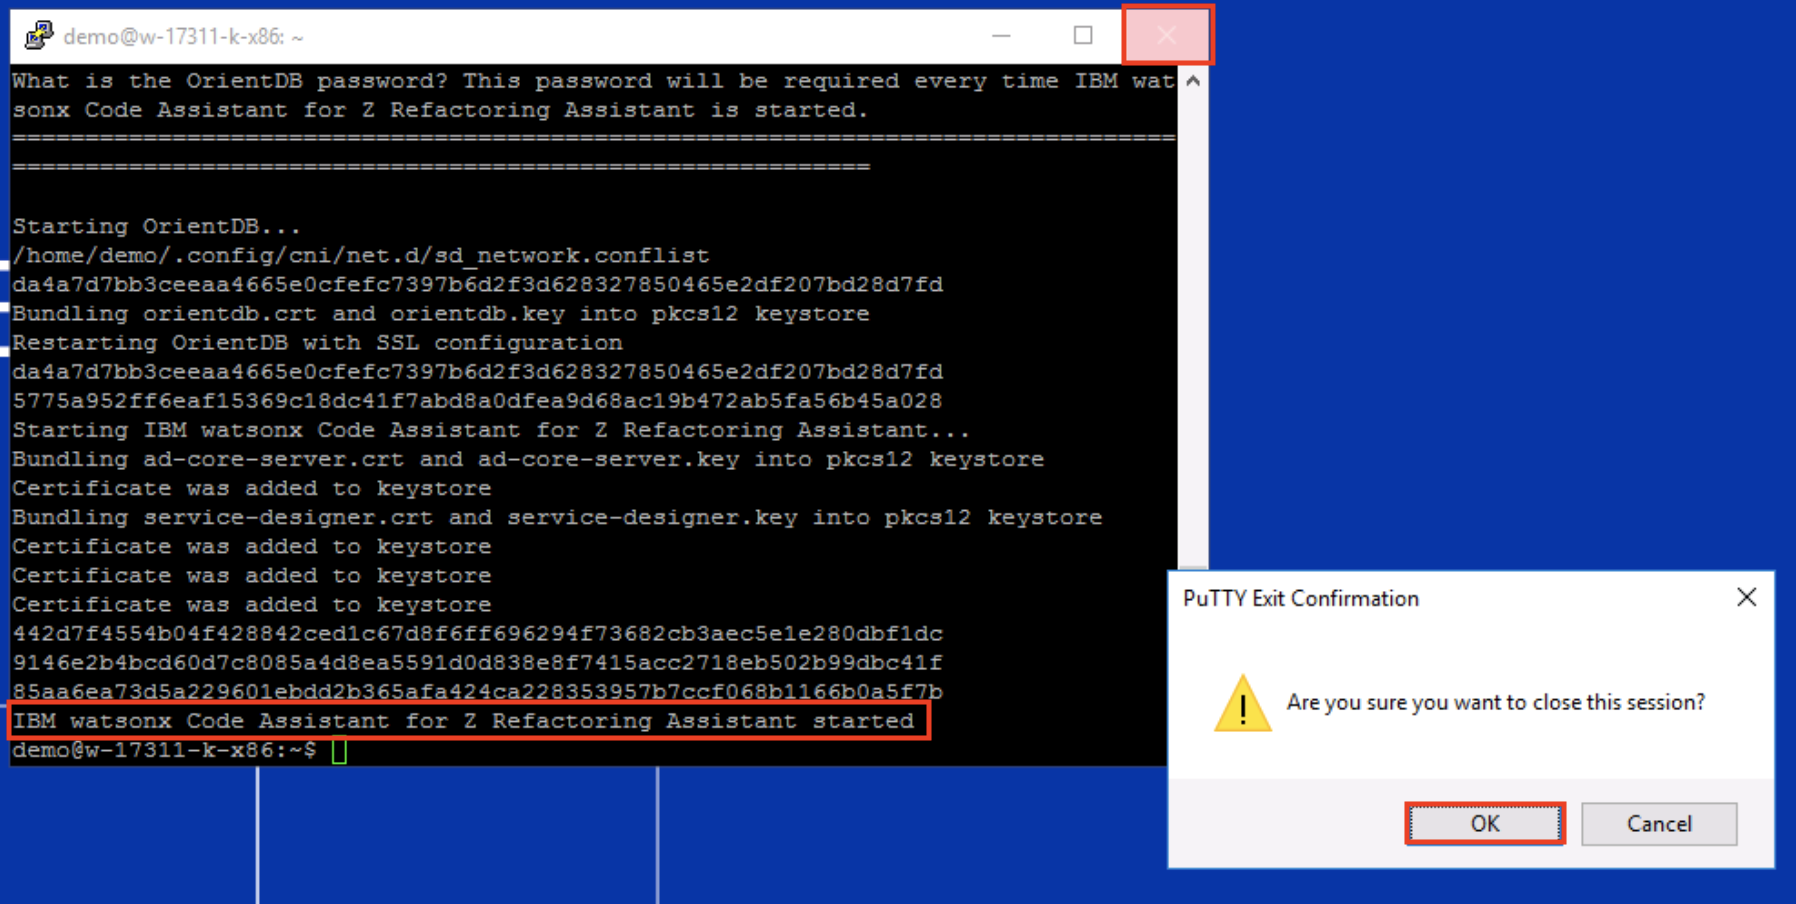
- A script will run in Putty to start the Refactoring Assistant. When you see the text IBM Watson code assistant for Z Refactoring Assistant started at the bottom of the Putty window, you can close it by clicking the X button in the top right corner. You will be asked Are you sure you want to close the session?. Click OK.
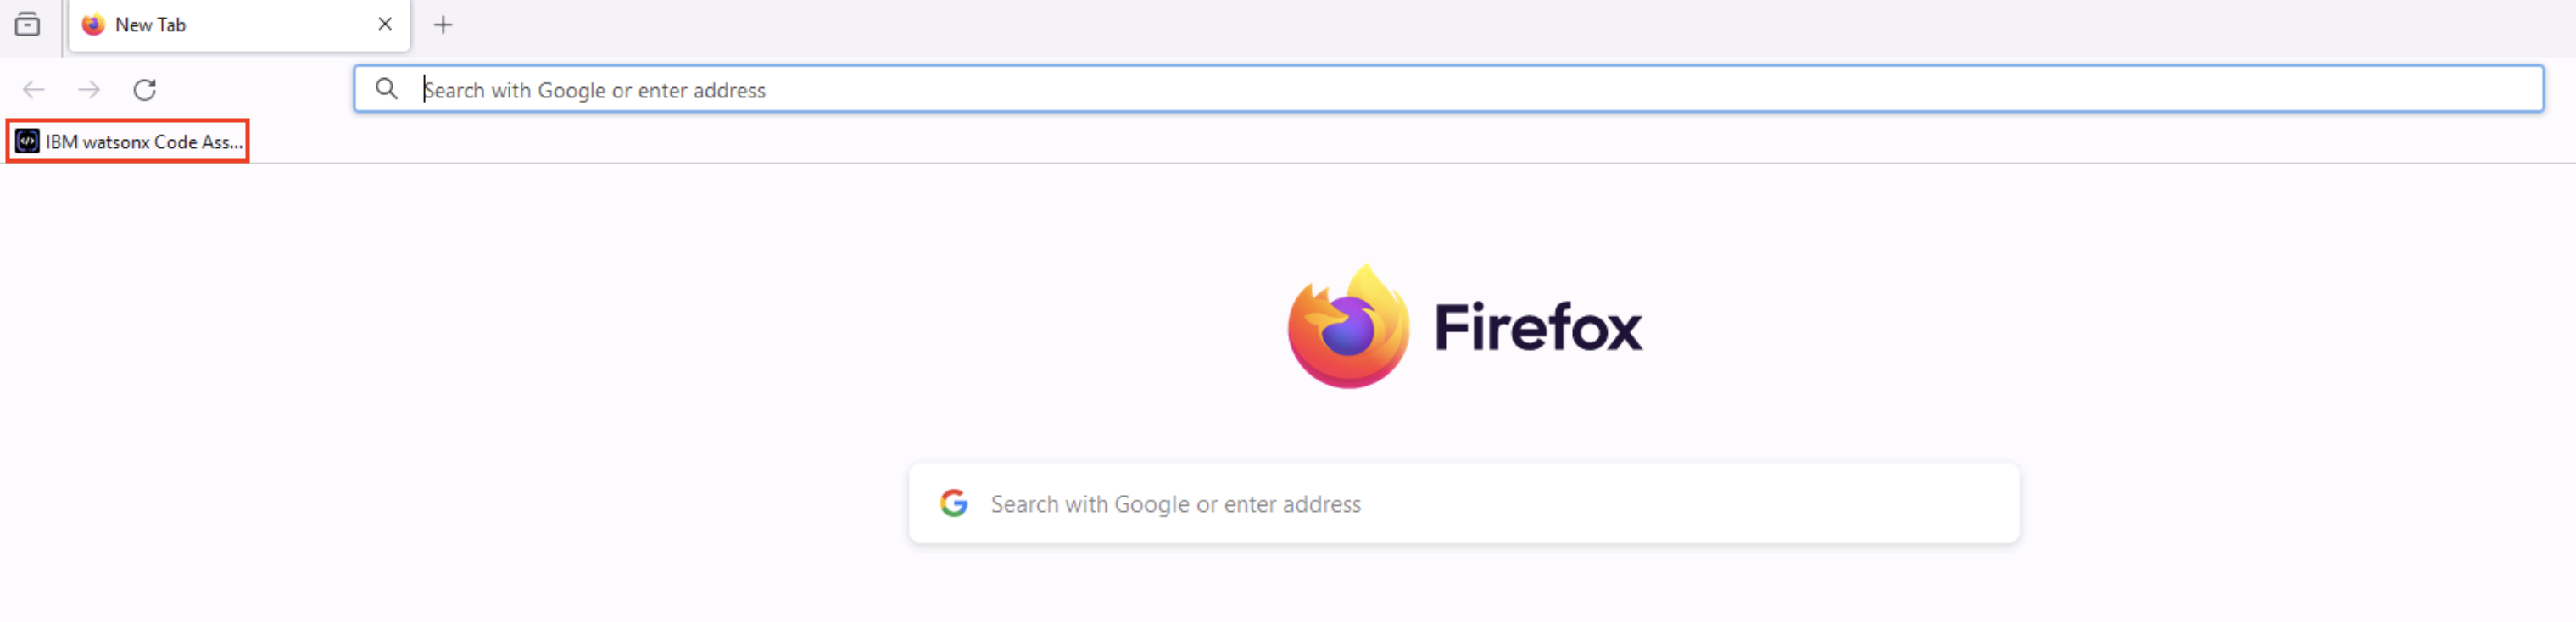
- Click on the Firefox icon in the taskbar to open it.

- Click the IBM watsonx Code Assistant for Z Refactoring Assistant link in the Favorites bar at the top.
-
Click Log in to proceed to the IBM watsonx Code Assistant for Z Refactoring Assistant with the prefilled credentials.
-
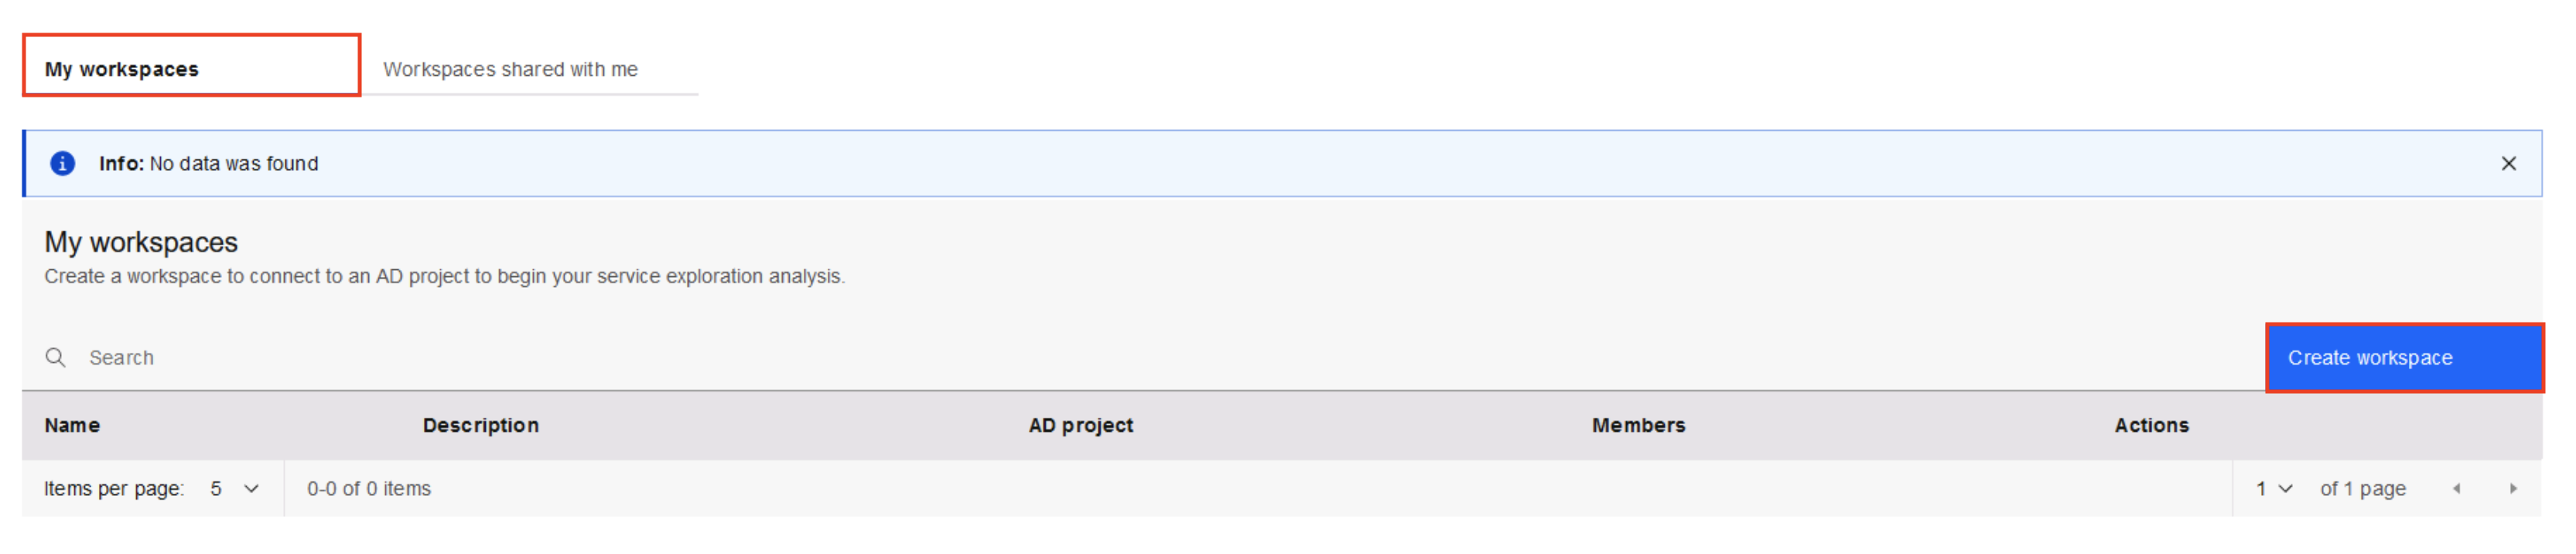
After building a project in the Understand phase, you can create a workspace to work on that project with IBM watsonx Code Assistant for Z Refactoring Assistant. In the My workspaces tab, click the Create workspace button on the right.
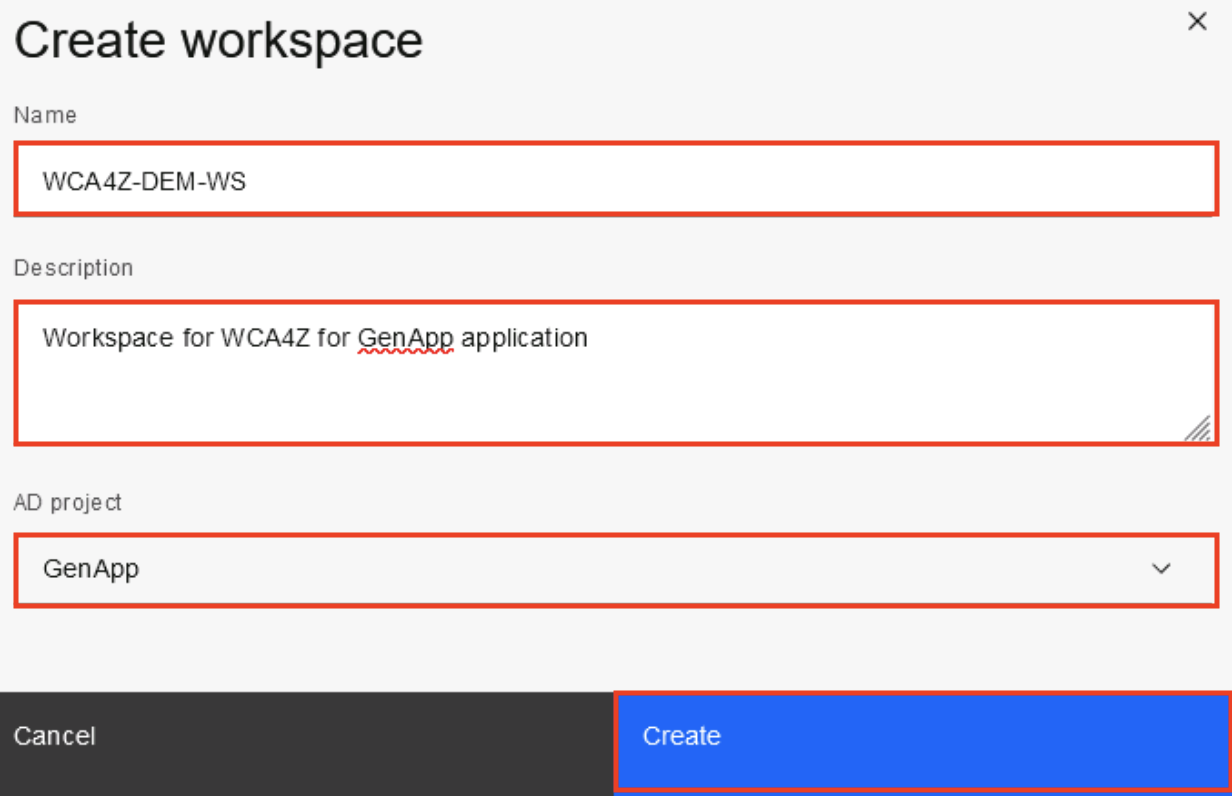
- In the Create workspace dialog window, fill out the information below and then press the Create button:
- Name:
WCA4Z-DEM-WS - Description:
Workspace for WCA4Z for GenApp application - AD project: select GenApp
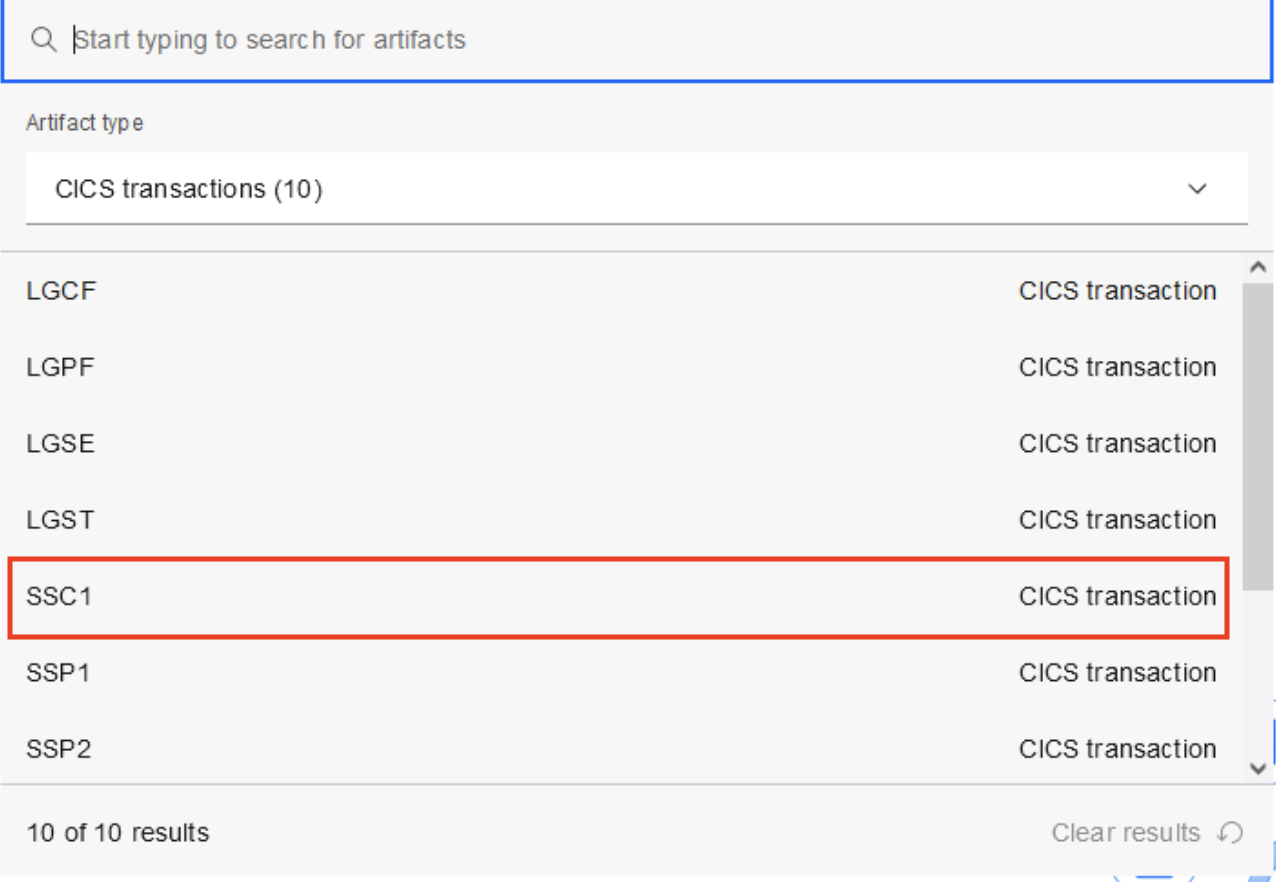
- The GenApp workspace’s Graph tab is displayed. Click in the Search bar at the top. You will see the Artifact type drop-down menu.

- Select All artifact types (it’s likely the default) to see a dropdown list of the different artifact types. Select CICS transactions.
- From the dropdown list of transactions, double-click on the SSC1 artifact to open it.
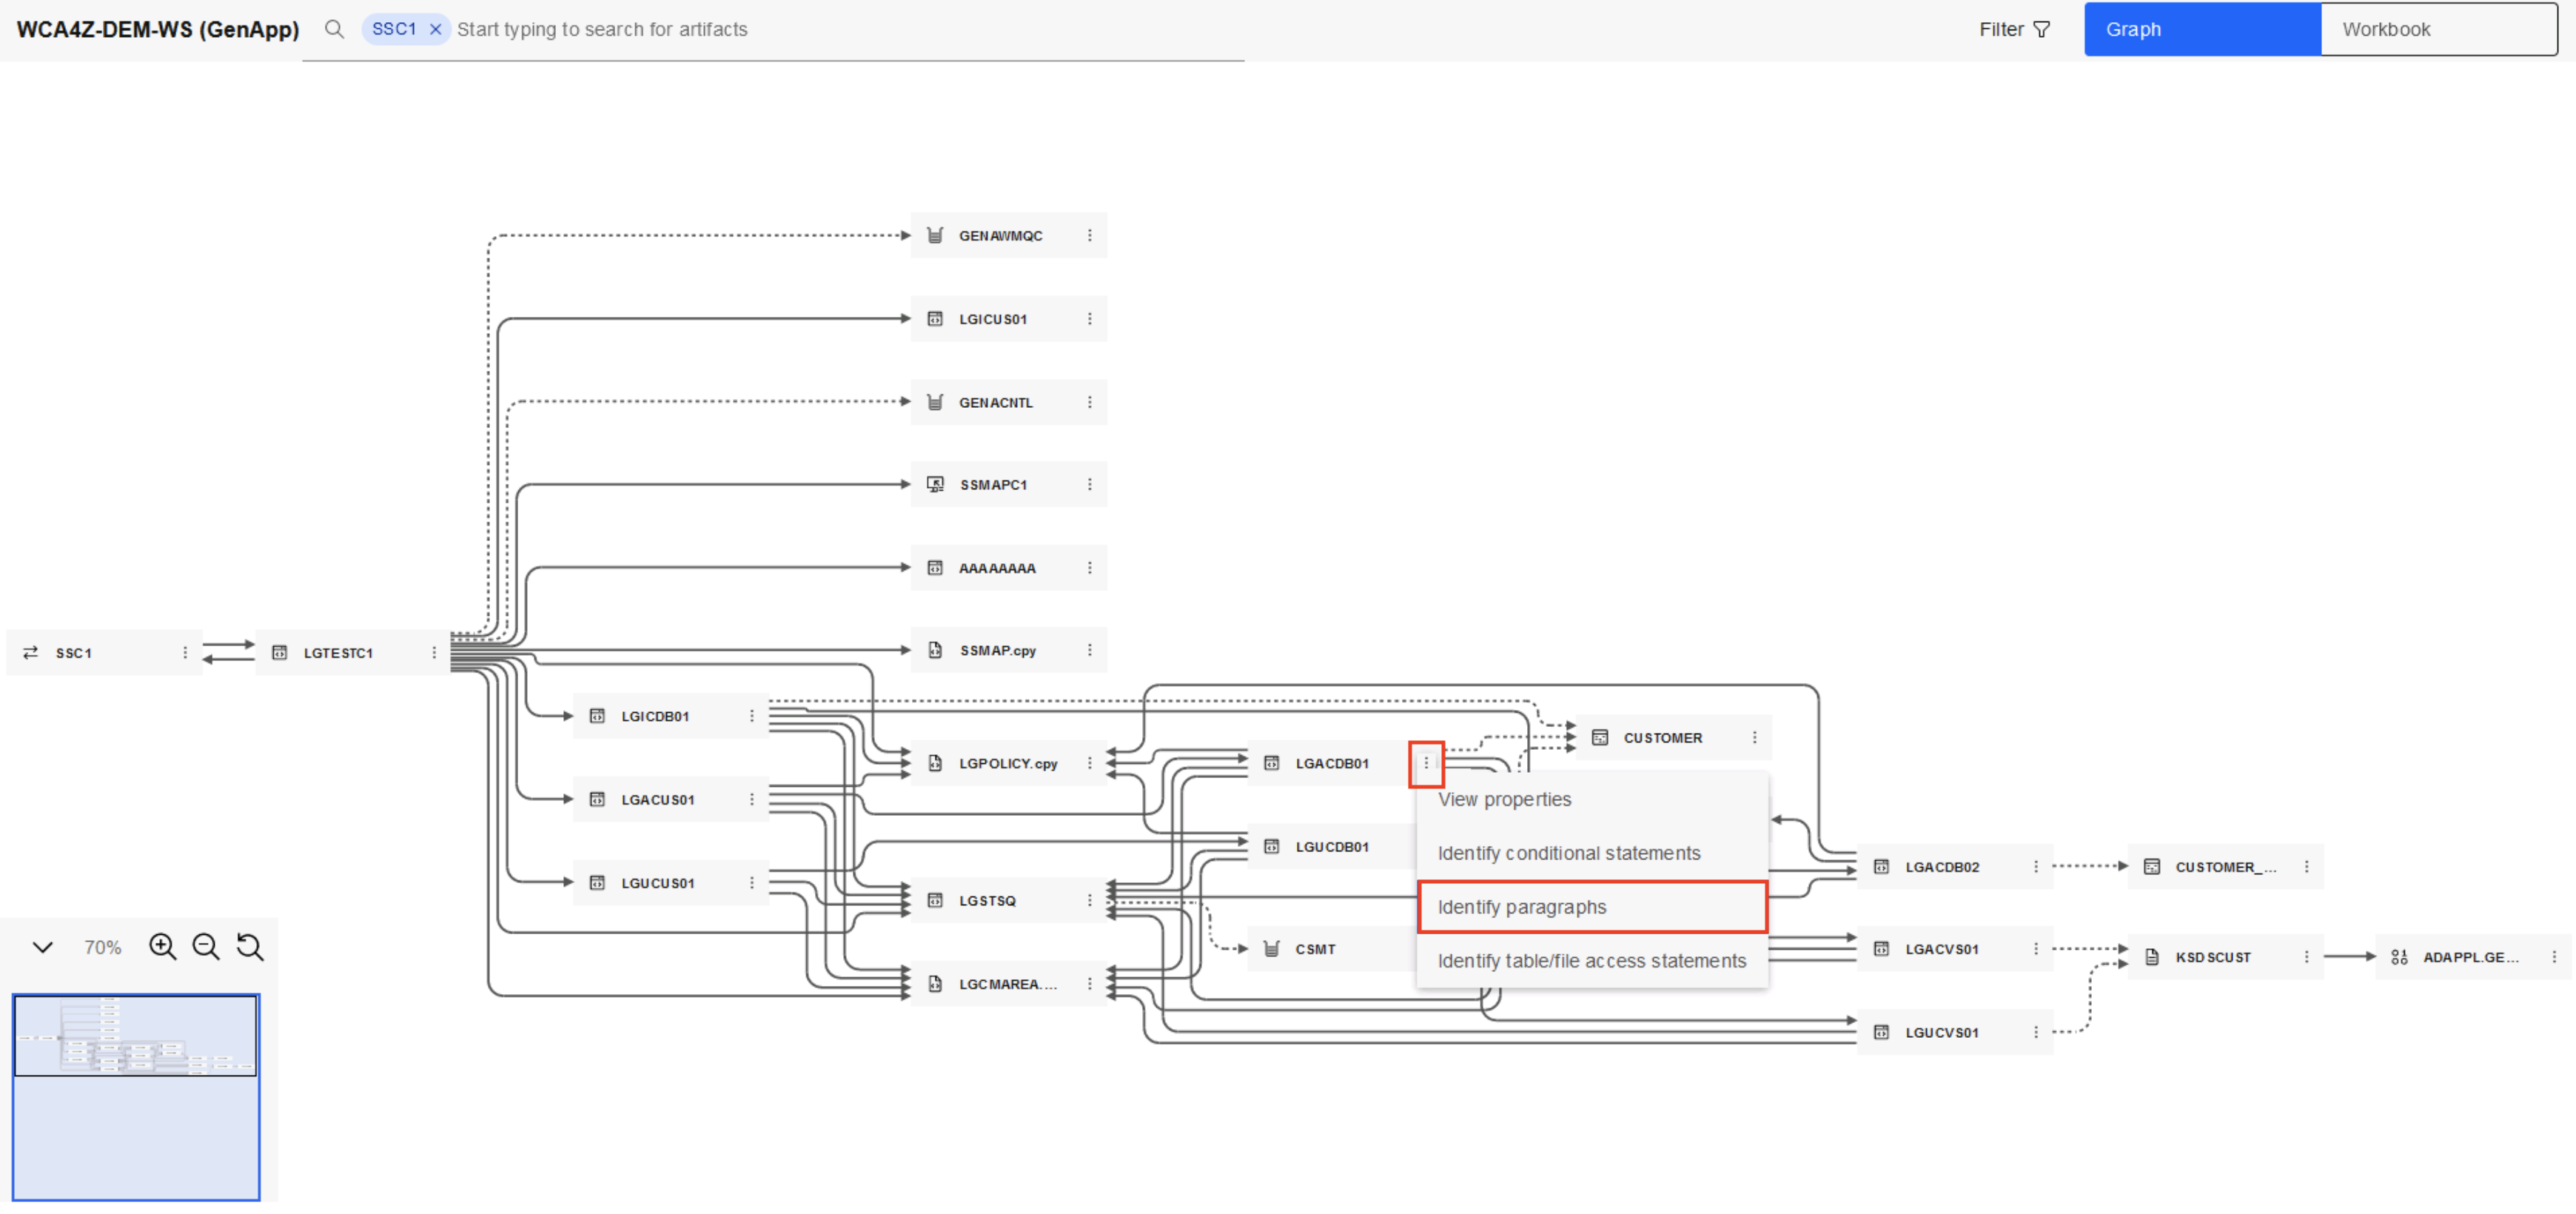
- The SSC1 transaction graph opens. Zoom out by 30% using the magnifying glass icon (bottom left) until you can see the complete callgraph in the window. The entire graph should be displayed after zooming out. Locate and click on the CUSTOMER table to highlight the flow of program dependencies for this table.

- In the last lab for the Understand phase, you checked the callgraph for SSC1 transactions and then looked at the INSERT-CUSTOMER query in the LGACDB01 code. Now click on the ellipsis icon (3 dots) beside LGACDB01. You are presented with the following actions:
There is a quiz question on the actions presented from selecting the 3 dots/ellipses beside LGACDB01.
- View properties
- Identify conditional statements
- Identify paragraphs
- Identify tables/file access statements
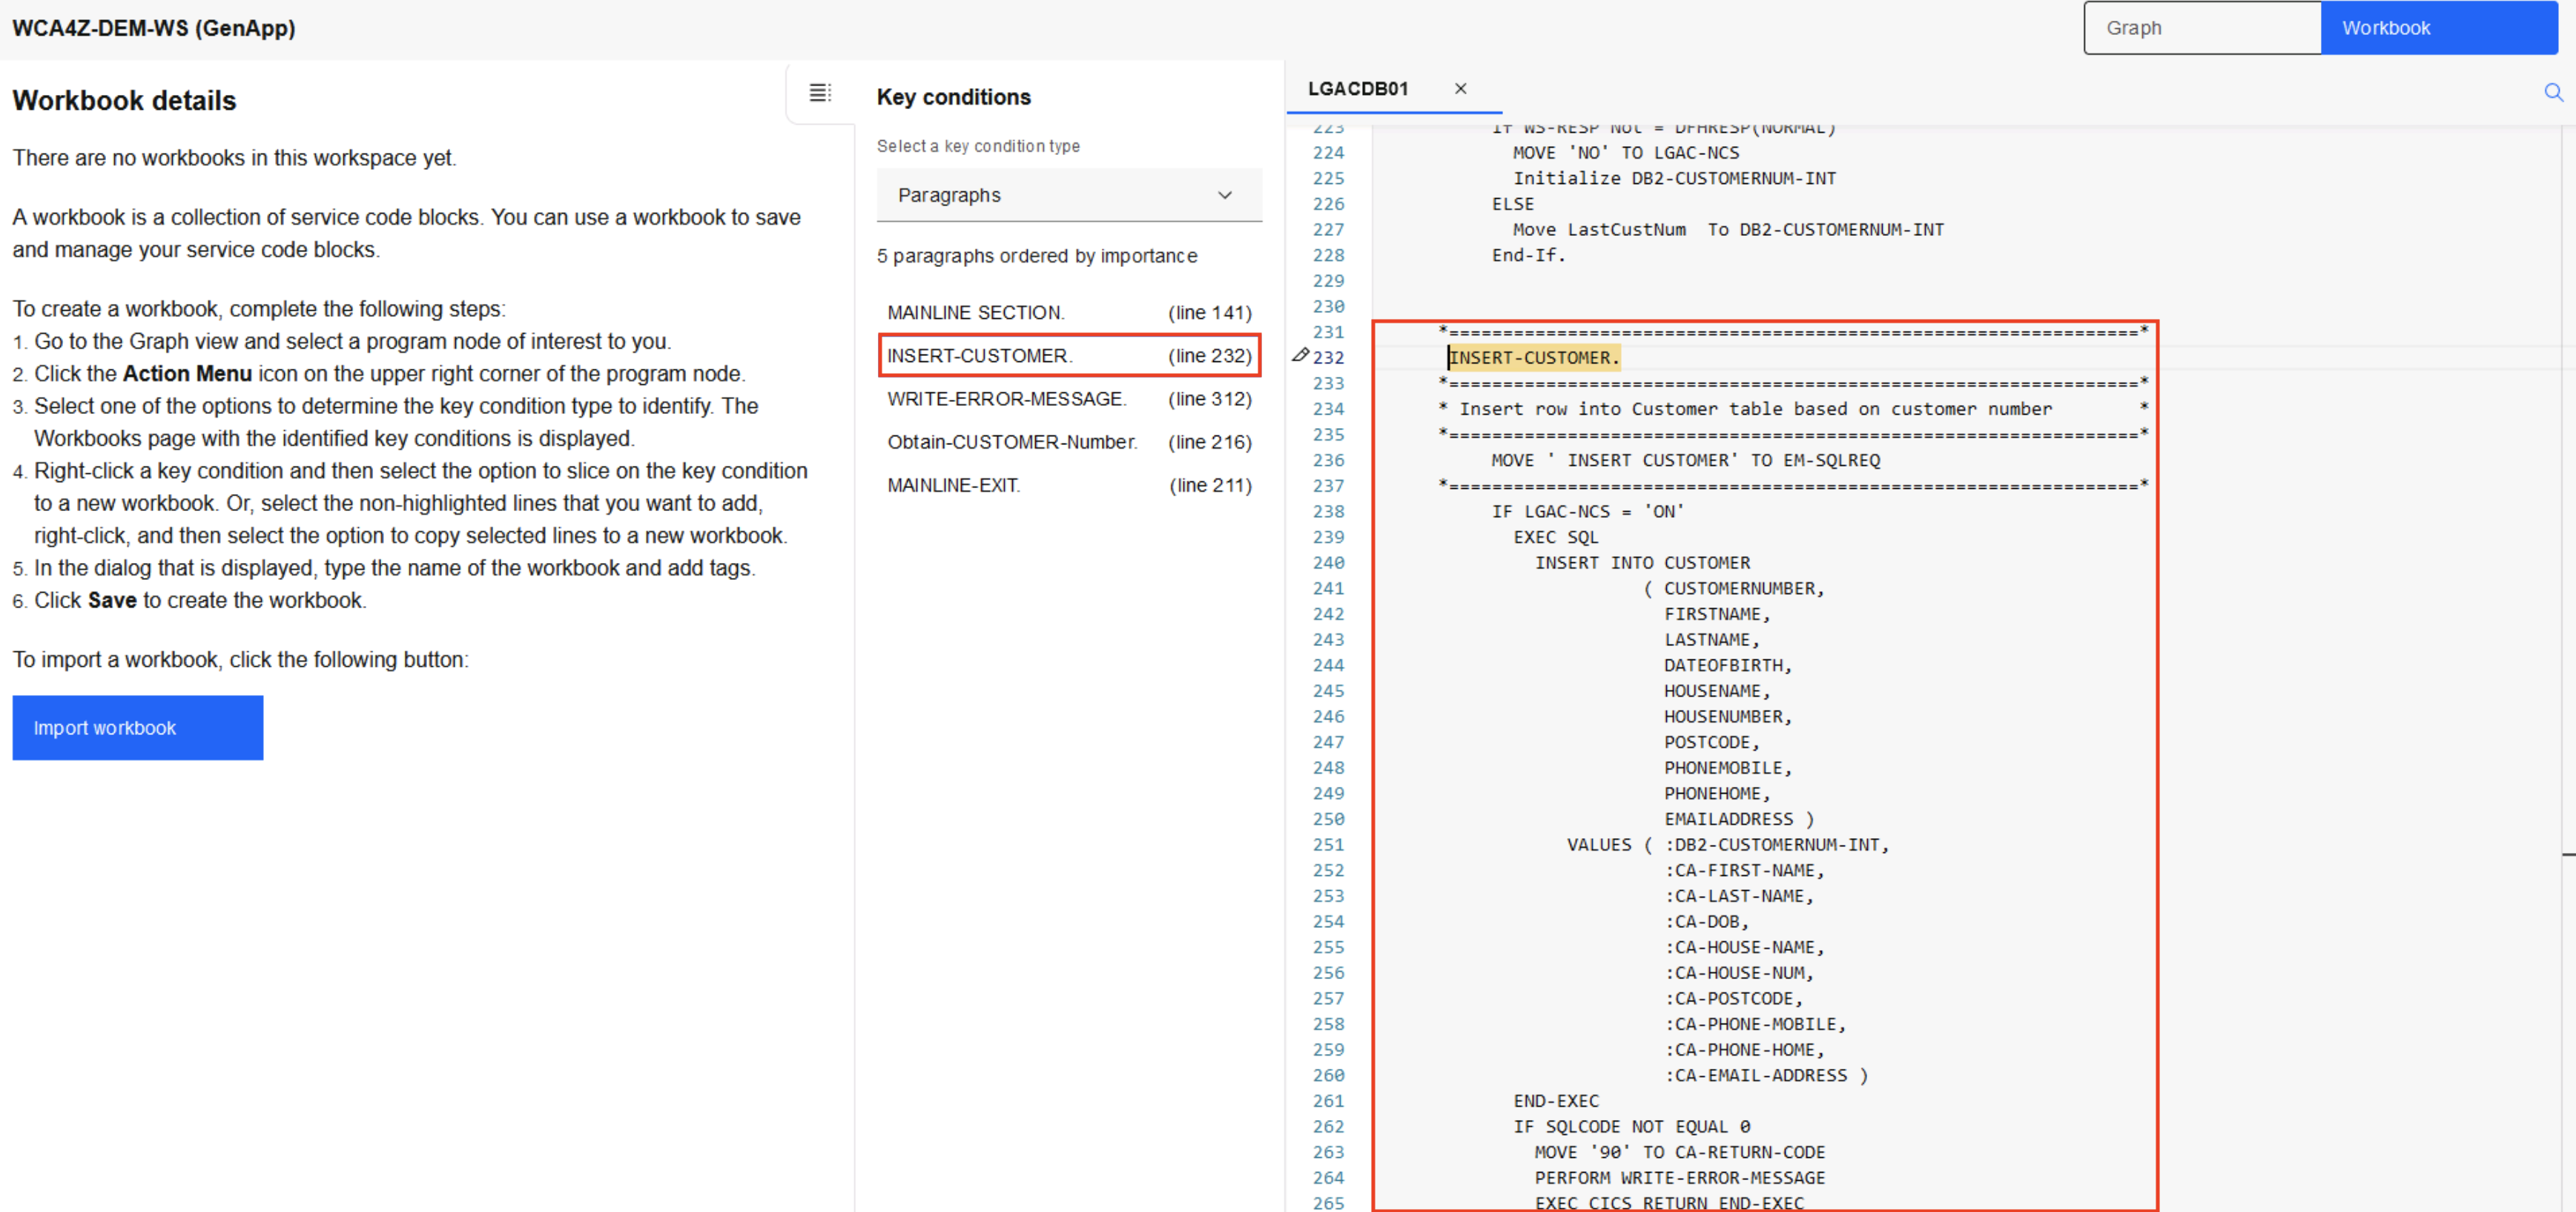
Select the Identify paragraphs option to display all paragraphs in the code in the order of importance.
- The screen will switch to the Workbook tab with a paragraph identification form. You can see 3 sections:
There is a quiz question on the Workbook view.
- Workbook details on the left
- Key conditions in the middle section, showing the paragraphs in the code in the order of importance/complexity
- Artifact’s code in the right section
Click on INSERT-CUSTOMER in the Key conditions box to jump to this code on the right.
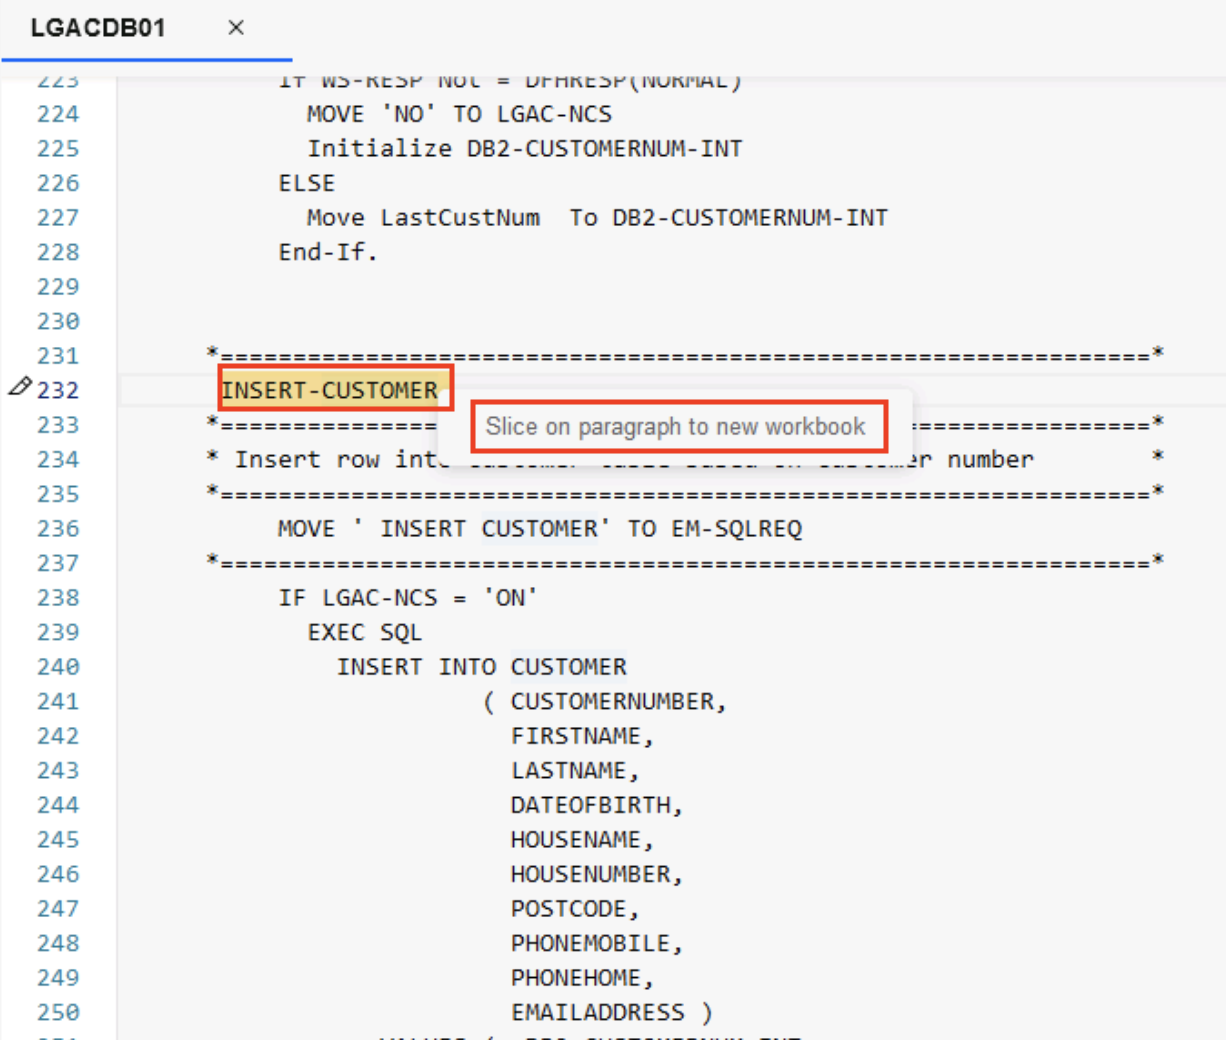
- Click on the INSERT-CUSTOMER text (line 232) in the code, then right-click to see the Slice on paragraph to new workbook option. Click the Slice on paragraph to new workbook option.
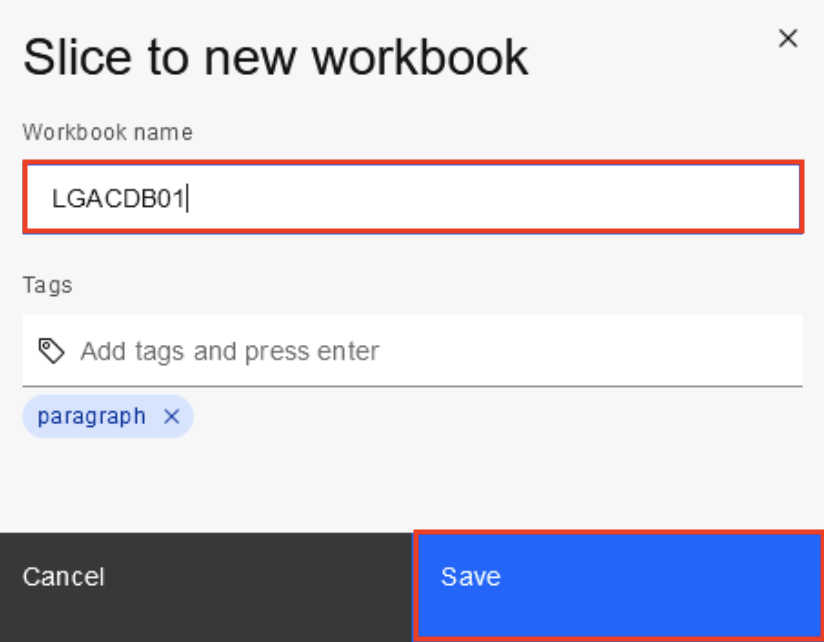
- The Slice to a new workbook pop-up window will appear. Enter
LGACDB01in the Workbook name field, then click the Save button.
The selected paragraph of code will be sliced into a new workbook (called LGACDB01) and displayed on the left. Note how the selected code is marked with a dotted blue line in the code editor on the right.
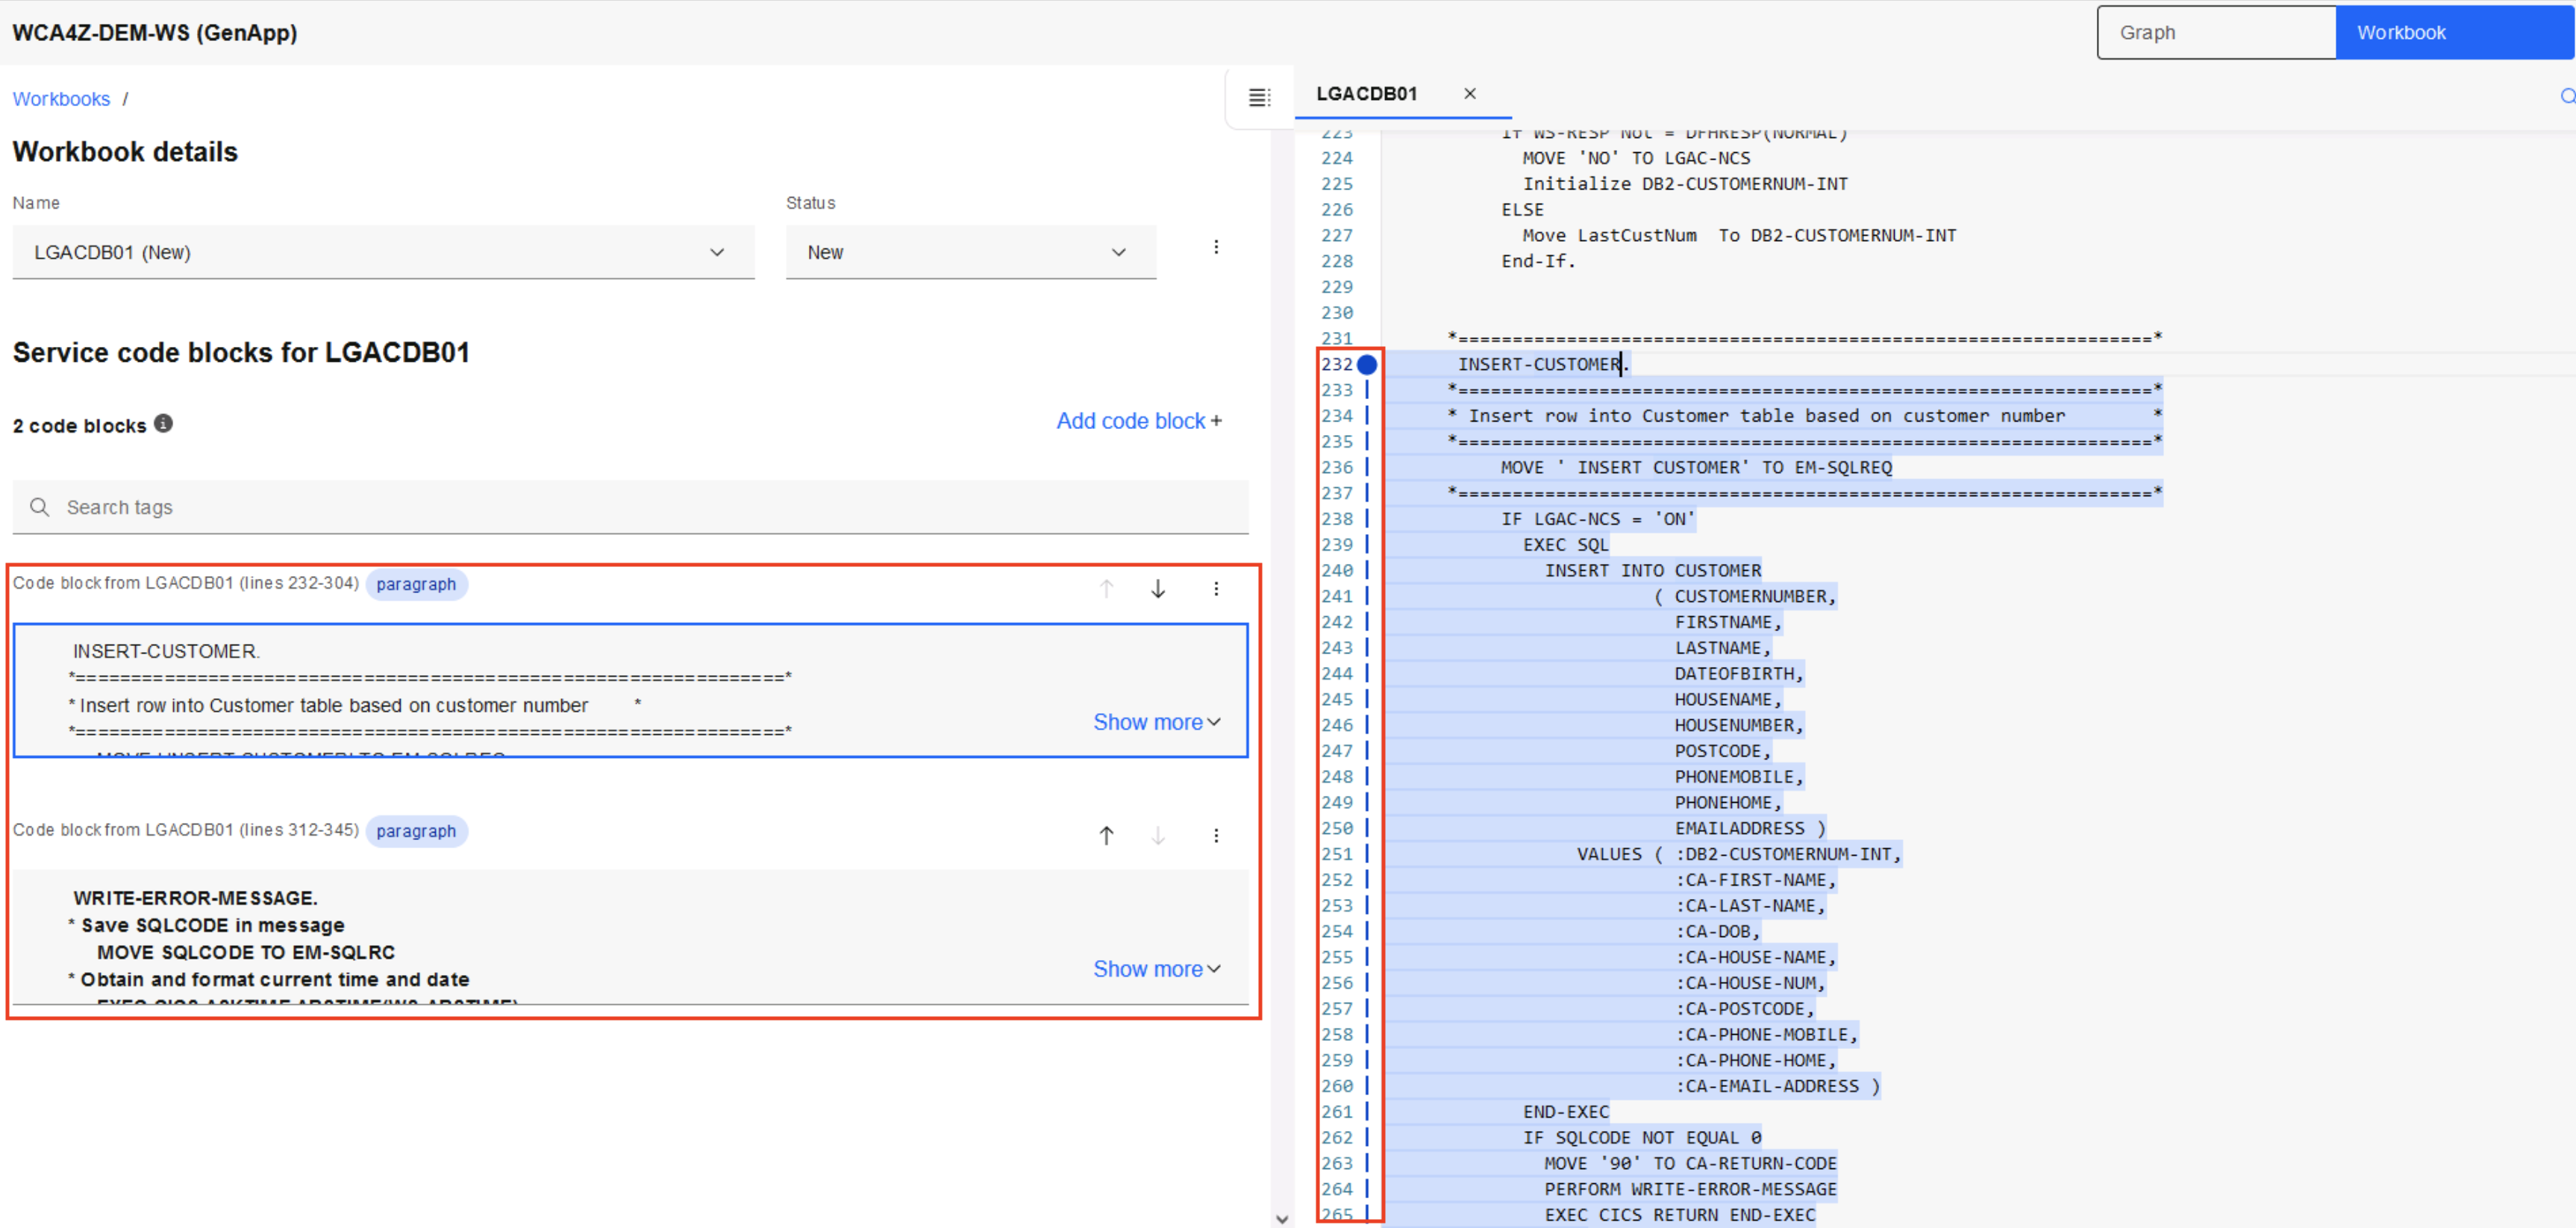
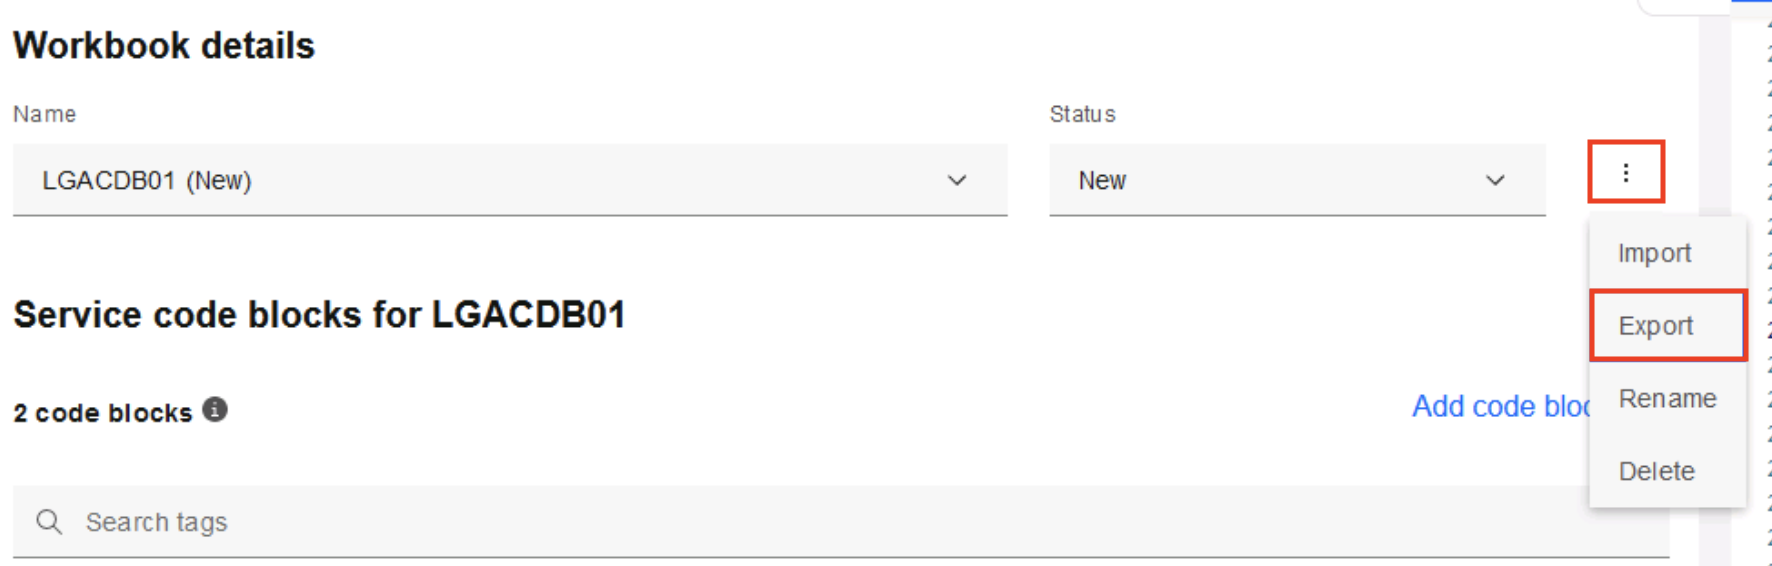
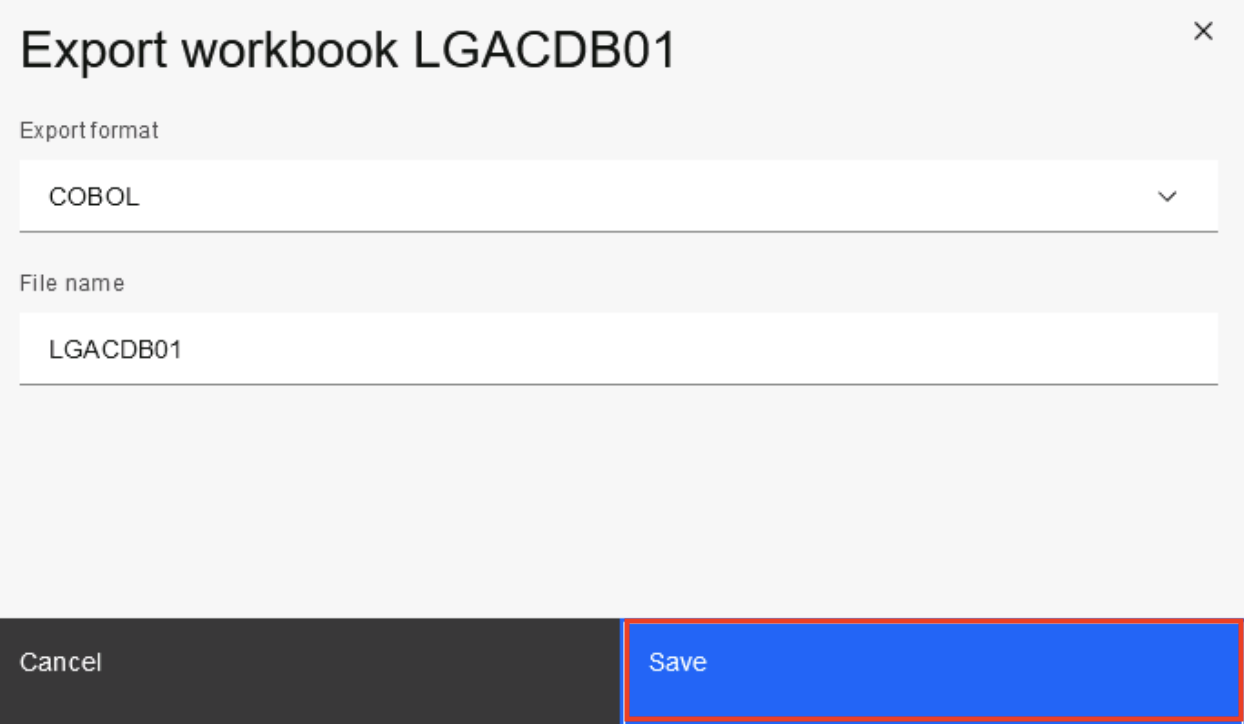
- In the Workbook details section, click the ellipsis icon (3 dots) beside Status. Select the Export option to export the sliced code. An Export workbox LGACDB01 window will appear. Click Save.
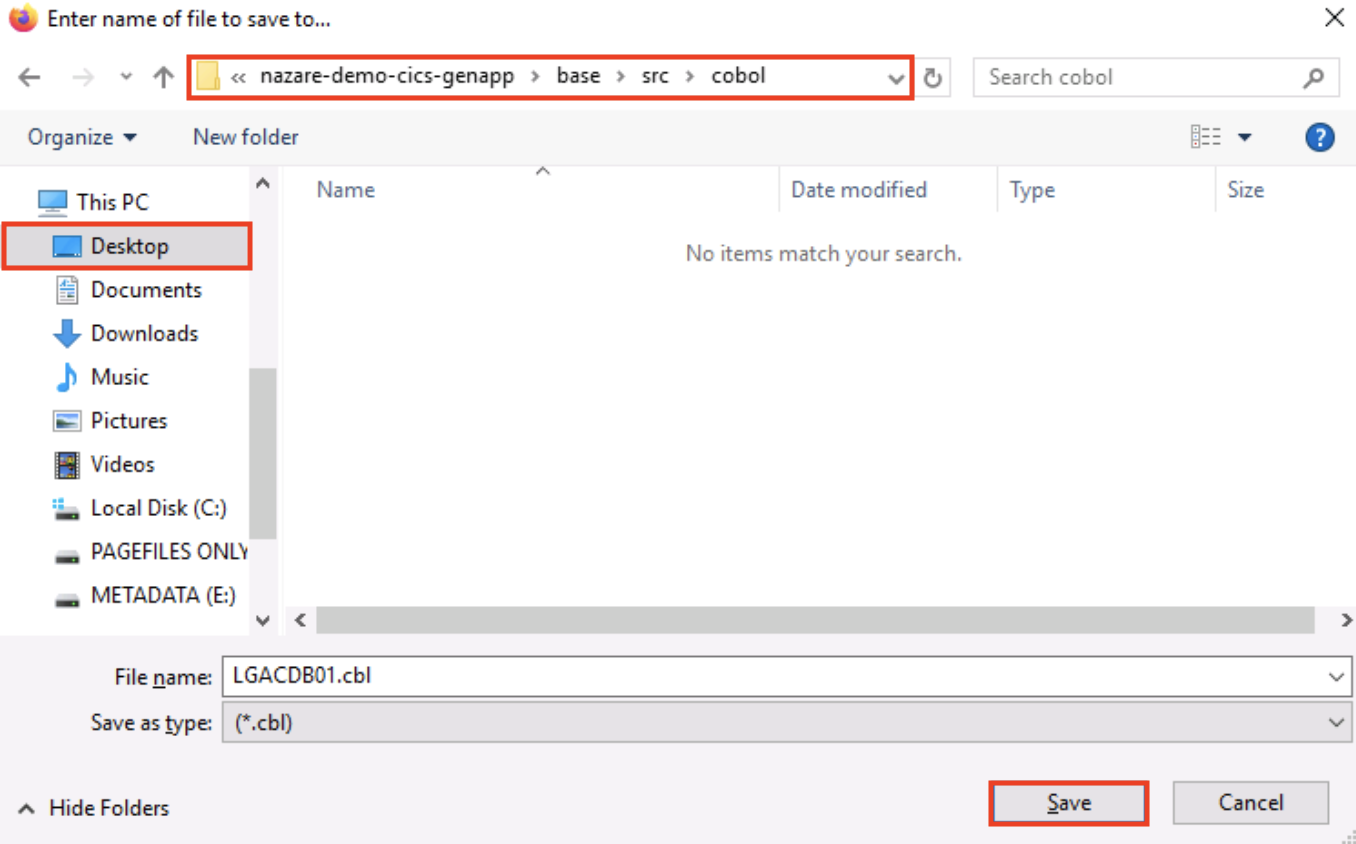
- A pop-up window will appear with a default location to save the exported sliced code. Click Desktop on the left and navigate to the following: Desktop\WCAZ Lab Data\nazare-demo-cics-genapp\base\src\cobol. Then click Save to save the exported code. This exported workbook will be used in the next lab for the Transform phase.
You have successfully completed the Refactor phase of the mainframe application modernization lifecycle. In this lab:
There is a quiz question on the Refactor phase.
-
You used information from the Understand phase to select the SSC1 transaction
-
You used IBM watsonx Code Assistant for Z Refactoring Assistant to refactor the INSERT-CUSTOMER functionality by slicing code from the LGACDB01 artifact into a workbook
-
You exported this workbook to be used in the next lab for the Transform phase
Congratulations, you've reached the end of lab 113 using IBM watsonx Code Assistant (WCA) for Z Auto Refactoring.
Click, lab 114 to start next lab.