203: LangChain
In this lab, you will review and run examples of LLM applications that use the LangChain
framework. We will expand on the concepts that you learned in the previous labs.
Requirements
If you completed these steps in the previous labs (see lab Getting Started with Generative
AI in watsonx.ai Lab), you don’t need to repeat them. You are however encouraged to read
through this section as it contains important comments and hints that may help you debug your
environment, script, or notebook faster if your code fails to execute correctly.
- To complete this lab you will need access to an instance of watsonx.ai
- Some knowledge of Python
LangChain Overview
As we discussed in previous labs, LLMs are not used as stand-alone components but rather included in applications. LangChain is a popular open-source framework that's becoming a de facto standard for LLM application development. LangChain simplifies the implementation of many tasks that are typical in LLM applications, such as:
- Using prompt templates
- Parsing the output of LLMs
- Creating a sequence of calls to LLMs
- Maintaining session state between LLM calls (memory)
- A systemic approach for implementation of RAG use cases
LangChain does not add capabilities to LLMs, it's a complimentary framework that's used to build well-structured LLM applications in Python and JavaScript.
Most of LangChain's capabilities are "vendor and LLM-neutral", meaning that the LangChain API works the same way regardless of LLMs developed and hosted by different vendors. For example, this line of code creates a sequence of steps (chain) to prompt one of the several types of LLMs that are supported by LangChain:
chain = prompt | llm
This expression syntax is named LangChain Expression Language (LCEL).
There are many good community and free resources for LangChain, such as courses, YouTube tutorials, and blog posts.
We recommend the following resources for additional education:
- Deep Learning AI Introduction to LangChain course
- LangChain documentation
- LangChain community
Support of LangChain in watsonx.ai
Watsonx.ai supports LangChain through extensions in the WML (Watson Machine Learning) API, now named ibm-watsonx-ai.
Compatibility with LangChain is provided via the langchain-ibm package.
You can learn more about these chains in the LangChain documentation.
We also recommend that you check the WML documentation for the latest supported features.
In this lab, we will review several Python code samples that use LangChain to show how these building blocks can be invoked from client applications.
Review Notebooks and scripts for various LangChain tasks
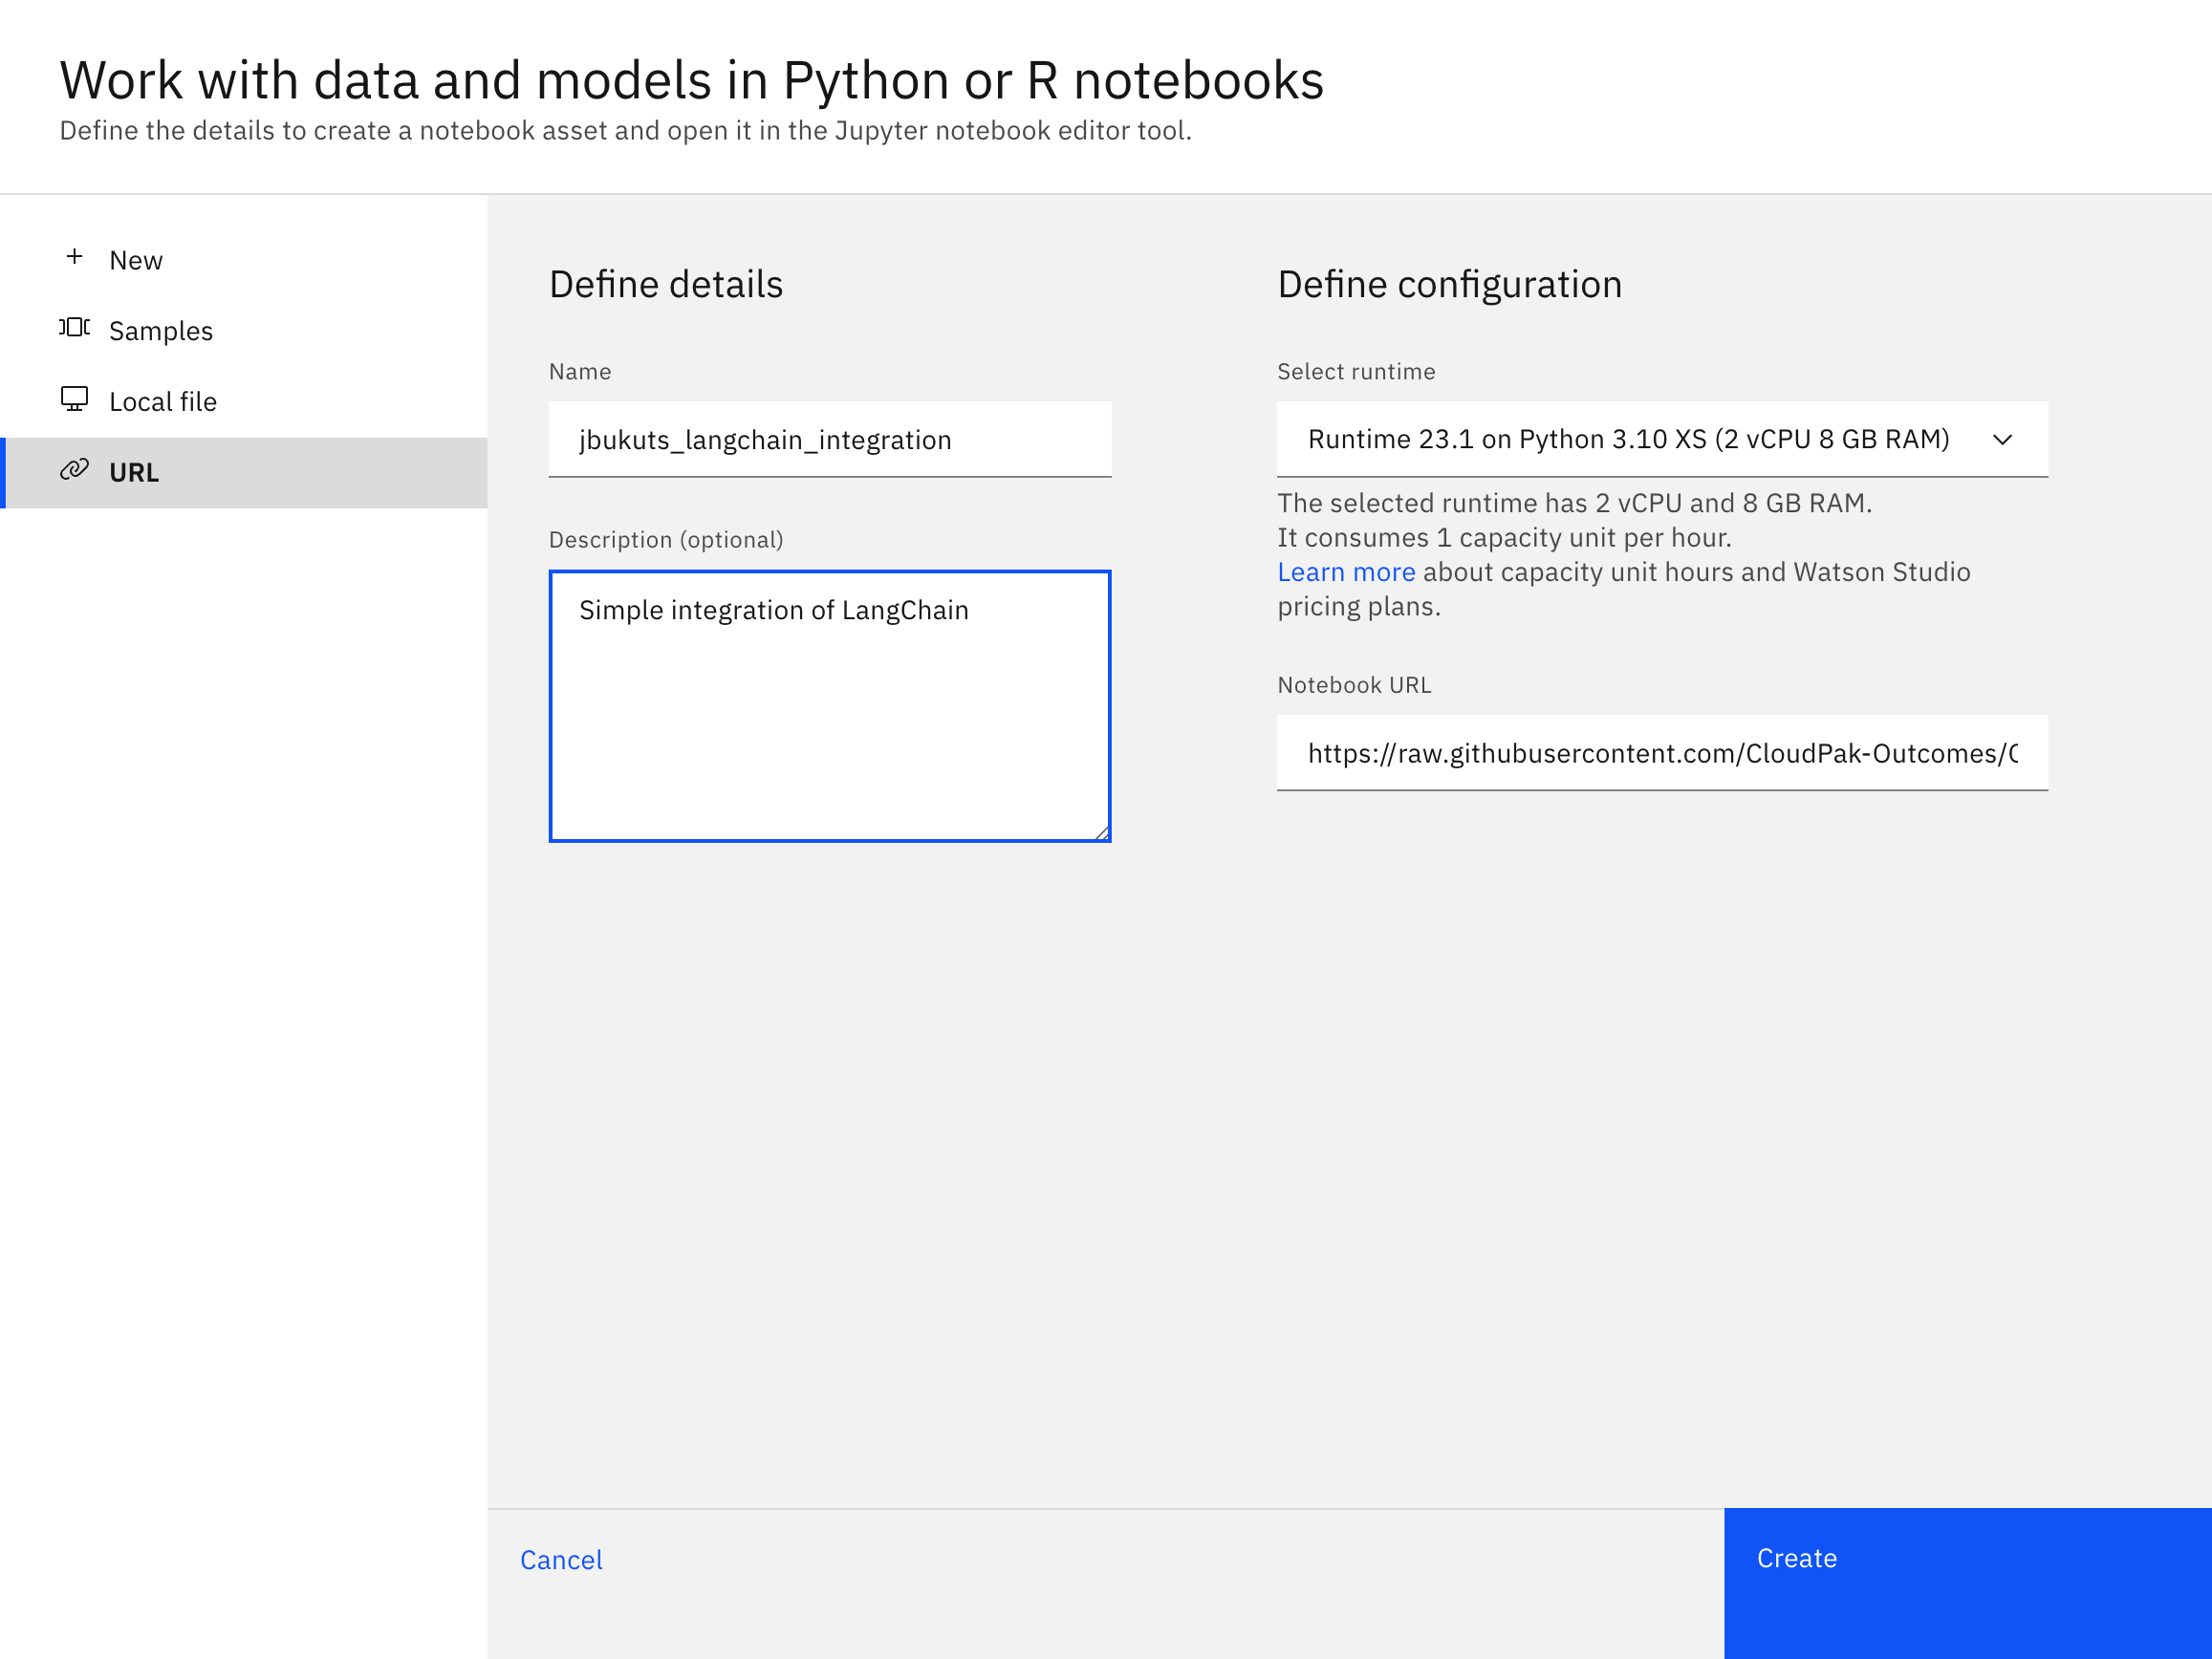
Review sample notebook
- Log in to watsonx.ai and navigate to your project.
- Create a new notebook from a URL:
- Select New Task -> Work with data and models in Python and R notebooks
- From the left-hand nav select URL as the source for the notebook
- Keep the default runtime environment (Python 3.10 XS)
- Given the notebook a unique name like
[your_name]_langchain_integration - Enter an optional description for your notebook
- Use
https://raw.githubusercontent.com/ibm-build-lab/VAD-VAR-Workshop/main/content/labs/Watsonx/WatsonxAI/files/203/LangChain_Integration.ipynbfor the Notebook URL
After clicking the create button you will then be redirected to the notebook editor within watsonx. Let's now review the code in the notebook.
Scroll down the notebook and run it line by line, as it is quite self-explanatory.
When you get to the section that instantiates the PromptTemplate, take a special look to understand it better.
The PromptTemplate object does not add any new capabilities to prompts, but it helps us write better-structured code. Notice that when we create the PromptTemplate object, we explicitly specify parameters (input variables) that will be used in the prompt.
from langchain import PromptTemplate
gen_question = PromptTemplate(
input_variables=["topic"],
template="Generate a random question about {topic}: Question: ",
)
answer_question = PromptTemplate(
input_variables=["question"],
template="Answer the following question: {question}",
)
pythonThe chain_q.invoke()_ function call in the last cell invokes the LLMs sequentially.
Run the notebook. If you wish, change the parameters that are passed to the LLM to see different results.
Next, we will implement the chain using the provided sample prompts. You can either use your own prompts or our examples.
Implement your own sequential chain
- Using the sample code that we reviewed, create your own chain and run it. For reference, it may look something like this:
prompt_1 = PromptTemplate(
input_variables=["customer_complaint"],
template="From the following customer complaint, extract 3 factors that caused the customer to be unhappy. Put each factor on a new line. Customer complaint: {customer_complaint}. Numbered list of complaints: "
)
prompt_2 = PromptTemplate(
input_variables=["list_of_complaints"],
template="Does the following statements contain the concept of identify theft?: {list_of_complaints}"
)
# Experiment with different values of customer complaints
customer_complaint = "I am writing you this statement to delete the following information on my credit report. The items I need deleted are listed in the report. I am a victim of identity thief, I demand that you remove these errors to correct my report immediately! I have reported this to the federal trade commission and have attached the federal trade commission affidavit. Now that I have given you the following information, please correct my credit report or I shall proceed with involving my attorney!"
pythonYou can find other complaint prompts here
As you can tell from the prompts, the first step in the sequence creates of list of items from the customer review and the second step checks if identity theft is mentioned.
If you would like to review the completed code for this task, you can find it in the LangChain_Integration_Completed notebook here
Next, we will look at another feature of the LangChain API, memory.
Implement memory with LangChain
As you have likely noticed in your experience with LLMs, they are stateless. This means that each request to an LLM is independent of the previous or the next one. In architecture, this is called a stateless implementation. For some cases, specifically for the ones that involve multiple interactions with an LLM (for example, a chatbot), we may need to maintain a "history" of the conversation, which in programming terms is described as memory.
In LangChain memory is implemented by appending to the prompt. Both input and output are appended.
the benefit of this approach is that it's easy to understand and implement. However, there are two important considerations:
- The token limit of LLMs still applies. If you keep adding prompts and responses to memory, you can quickly run out of tokens.
- Cost of tokens if you're using a hosted instance of LLMs.
LangChain provides several types of memory to help mitigate these issues, described in the documentation.
In this lab we will use the most basic way to implement a BaseChatMessageHistory object: a global variable in our code.
-
Log in to watsonx.ai and navigate to your project.
-
Create a notebook from a URL:
- Select New Task -> Work with data and models in Python and R notebooks
- From the left-hand nav select URL as the source for the notebook
- Keep the default runtime environment (Python 3.10 XS)
- Given the notebook a unique name like
[your_name]_langchain_memory - Enter an optional description for your notebook
- Use
https://raw.githubusercontent.com/ibm-build-lab/VAD-VAR-Workshop/main/content/labs/Watsonx/WatsonxAI/files/203/LangChain_Memory.ipynbfor the Notebook URL
Let's review the notebook code.
After installing the required libraries, we create a model object similar to the way we created it in the previous example.
Run through the notebook, paying extra attention to it. Then return here to implement a RAG (Retrieval-Augmented Generation) use case.
Implement a simple RAG use case with LangChain
Retrieval Augmented Generation (RAG) allows us to use LLMs to interact with "external data" i.e. data that was not used for model training. Many use cases require working with proprietary company data, and it's one of the reasons why RAG is frequently used in generative AI applications.
There is more than one way to implement the RAG pattern, which we will cover in a later lab. In this lab, we will use LangChain's RetrievalQA API to demonstrate one implementation of a RAG pattern. In general, RAG can be used for more than just question-and-answer use cases, but as you can tell from the name of the API, RetrievalQA was implemented specifically for question-and-answer.
To get started:
-
Log in to watsonx.ai and navigate to your project.
-
Create a notebook from a URL:
- Select New Task -> Work with data and models in Python and R notebooks
- From the left-hand nav select URL as the source for the notebook
- Keep the default runtime environment (Python 3.10 XS)
- Given the notebook a unique name like
[your_name]_langchain_simple_rag - Enter an optional description for your notebook
- Use
https://raw.githubusercontent.com/ibm-build-lab/VAD-VAR-Workshop/main/content/labs/Watsonx/WatsonxAI/files/203/LangChain_Simple_RAG.ipynbfor the Notebook URL
Let's review the code.
-
get_model(): creates a model object that will be used to invoke the LLM. If the
to_langchainparameter is set to True, a model wrapper to will be used with the LangChain API will be returned. Since the function is parametrized, it's the same in all examples. -
answer_question_from_doc(): specifies model parameters, loads the PDF file, creates an index from the loaded document, the instantiates and invokes the chain.
Notice unlike other examples, we don't create a prompt. The question and file_path are specified in the last code cell that invokes answer_questions_from_doc()
You can now follow along in the notebook and run each cell.
Conclusion
You have now finished the LangChain lab. In this lab, you learned:
- How to use Langchain to invoke a sequence of calls to LLMs.
- How to implement memory with LangChain
- How to implement a simple RAG use case with LangChain
LangChain has many other useful APIs, and we will continue to use them in the lab that focuses specifically on the RAG pattern.