Time Travel and Rollback
Time Travel and Rollback
The Iceberg open table format provides a number of benefits to users, including the ability to see a table as it existed at a point in the past. This time travel capability is useful in a number of different ways. For example, having the ability to query historical data is useful for auditing purposes. Or if an application corrupts table data in some way, you can imagine the value in being able to quickly reverse those changes by resetting the table to a known good state.
Iceberg uses snapshots to support this time travel capability. A snapshot represents the state of a table at some point in time. When data is modified in a table, such as inserting, updating, or deleting records, a new snapshot is created. There are maintenance operations that can be used to clean up older snapshots that are no longer needed.
As of 3Q 2023, time travel queries are not yet supported in watsonx.data. However, you can roll back a table to an earlier point in time using snapshots. You will go through that process in this section.
-
Select the Query workspace icon from the left-side menu.
-
Copy and paste the following SQL statement into the SQL worksheet. Click Run on presto-01.
create table iceberg_data.my_schema.airport_id as select * from hive_data.ontime.airport_id;
bash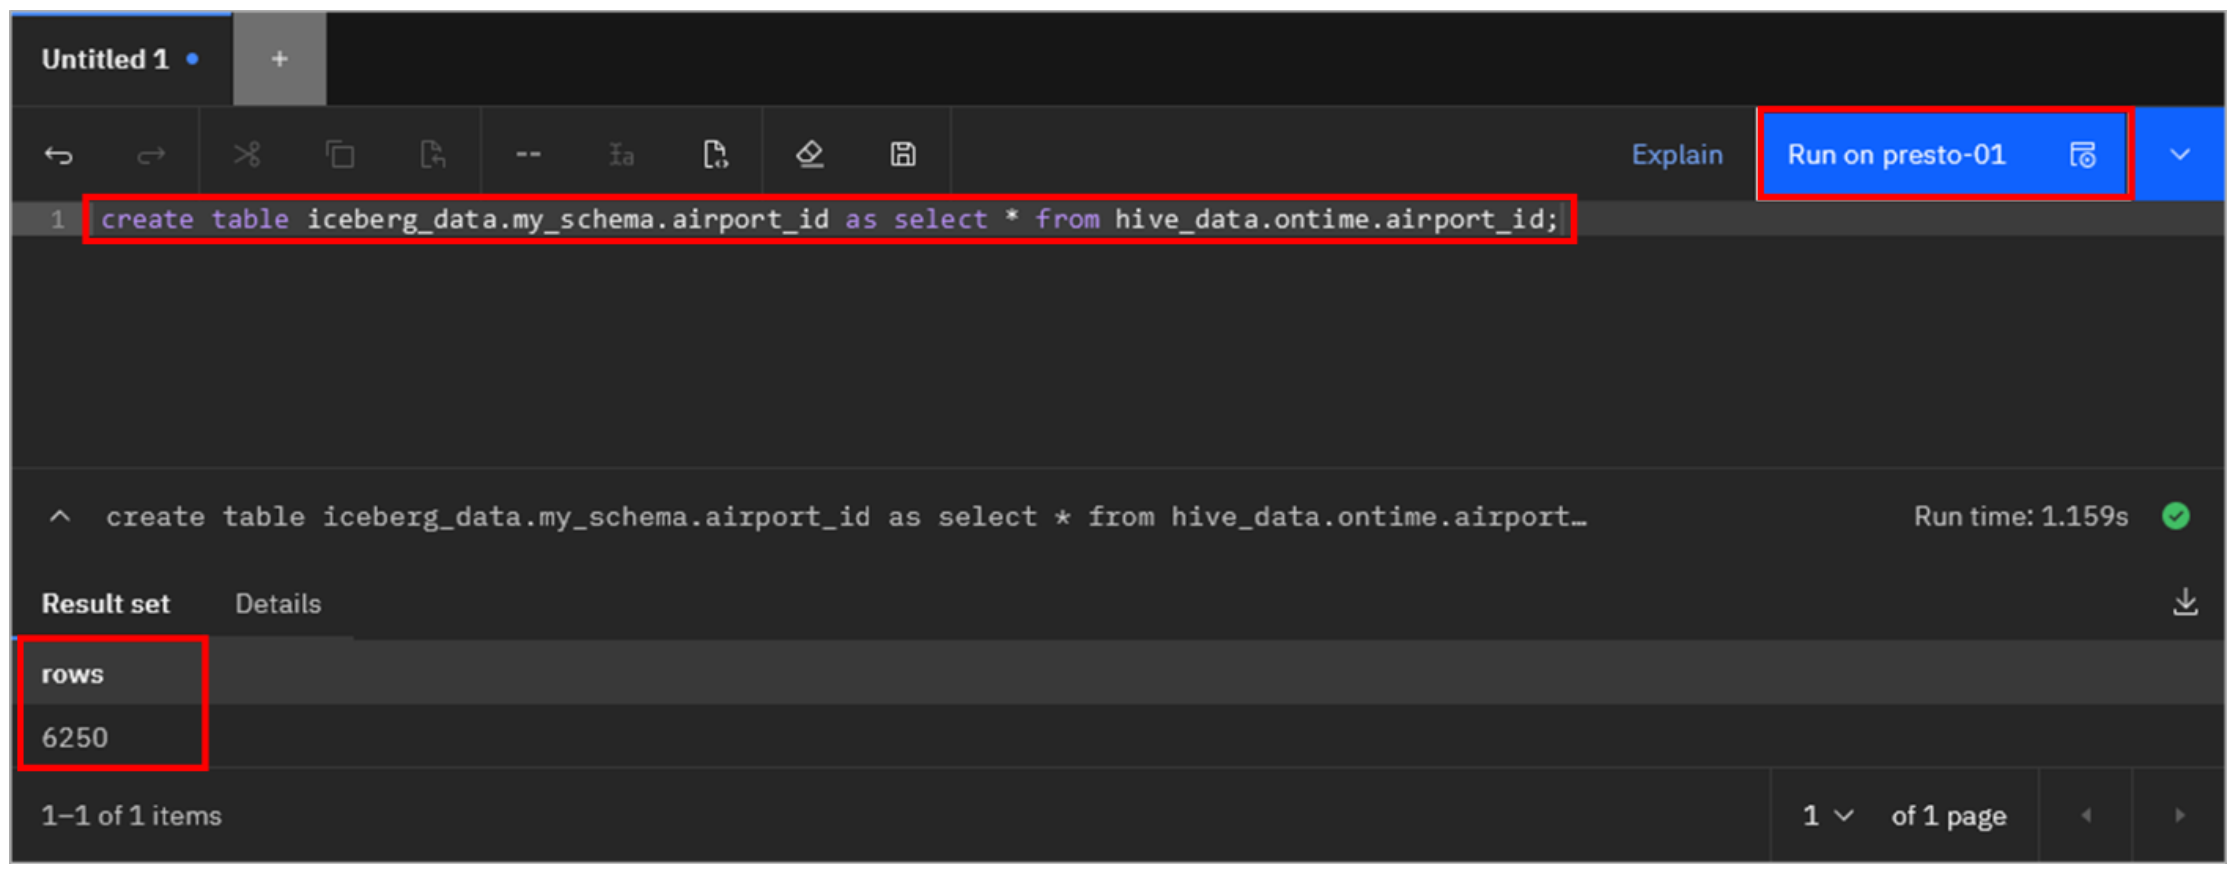
As shown in the output above after running the query, there are 6,250 rows in this table.
-
Select the Data manager icon from the left-side menu.
-
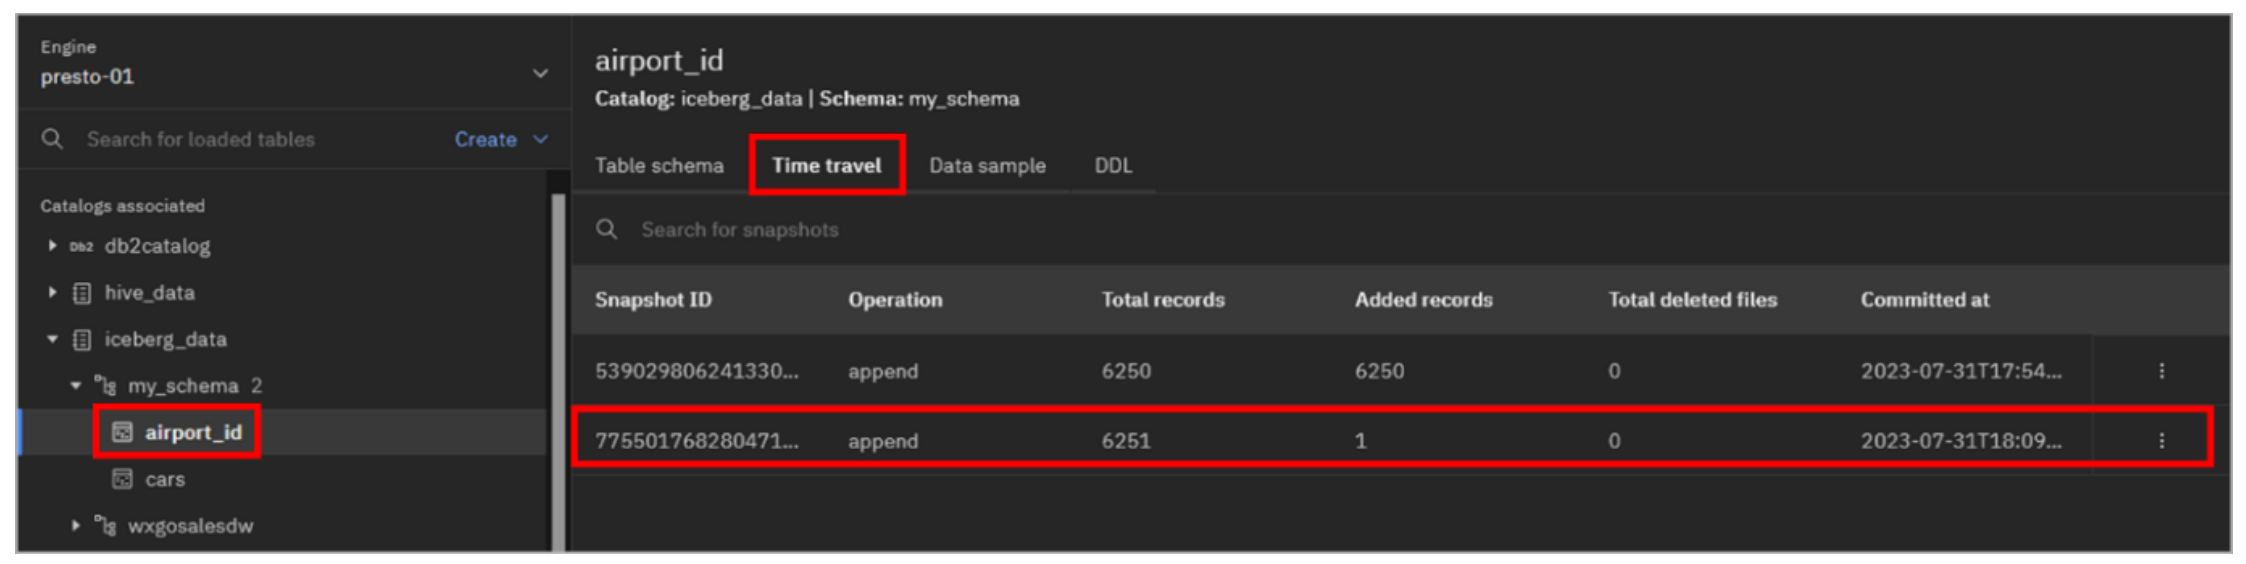
Navigate to the iceberg_data > my_schema > airport_id table (if you don’t see the table, refresh the schema). Then, select the Time travel tab.

This tab lists the snapshots associated with the table (identified by a Snapshot ID). At this point there is only one snapshot and there are 6,250 total records (matching what you saw earlier).
Note: For reference, you can get snapshot information through SQL as well. For example (and no need to run this now), this will query the snapshots available for the airport_id table:
select * from iceberg_data.my_schema."airport_id$snapshots" order by committed_at;
bash-
Select the Query workspace icon again from the left-side menu.
-
Copy and paste the following SQL statement into the SQL worksheet and click Run on presto-01.
insert into iceberg_data.my_schema.airport_id values (10000, 'North Pole: Reindeer Field');
bash- Copy and paste (replacing the SQL already there) the following SQL statement into the SQL worksheet and click Run on presto-01.
select * from iceberg_data.my_schema.airport_id where code = 10000;
bashYou should see the row you inserted in the previous step.

- Copy and paste (replacing the SQL already there) the following SQL statement into the SQL worksheet and click Run on presto-01.
select count(*) from iceberg_data.my_schema.airport_id;
bashYou should see a count of 6,251 rows.
-
Select the Data manager icon again from the left-side menu.
-
As before, navigate to the iceberg_data > my_schema > airport_id table. Then, select the Time travel tab.
Note: how are there are now two snapshots shown. If you do not see a second snapshot then refresh your browser and repeat this step.
The second snapshot shows that there are 6,251 total rows, with 1 row having been added in this new version of the table.
You are now going to roll the table back to the first snapshot, representing the initial state of the table. This version of the table did not have the row you added.
-
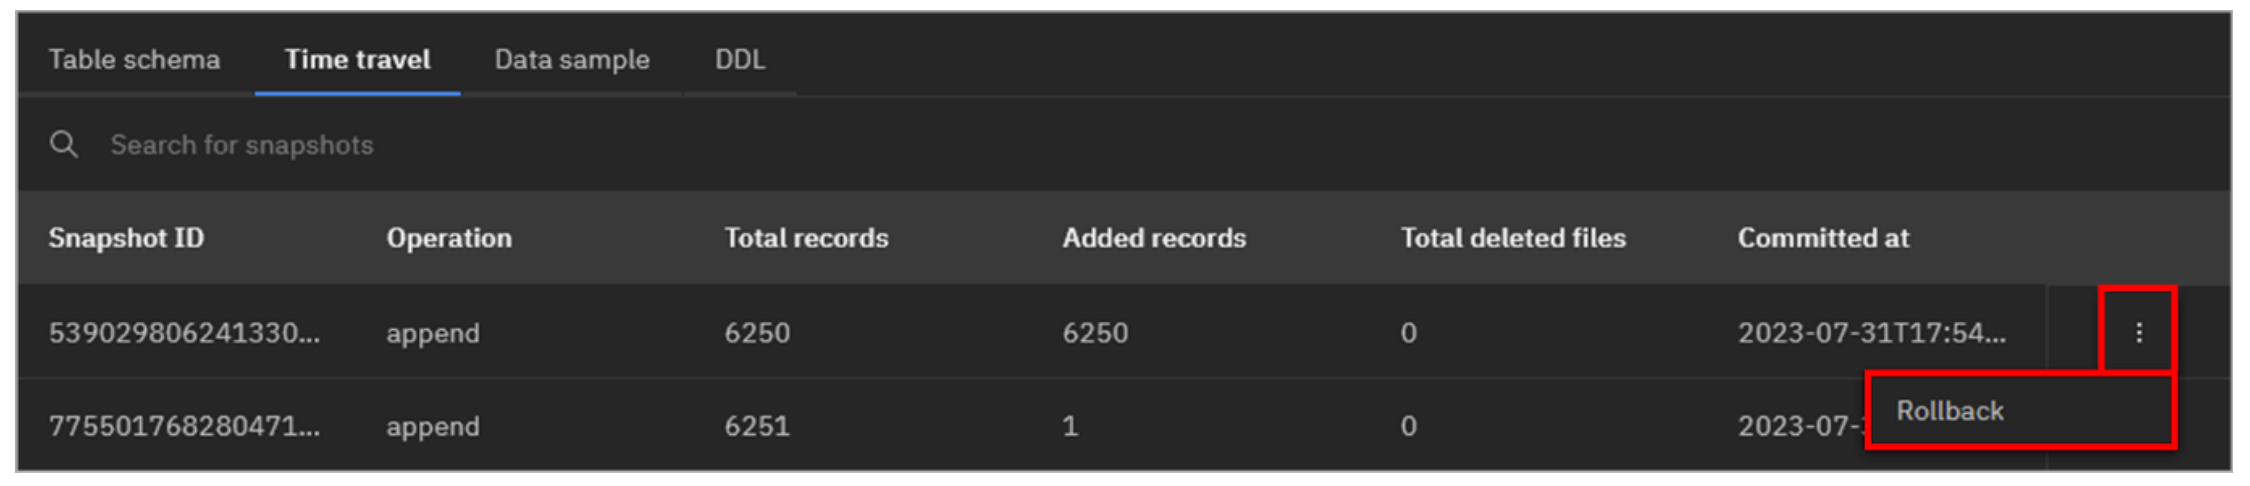
Click the overflow menu icon (vertical ellipses) at the end of the row for the original snapshot (the first snapshot shown, with the earlier Committed at timestamp and 6250 Added records). Click Rollback.
-
In the Confirm rollback pop-up window, click Rollback.

Note: For reference, the following SQL statement will perform the equivalent roll back operation (DO NOT RUN THIS NOW):
call iceberg_data.system.rollback_to_snapshot ('my_schema', 'airport_id', <snapshotID>);
bash-
Select the Query workspace icon again from the left-side menu.
-
Copy and paste the following SQL statement into the SQL worksheet and click Run on presto-01.
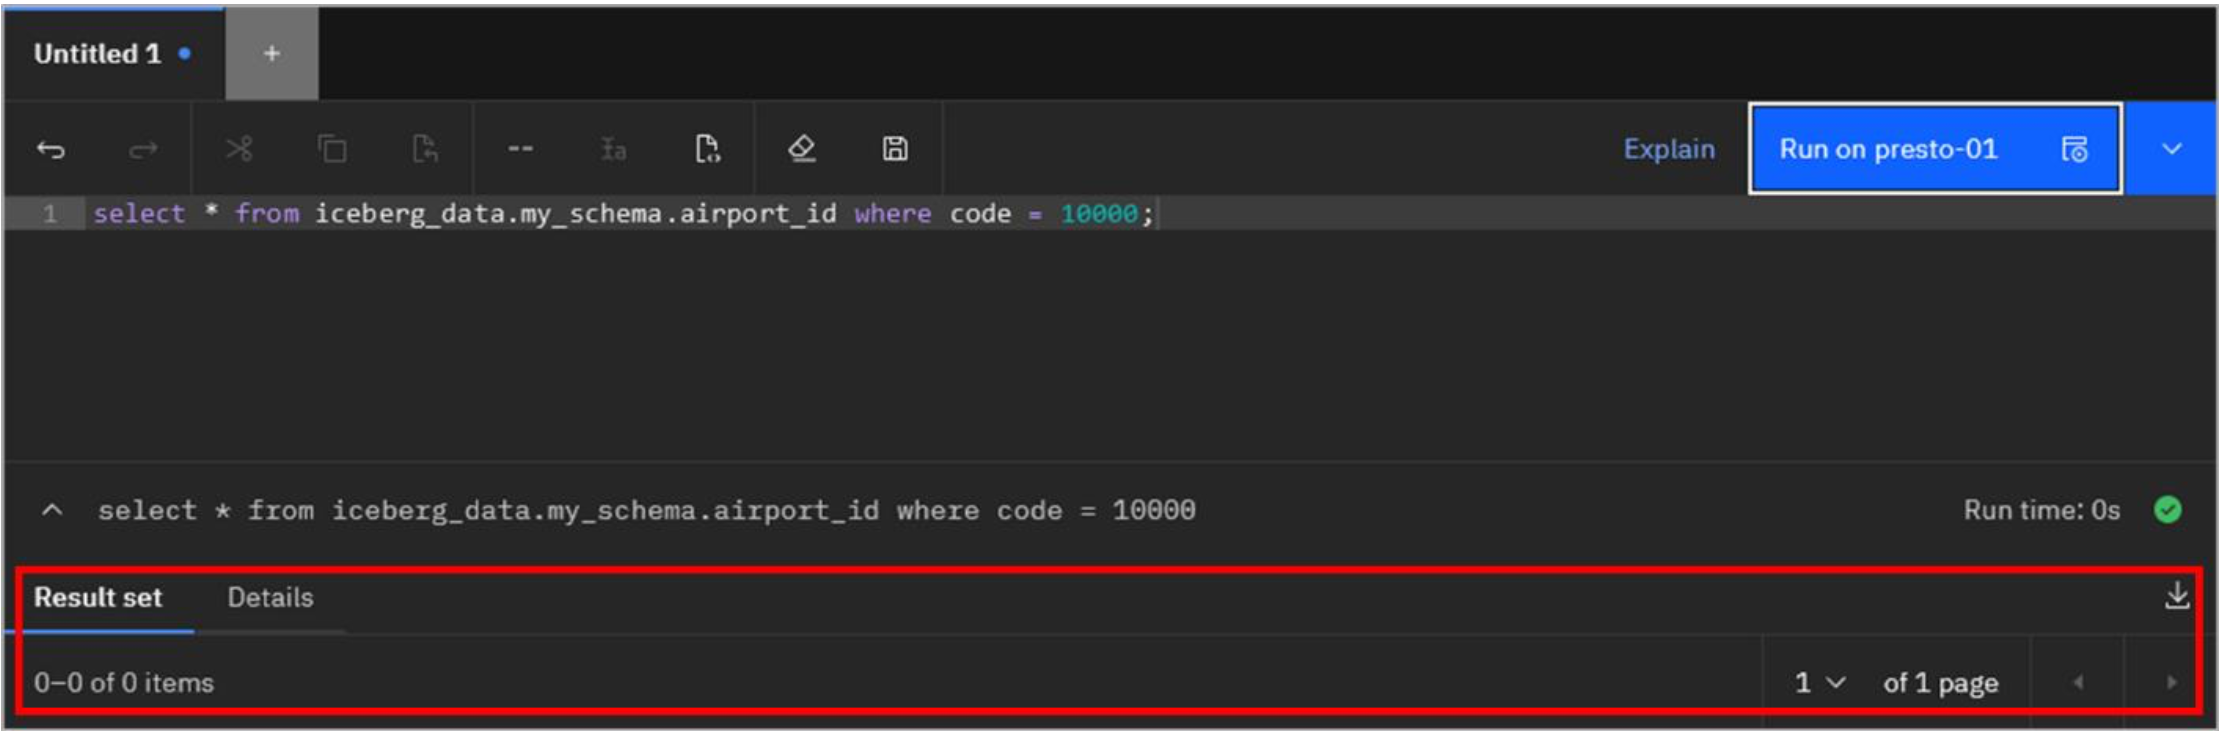
select * from iceberg_data.my_schema.airport_id where code = 10000;
bashThe row you added earlier is now gone!
- Copy and paste (replacing the SQL already there) the following SQL statement into the SQL worksheet and click Run on presto-01.
select count(*) from iceberg_data.my_schema.airport_id;
bash
You should see a count of 6,250 rows, which matches the original count when you first created the table. The table is back at the state it was in when it was first created!
Congratulations, you've reached the end of lab 108.
This concludes the L3 lab. More watsonx.data resources, including further demo modules can be found on the “IBM watsonx.data Sales Kit
” seismic page.
You can now complete the quiz for IBM watsonx.data for Technical Sales Level 3 Quiz