PoX environment setup
A watsonx.ai PoX can involve various cloud services, depending on what a sales team is trying to prove to the client. There are lots of combinations and variations. This document describes how to set up some of the most common environments. Specifically:
- IBM watsonx.ai (using the IBM Technology Sales TechZone pattern)
- IBM watsonx.ai + Watson Discovery + watsonx Assistant (using the IBM Technology Sales TechZone pattern)
- REST API access for when a client wants to use their own applications (this path does not require a TechZone pattern)
Prerequisites
You will need an IBM Cloud account to gain access to the TechZone account that hosts the various Watson and watsonx services. Depending on your account status, follow the steps below before proceeding to section 2 to request a reservation.
Obtain an IBM Cloud Account (Optional)
If you have an IBM Cloud account you can skip this step. If you do not have an IBM Cloud
account, Click this link to create one. After registration, you will be sent an email to activate your account. This can take a few hours to process. Once you receive the confirmation email, follow
the instructions provided in the email to activate your account.
Selecting your TechZone pattern
The instructions in this section describe what you see when you reserve a watsonx.ai TechZone environment for the first time. Some steps will be skipped if you extend your reservation, or if you reserve again.
-
Go to the IBM TechZone website.
Note: Safari is not a supported browser, you should use Chrome, Edge, or Firefox (this lab was tested using Chrome). -
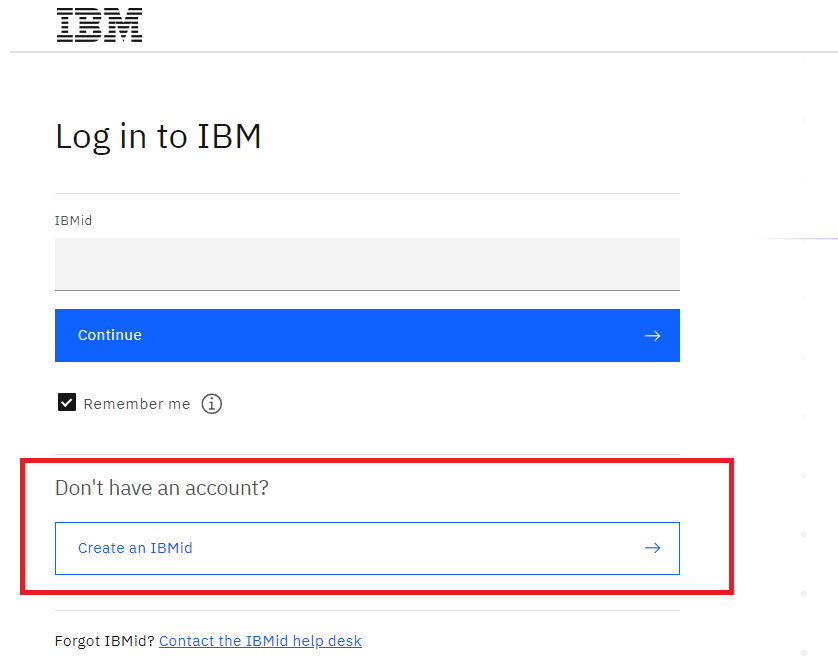
If you already have an IBMid, skip this section and go to Section 2.1. If you do not have one, click Create an IBMid and follow the instructions from the subsequent panels to create your IBMid… then go to the next step.
- Provide your IBMid and click Continue.

- If presented with this option, select the Single-Sign-On method.
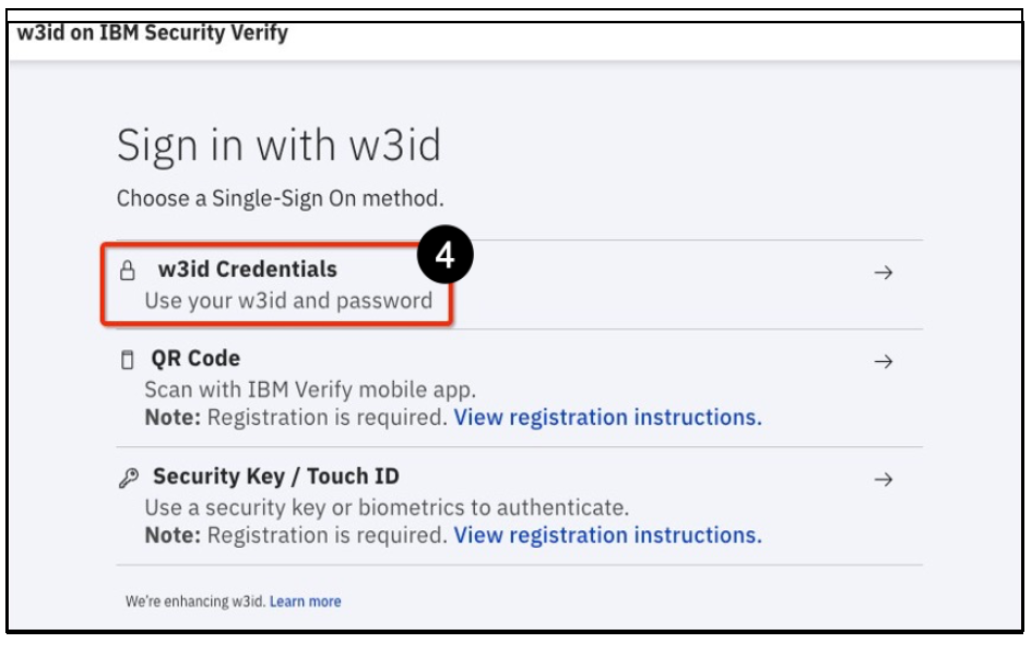
- Provide the necessary information (w3id and password, QR code, etc.) and sign in. The next step depends on what you need to reserve from TechZone. If you only want to reserve a watsonx.ai environment, use the steps in Section 2.1. For a watsonx.ai + Watson Discovery + watsonx Assistant environment (what this lab is about), use the instructions in Section 2.2.
1. Reserving a TechZone Environment to PoX the watsonx.ai pattern
If you only need to demonstrate watsonx.ai (in Prompt Lab or Tuning Studio) then you can simply reserve the watsonx.ai pattern.
-
You should be logged into IBM TechZone.
-
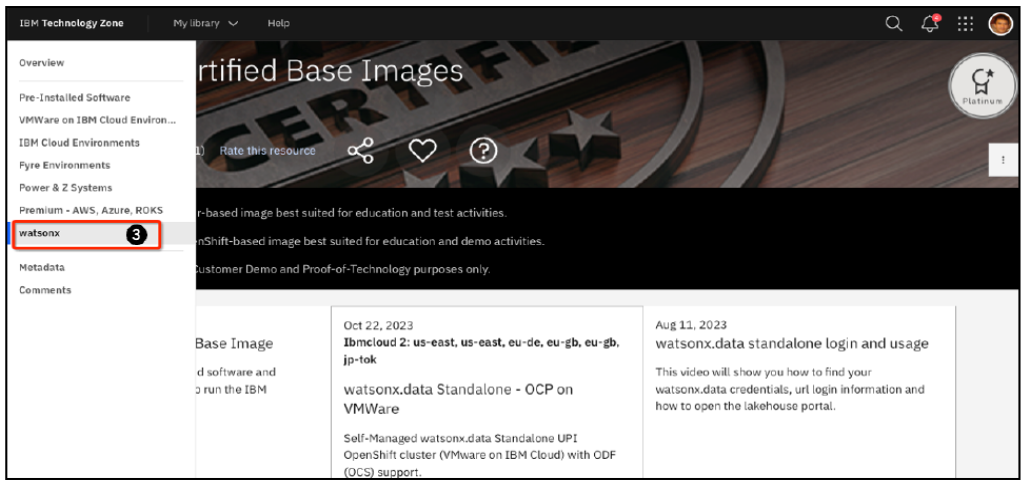
On the TechZone dashboard, click on TechZone Certified Base Images - watsonx hyperlink in the watsonx now on TechZone! tile.
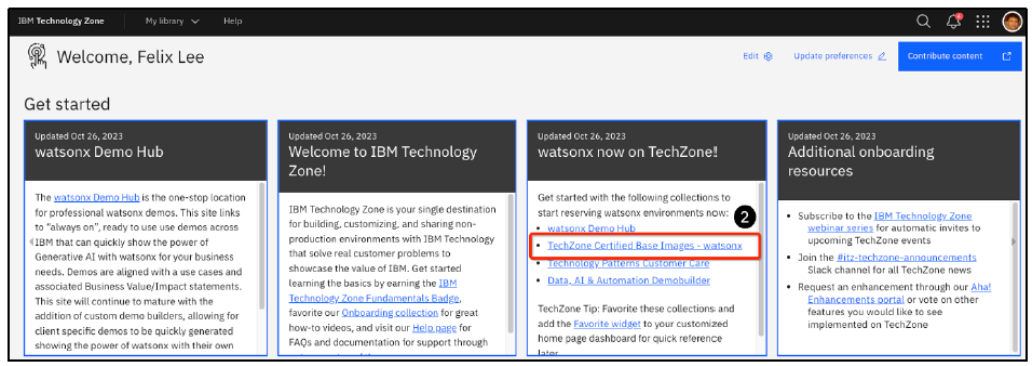
- The TechZone Certified Base Images - watsonx page opens. On the left navigation menu select watsonx if it is not already selected.
-
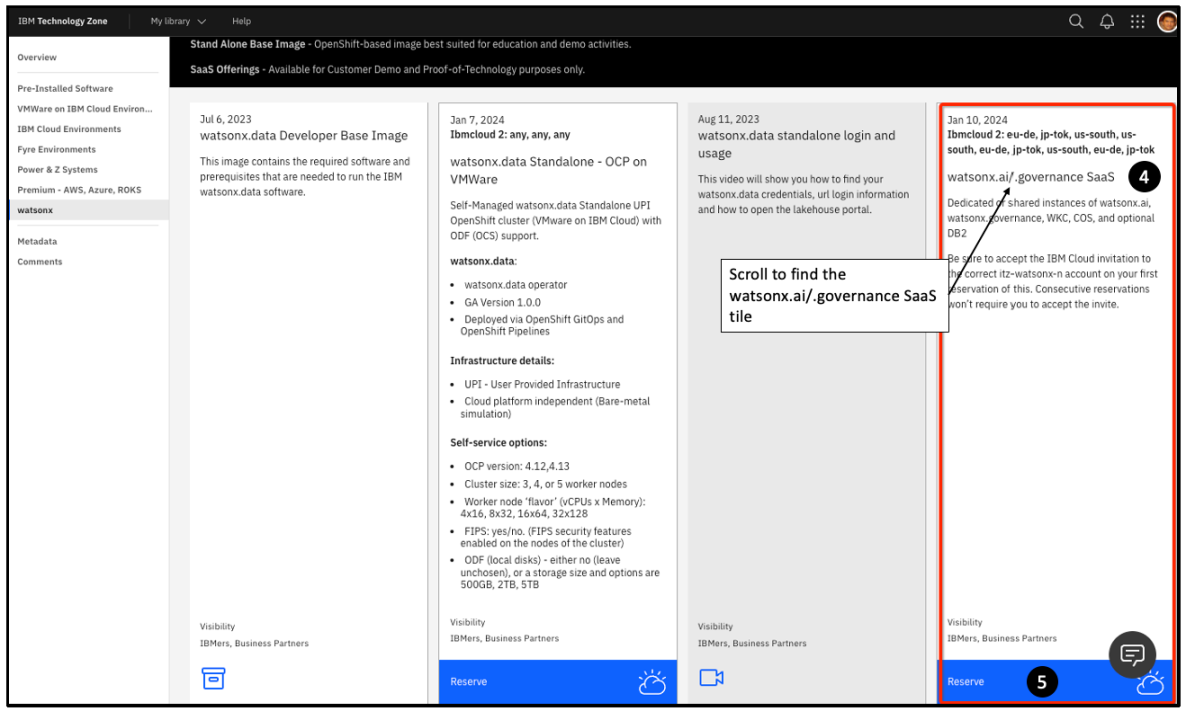
Scroll down until you find the watsonx.ai/.governance SaaS section.
-
Click the Reserve button at the bottom.
-
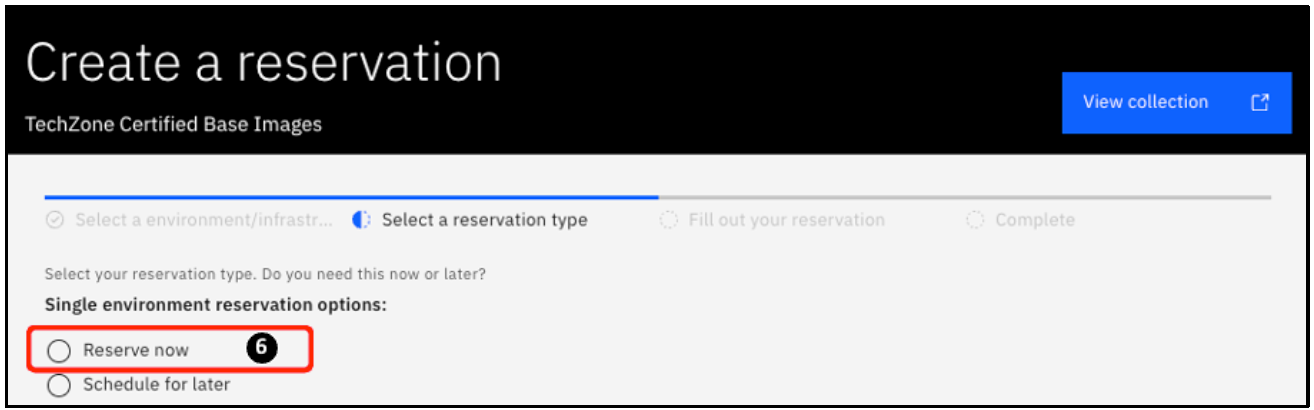
The Create a reservation page opens. Select the Reserve now radio button. If you are not ready to start, you can select the Schedule for later radio button – the steps thatfollow are the same either way.
-
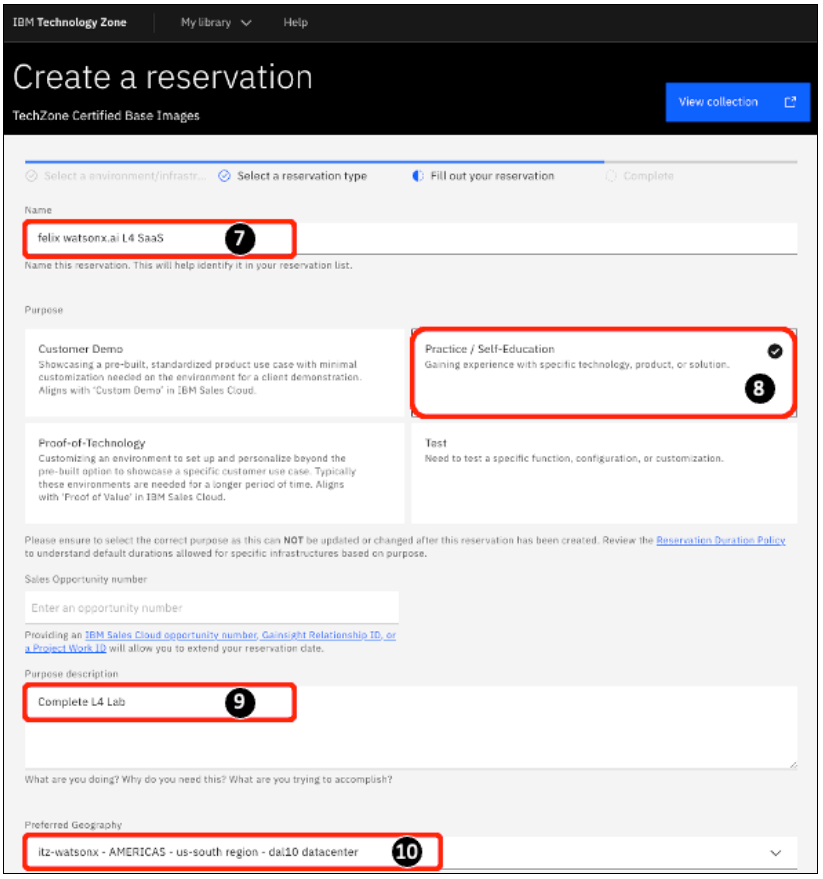
Change the Name of this reservation to your Name watsonx.ai L4 SaaS.
-
In the Purpose section, select the Practice/Self-Education tile or Proof-of-Technology tile if you need to reserve a PoX environment.
-
In the Purpose description, box enter Complete L4.
-
The US-south region is used in this lab. Select itz-watsonx- n -AMERICAS -us-south region - dal10 datacenter from the Preferred Geography drop-down. Note that TechZone will provision additional accounts as the number of TechZone users
increases. You may see itz-watsonx- 2, itz-watsonx- 3, or itz-watsonx- n in general. In the following write-up, part of the lab, it is assumed that you use itz-watsonx (with no n value). If you pick itz-watsonx- n, then simply account for the choice in the lab exercises below.
Note: If there are a lot of reservation requests on the system, the reservation task might fail. If this happens, try again later, or try reserving using a different value for the itzwatsonx-n value. For example, if you initially used itz-watsonx- 1 and it failed, try reserving using itz-watsonx- 2.
-
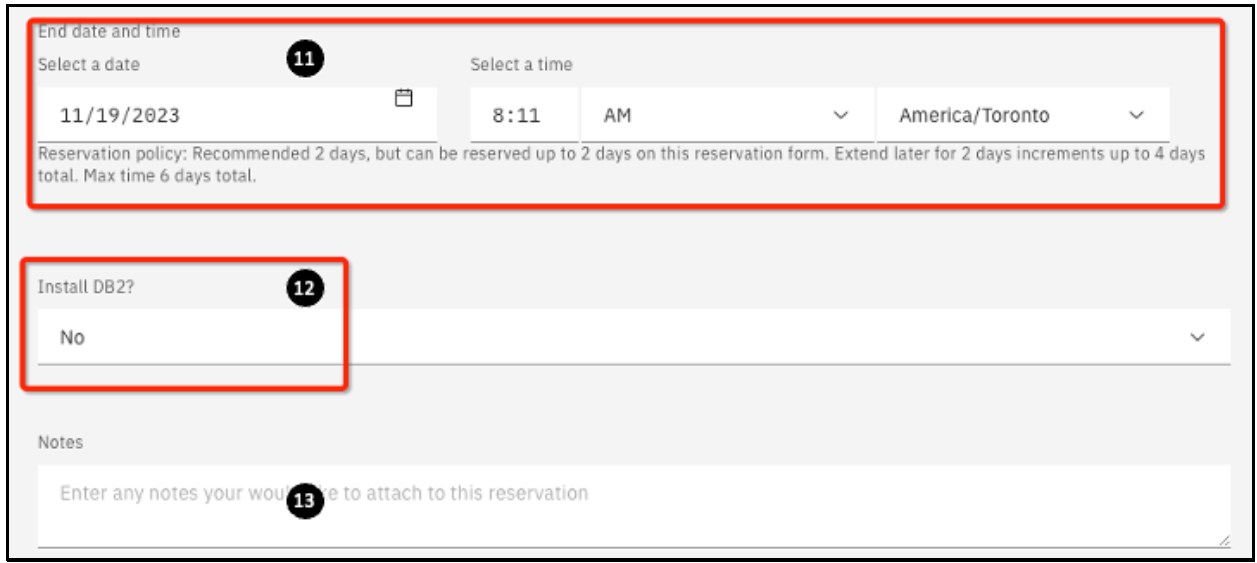
Scroll to the bottom part of the reservation page and fill in the end date and time field. The maximum you can select is 2 days from the current time, but it can be extended upto two times for a total of 4 more days. Your reservation period is longer if you select the Proof-of-Technology mode.
-
Click on the Install Db2 drop-down and select No.
-
Optionally provide some additional notes in the Notes section.
- On the right-hand side at the bottom, accept the Terms and Conditions, then click Submit.
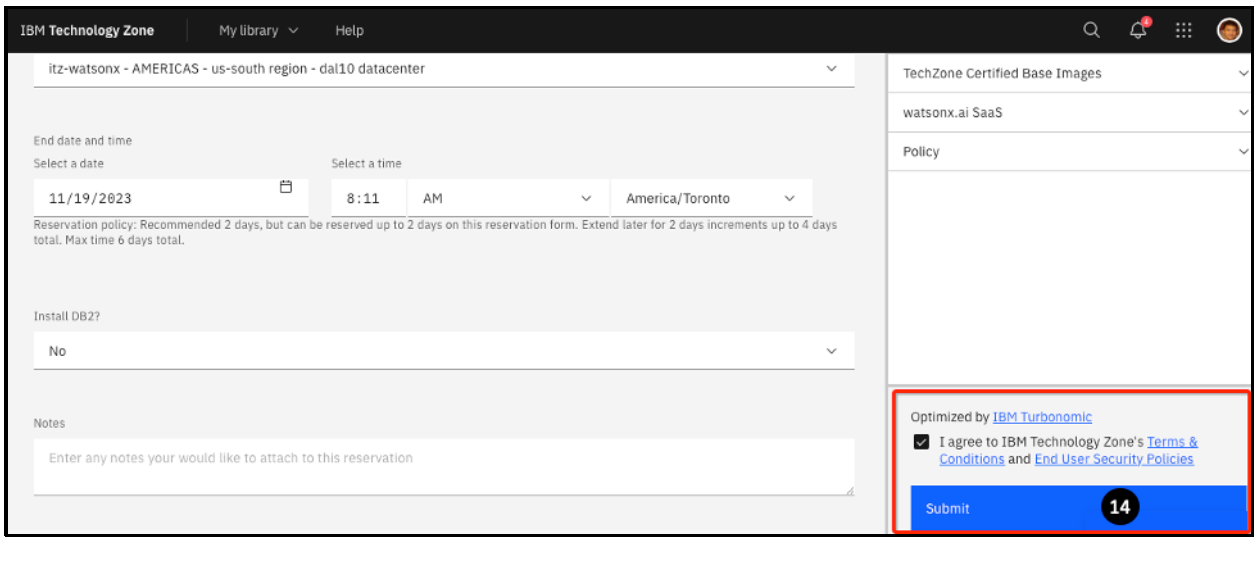
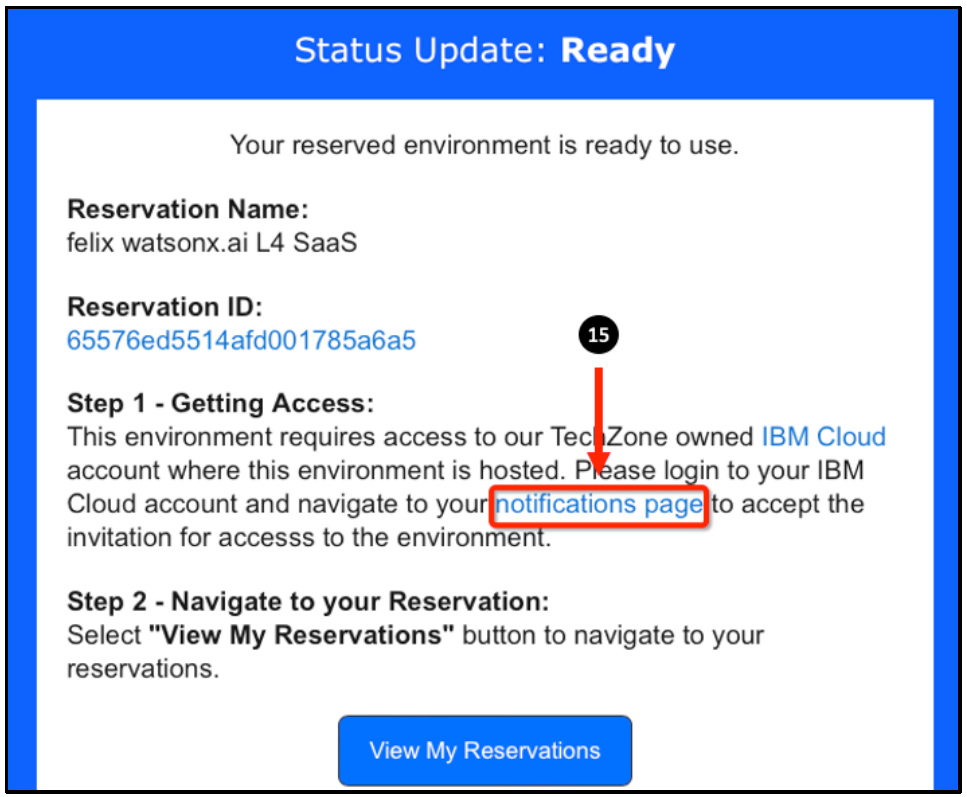
- A success message should appear in the top right. Next, an email will be sent to your IBMid email address immediately letting you know that your reservation is being provisioned. Once your watsonx.ai environment has been provisioned (typically within 10-15 minutes), you will receive a second email telling you that it is ready for use. This email looks like the example below. You will need to click on the notifications page link (highlighted in red below) to go to your reserved watsonx.ai environment.
Note: If there are a lot of reservation requests on the system, the reservation task might fail. If this happens, try again later, or try reserving using a different value for the itzwatsonx-n value. For example, if you initially used itz-watsonx- 1 and it failed, try reserving using itz-watsonx- 2.
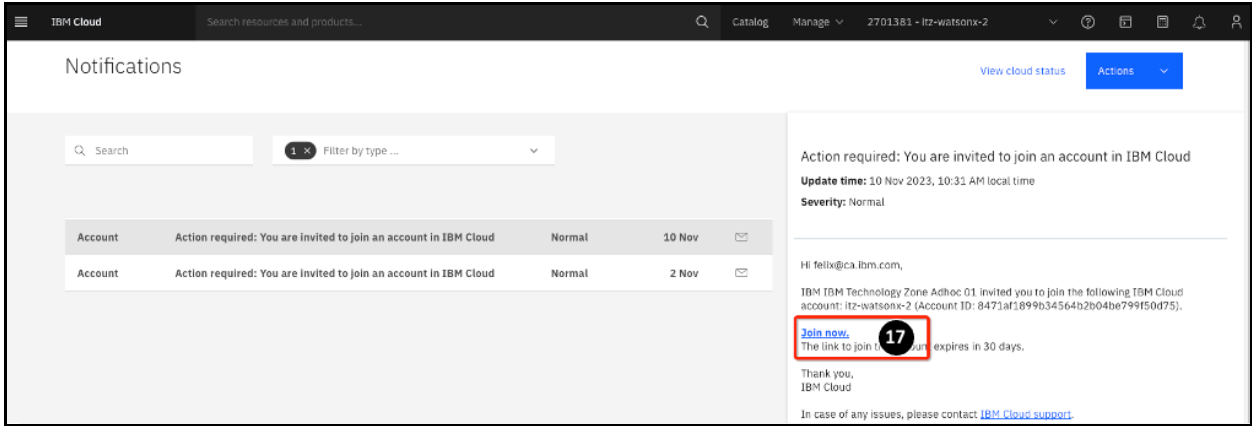
- Clicking on the notification page link in the status update email brings you to a login page where you need to provide your IBMid (and may have to log in with your credentials if you have not already done so). Then you will see the Action required item (you may have more than one). Click on each one and find the one associated with the account you used to reserve (ie, itz-watsonx- n)
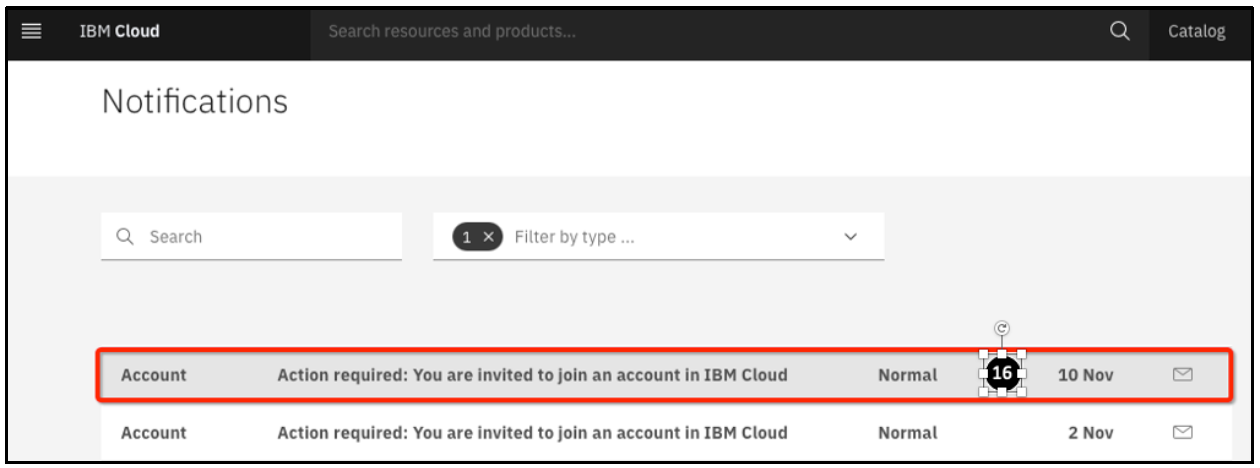
- Click the Join now link on the right.
-
Note: If you had previously applied and have accepted an invitation to the itz-watsonx account, you will not get another invite. However, if you did get the email noting that your reserved environment is ready, then you would be able to log in.
-
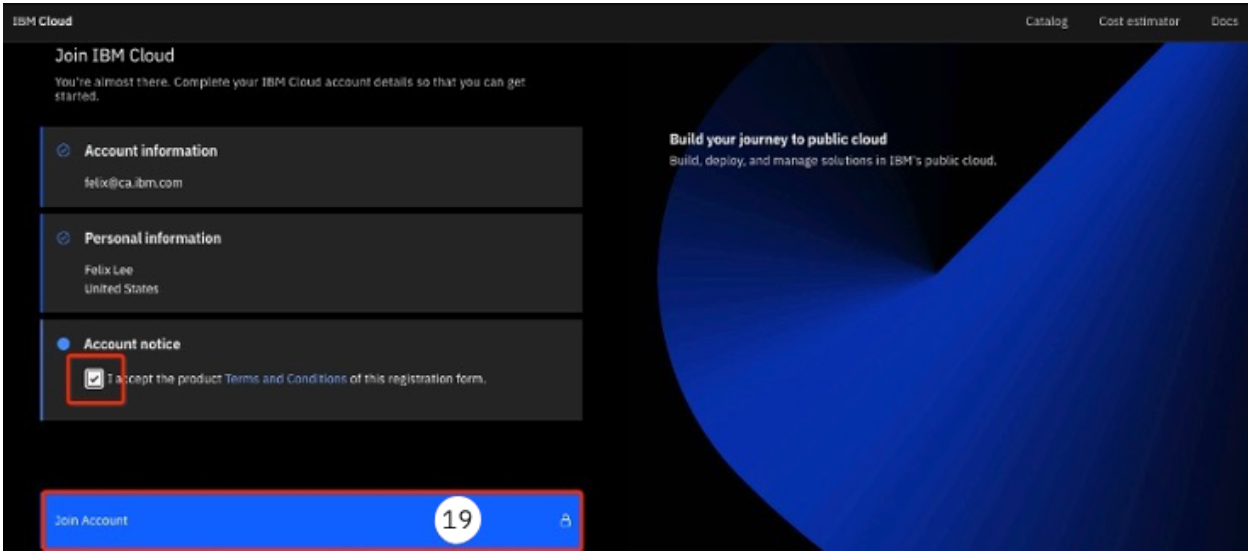
Use your IBMid to log in to the IBM Cloud login page. You are asked to join the TechZone account. Accept the Terms and Conditions, then click Join Account.
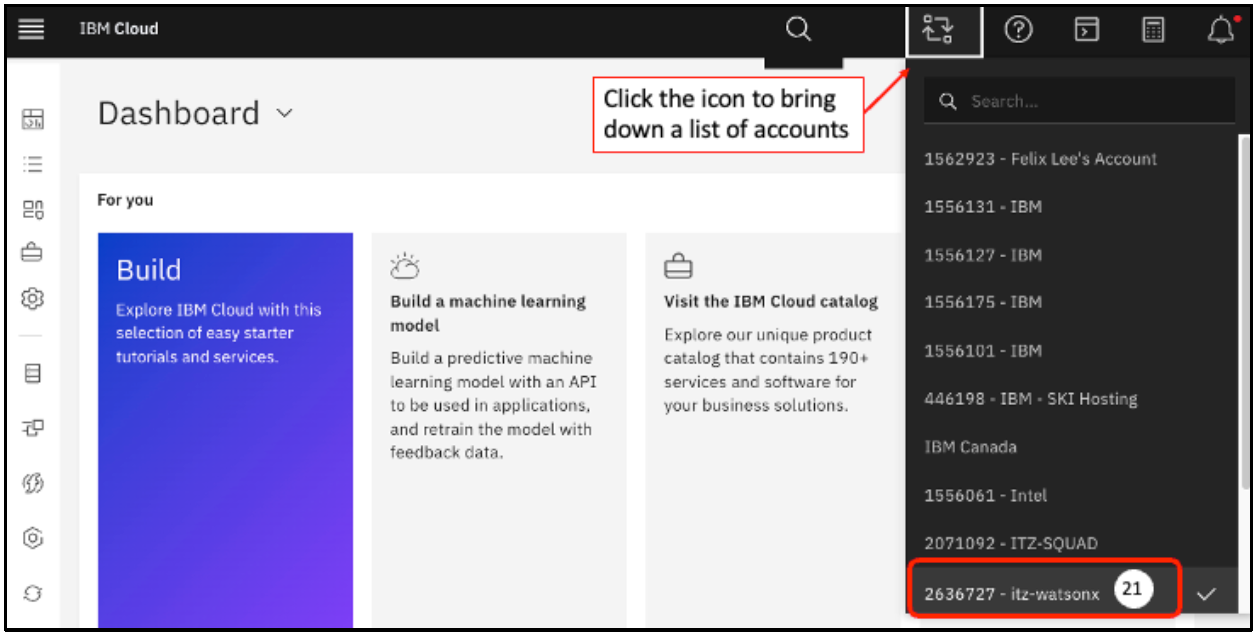
- Once logged in, ensure you are using the right account. If you accepted the TechZone invitation, you should have been added to an itz-watsonx (or itz-watsonx- n if you had chosen that) account. You should now be in that account. To verify, you should see this on the upper right.

- If that is not what you see, click the icon to bring the dropdown list. Select the account that looks like some number - itz-watsonx (if you reserve under itzwatsonx-n, look for that account).
-
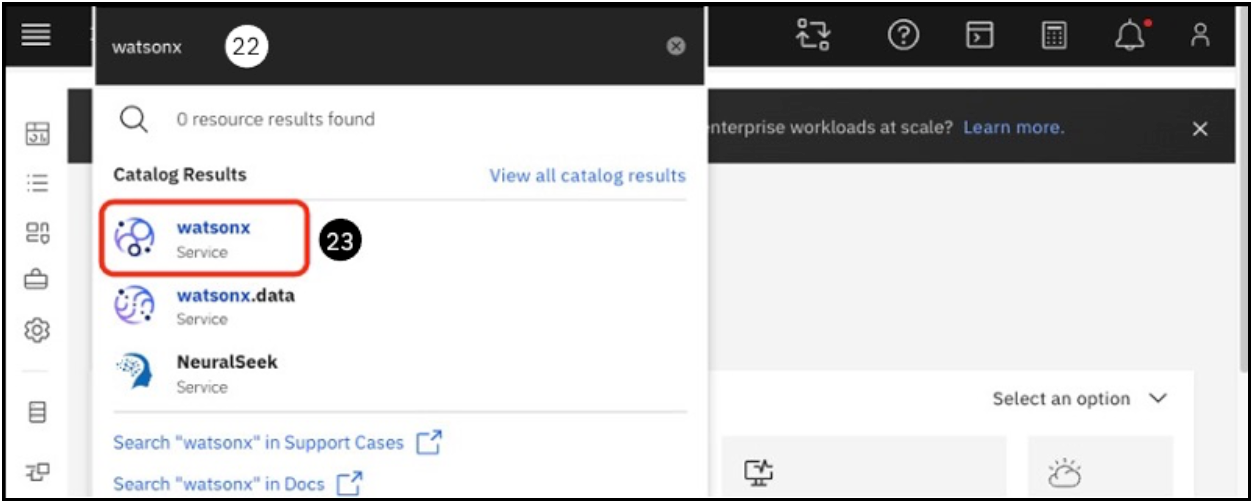
In the search field (at the top), enter watsonx.
-
The search returns a list like the following. Click watsonx.
- On the AI and data platform page, click Launch at the bottom of the watsonx.ai tile.
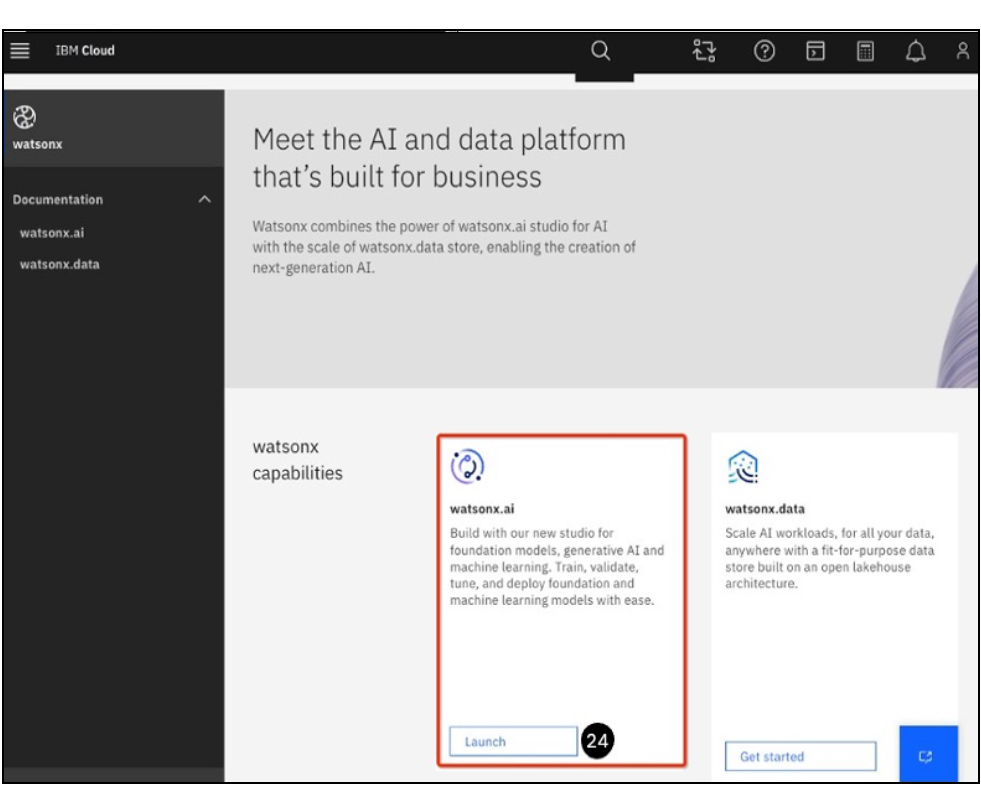
- The watsonx.ai console opens and you are ready to begin this lab.
-
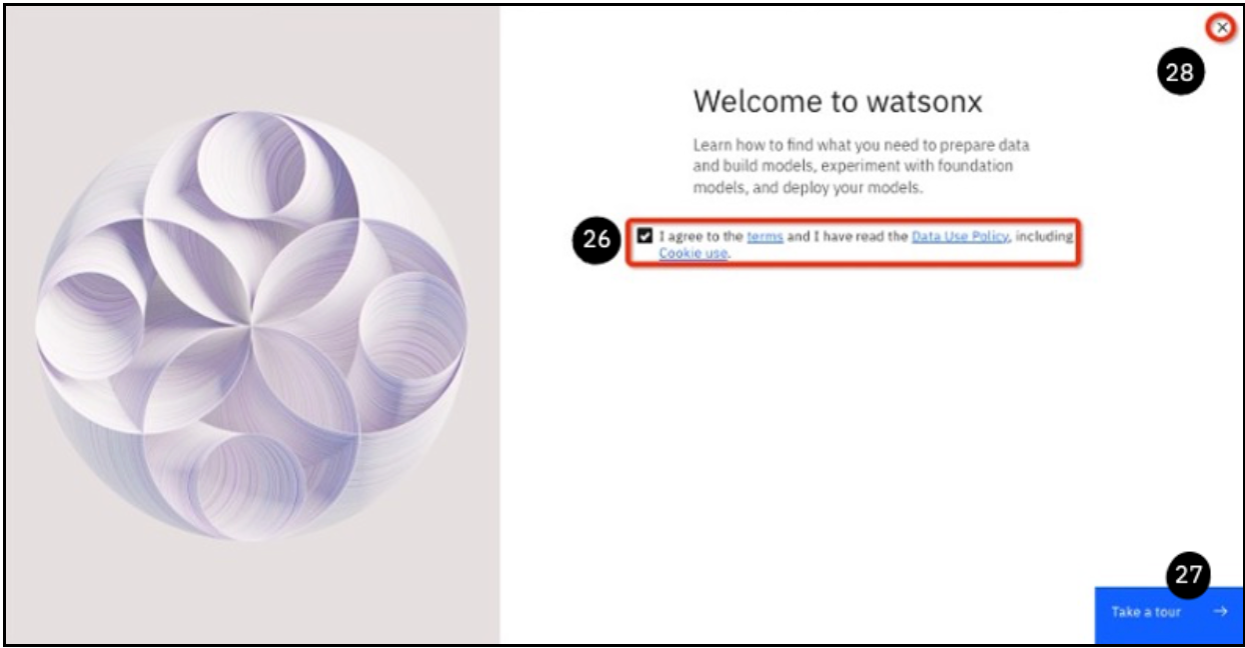
You might see a welcome page (if you don't skip the next few steps). Select the checkbox
to agree to the terms. -
Optionally click on the Take a tour button on the bottom-right to take a tour of
watsonx.ai. -
For this lab, dismiss the welcome message by clicking on the 'x' on the top right to close
this window.
-
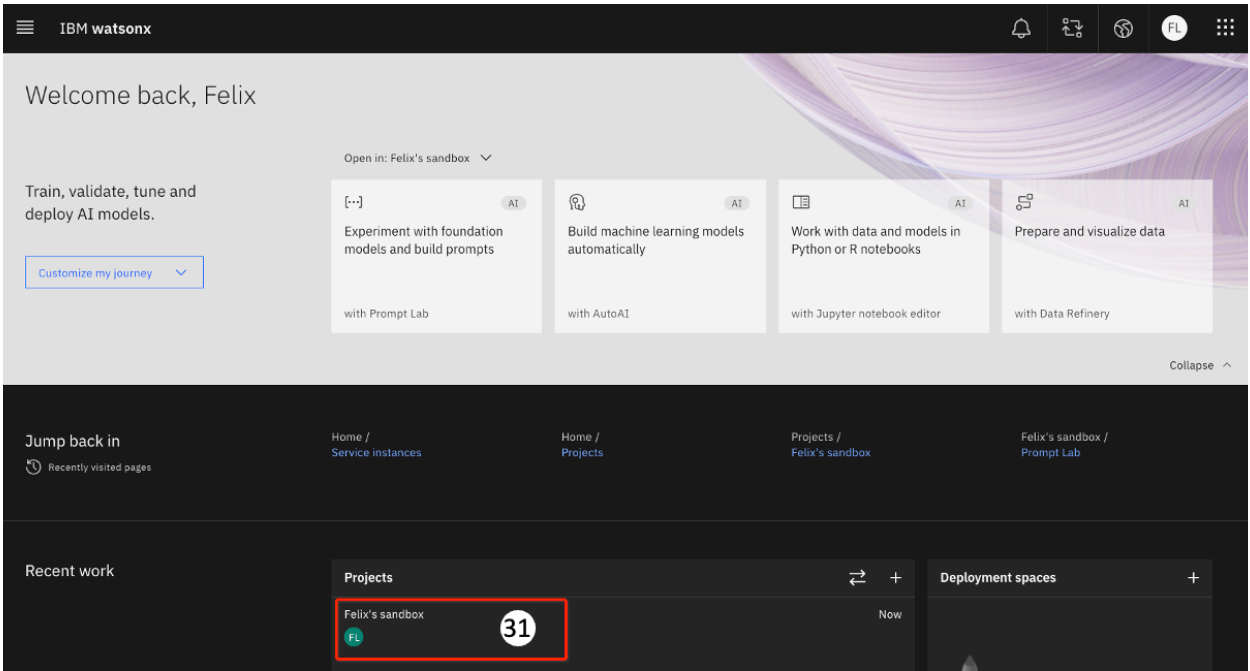
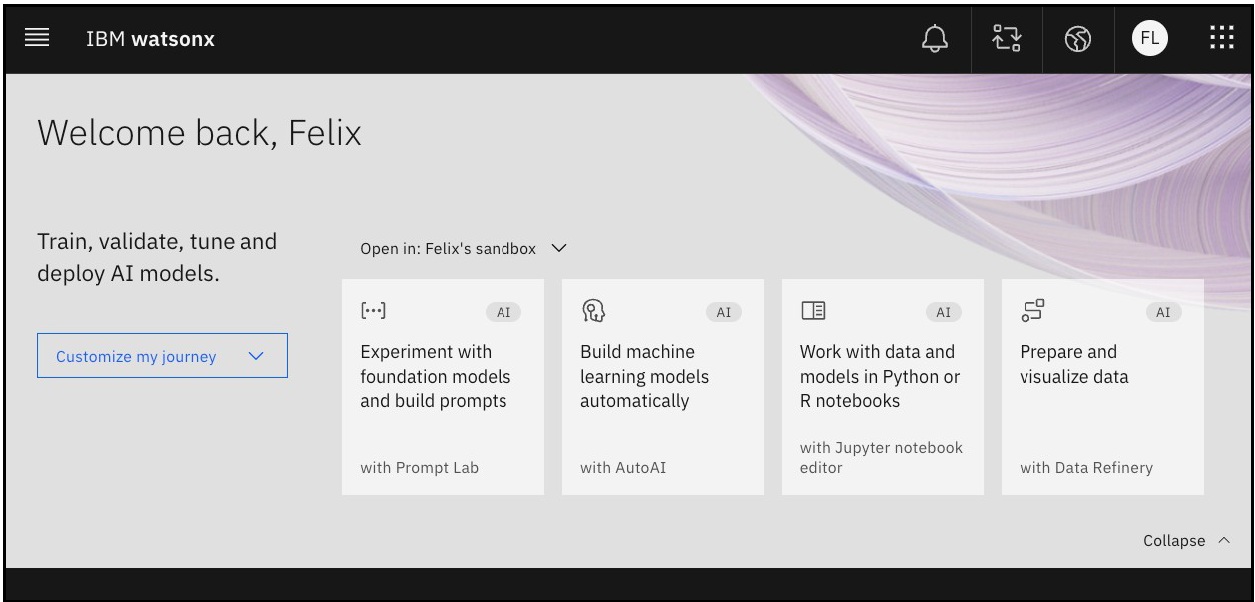
Click on the Experiment with foundation models and build prompts tile. The watsonx Welcome page opens.
-
You need to create a sandbox project. Click on the Create a sandbox project button in the Projects area. This creates a project with the necessary services associated with it. It takes a few minutes to create the sandbox project, so be patient.
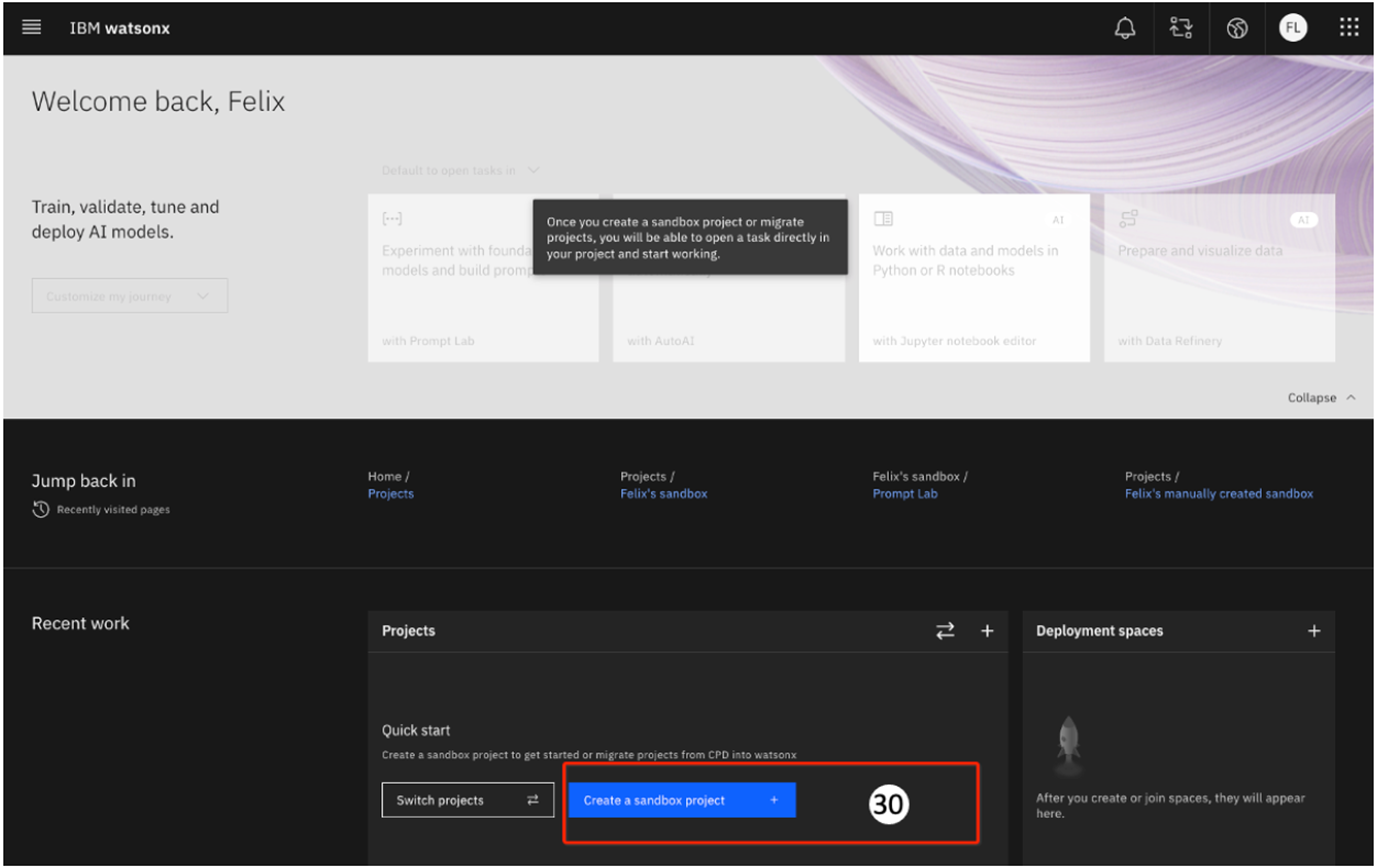
- You see the sandbox project in the Projects area. You are now ready to proceed with the lab.