Create / Manage Users and Assign Job Roles
This lab will focus on showing us how to create new users, manage these users, as well as assign roles for these users.
A simple high-level architecture view of this lab can be seen below
Prepare
After ensuring that your environment is set up and in working order, we will want to ensure a few things before jumping into the exercises for this lab
There are a couple of steps, listed below, we will want to ensure are complete before jumping into this labs
-
Start or Ensure all three virtual machines.
-
Log in to the DB server (raptor) virtual machine as user
rootwith passwordguardium. -
Check that the Db2 database is running.
- Open a Terminal window.
- To switch to the DB2INST1 user account, type:
su - db2inst1.bash
- To verify that the database is running, type:
db2startbash
- To activate the Db2 database, type:
db2 activate database sample.bash
If the database is running, you receive the following message:

If the database is NOT running, you can start it by running the following command:
db2startbash

- Open a Terminal window.
-
After closing the terminal window,lets ensure that raptor can connect to
MA170andC200. You can verify this be ensuring that login screen for each Guardium interface is displayed.
// TODO: ADD Login Image
Creating Guardium Users and Roles
In this section of the lab, we will use the IBM Guardium Data Protection console to create Guardium users and assign them to the appropriate roles. Guardium includes two built-in users to manage access to the Guardium console:
-
labaccessmgrA member of the
accessmgrrole. Use this user to create other users and roles, and to set role memberships. -
labadminA member of the
adminrole. Use this user for all other administrative functions.
Guardium provides
adminandaccessmgrusers. You cannot delete these users, nor can you remove them from their default roles. This lab guide follows the security principle of avoiding the use of high-level accounts.
In an environment with a central manager, such as the lab environment, Guardium users must be managed from the central manager.
Creating Users
-
On the database server, go to the Guardium graphical console for the central manager
MA170athttps://192.168.42.170:8443 -
Log in with user name
labaccessmgrand passwordP@ssw0rd. -
Navigate to Access > Access Management.

Extra users were added to the Guardium server for instructional purposes. A new installation of Guardium does not include all of these users.
-
To add a user, click Add User and enter the following information:
– Username:
User01
– Password:P@ssw0rd
– First Name:Henry
– Last Name:Davis
– Email:henry.davis@example.com
– Disabled checkbox: not selected
Remember to clear (or unselect) the **Disabled** checkbox because it is enabled by default.

-
Click Add User
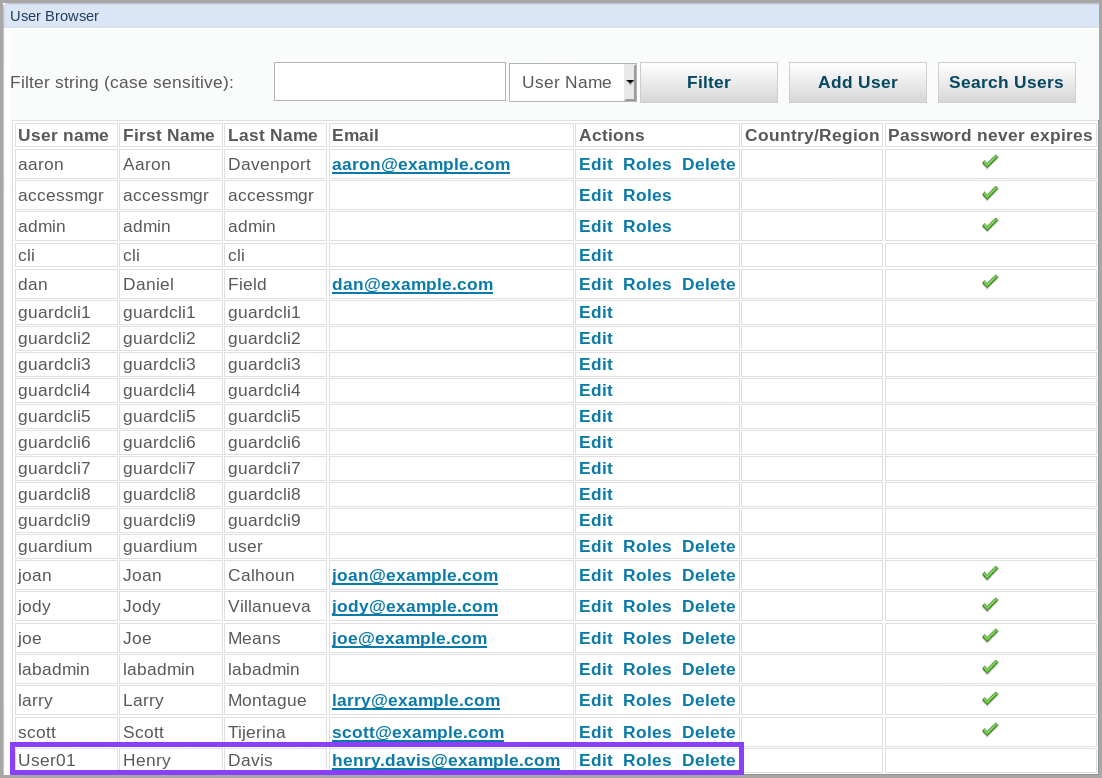
If you do not see User01, you might need to go to the second page of users, or filter on user name User01

-
For
User01, click the Roles link. -
To add
User01to the Infosec role, select the Infosec checkbox.User01is already a member of the user role. Observe that the user role is selected.
-
Scroll down and click Save.
The user browser should be displayed again.
-
To display summary information about user and role memberships, navigate to Access > User & Role Reports
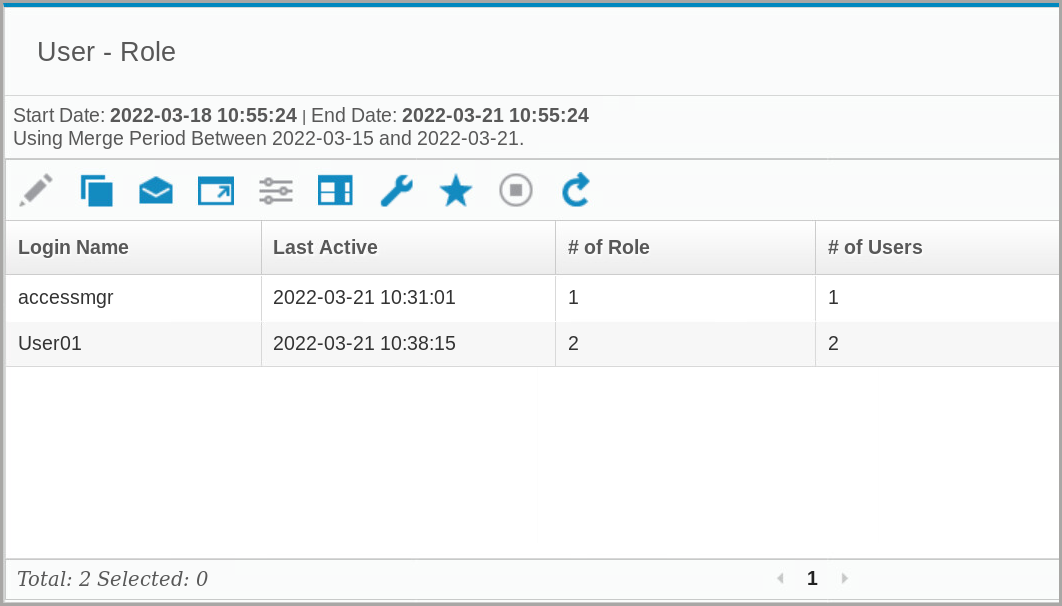
You should see the user that you created earlier in the User - Role report.
- To display a report with the user roles, right-click the user that you created and select Record Details.
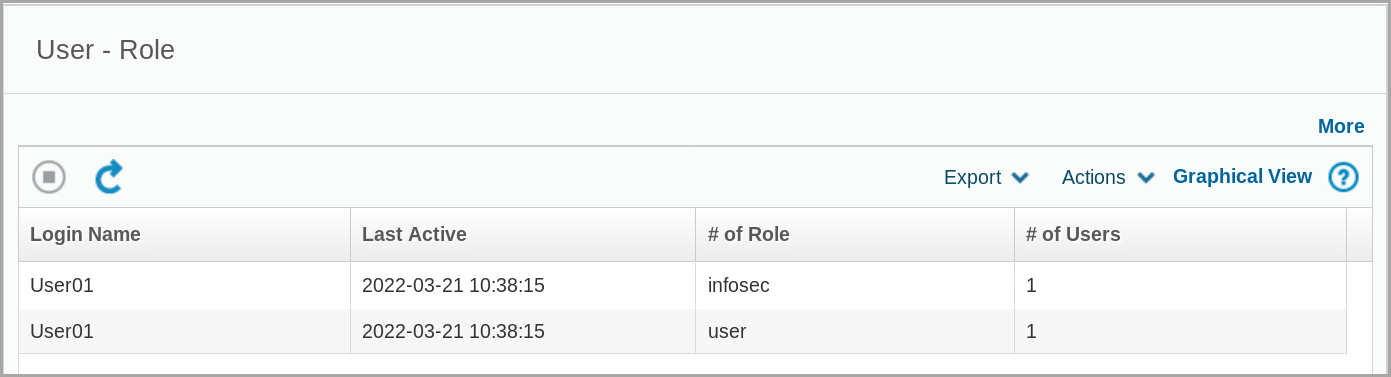
A new window opens with the details.
- Close the window and go back to the main Guardium Interface.
Creating Guardium Roles
In this section of the lab, we will now create a role and assign access permissions to the role.
- Navigate to Access > Access Management.
The User Browser pane opens and you should see a list of Guardium users.
- Select Role Browser.

The Role Browser pane opens
- Click Add Role

The Role Form window opens.
- In the Role Name field, enter
labroleand click Add Role. You should see the new role,labrole, listed in the Role Browser.

- On
labrolerow item, click Manage Permissions

The Manage Permissions for Role
labrolewindow opens.
-
Next we are going to add the System Configuration application to the new role.
- In the Inaccessible items list, use the filter field to search for
systemand then select System Configuration.
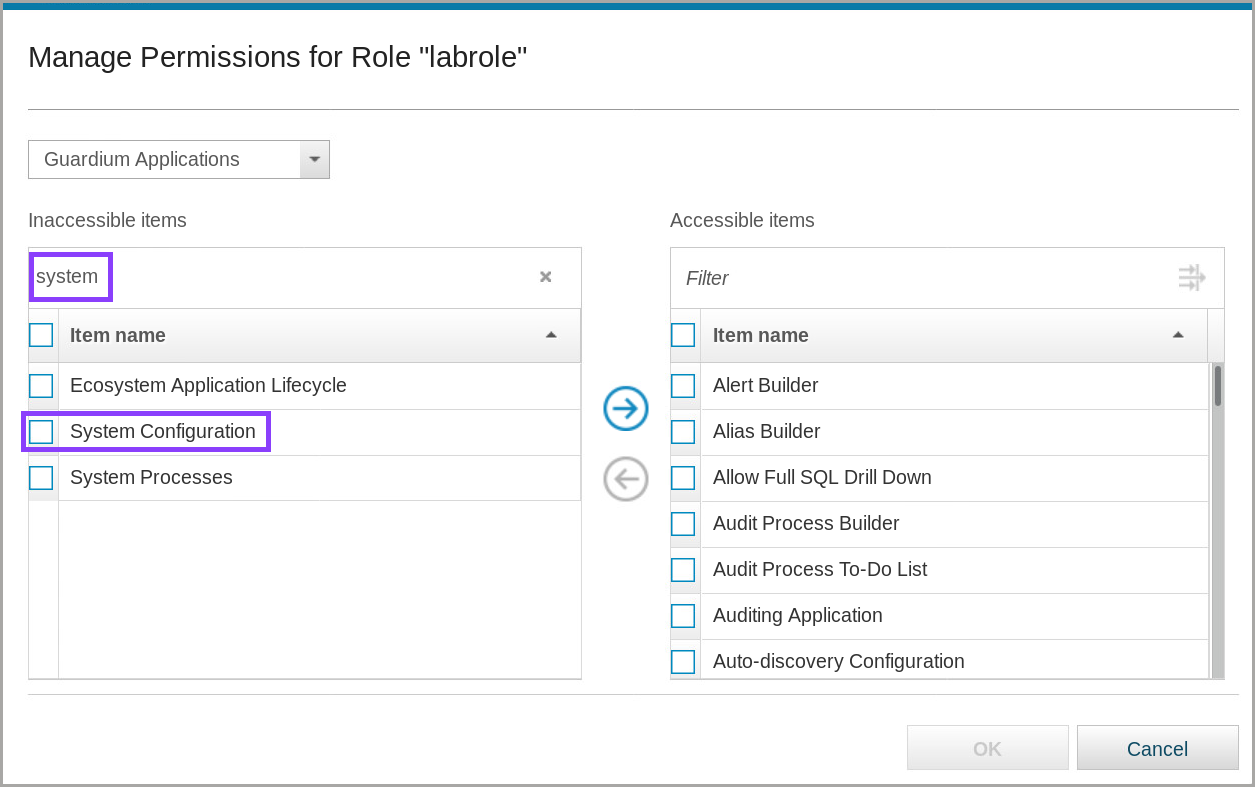
- To move System Configuration to the Accessible items list, click Move Right (Right Arrow → )
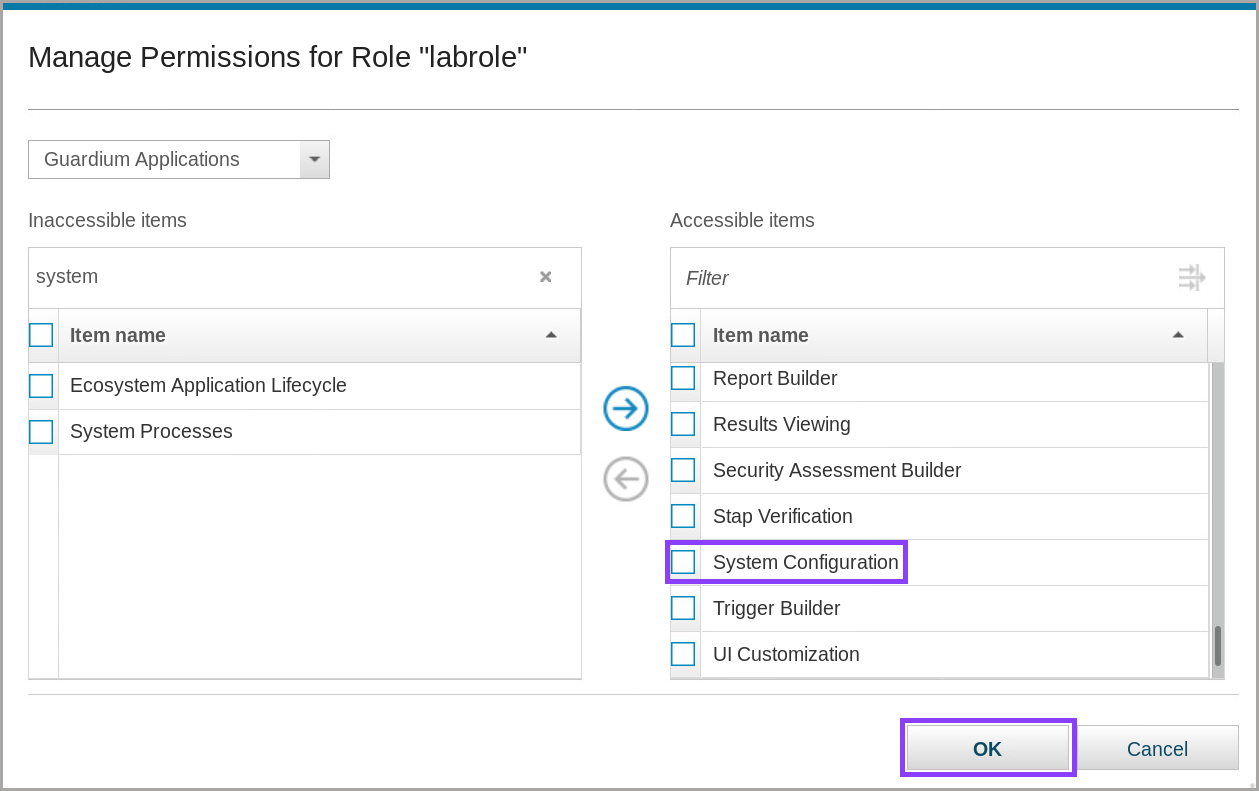
- Click OK and close the confirmation message.
The Role Browser should reopen.
- In the Inaccessible items list, use the filter field to search for
-
Now we are going to add our newly created role to a user
-
Go to the User Browser.
-
Search for
User01, which we created in the previous section of the lab, and click Roles. -
You should see the
labroleavailable to add as a role.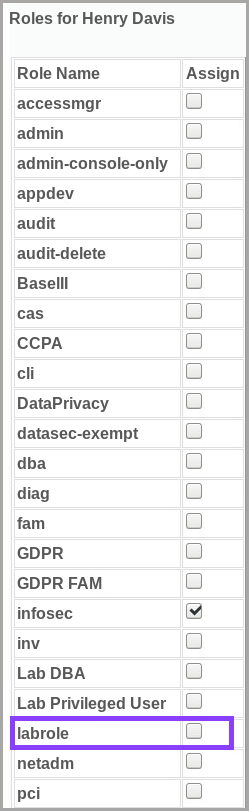
-
Select
labrole -
Hit Save to complete adding this new role to
User01
-
-
Now that we have completed creating the new user, roles, and assigning the new roles we can sign out of the Guardium console.
Test User w/Roles
Now that you added a user to the central manager, you need to synchronize the portal user data with the collector. Normally, this synchronization is automatically scheduled. In this section of the lab, we will synchronize manually rather than waiting for the scheduled job. Then, you log in as the new user on the collector and explore the console.
-
Log in to the Guardium portal on
MA170as userlabadminwith passwordP@ssw0rd. -
Go to Manage > Central Management > Central Management.
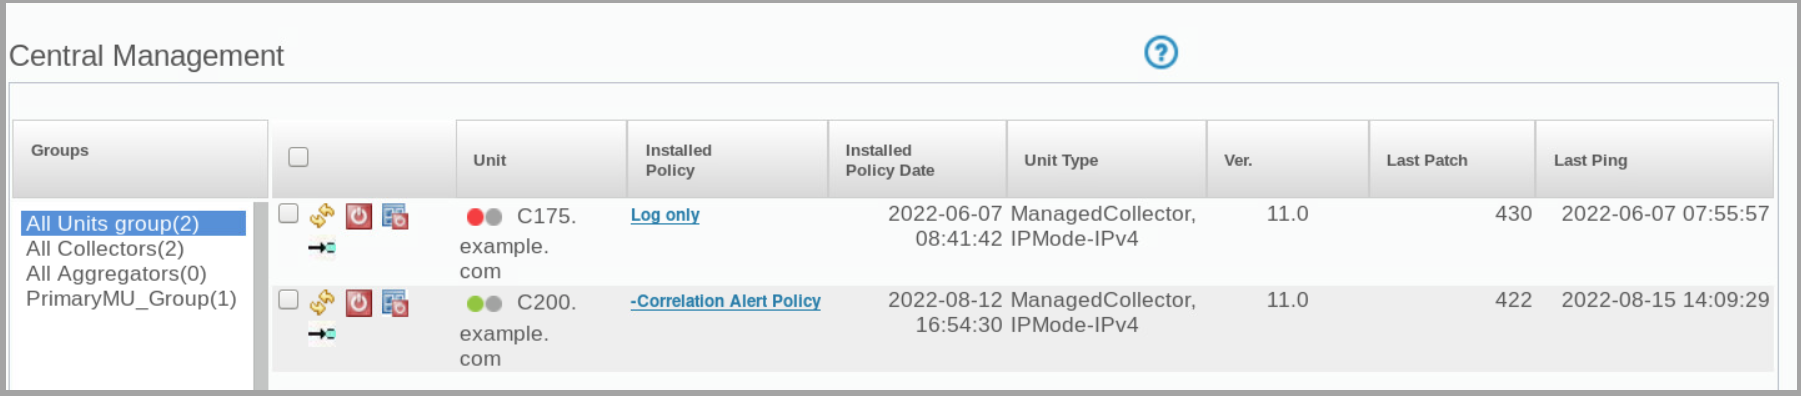
The Central Management pane opens.
- Next to Unit C200.example.com, click Refresh
Wait 2 minutes for the refresh to complete.
If refresh is not working, select the checkbox of item to refresh, scroll down the page and click the refresh button on the screen rather than the icon, Or try Manage > Central Management > Portal User Sync, and refresh from there.
-
On the collector (C200), log in to the Guardium console as
labaccessmgrwith passwordP@ssw0rd. -
Navigate to Access > Access Management
The User Browser pane opens and you see should your new user form the previous section, Henry Davis, in the User Browser.

If you do not see the new user, wait 5 minutes, then refresh the browser. Also check the second page or filter to find
User01.
-
Log out as
labaccessmgr -
On the collector (C200), log in to the Guardium console as
User01.If your password has expired, a Change your account password dialog opens.
-
Enter the old password of
P@ssw0rd, and then choose a new password that matches the requirements in the dialog. An example might beP@ssw0rd1. Take note or write down this new password for future reference:
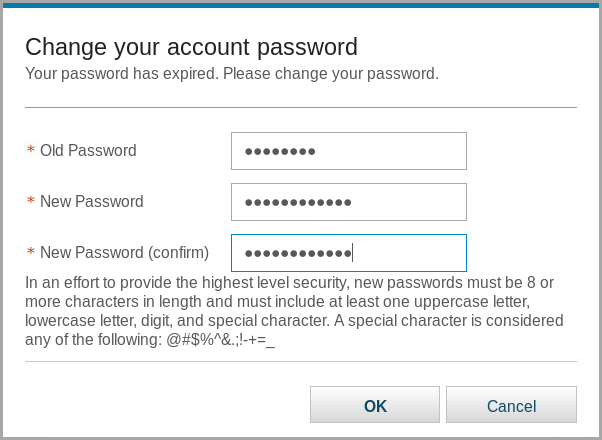
-
Click OK
A Success dialog opens and should show that the password was changed successfully.
-
Close the dialog. The console for
User01should open. -
Explore the console by using the user interface search and the navigation menu and note the features.

A few of the differences from the admin user portal that you might notice are:
– The Manage and Application icons are not available in the navigation menu.
– There are fewer reports listed under the Reports icon. Specifically, the Guardium Configuration Items and Monitoring of Guardium System report categories are unavailable.
– There are fewer options under Harden > Vulnerability Assessment.
- Log out of
User01
Congratulations, this is the end of Lab 201, you have successfully completed this lab where you learend how to create new users, create new roles, and assign roles to users.
Continue onward to Lab 202