103: Alerting and Synthetics
Alerting
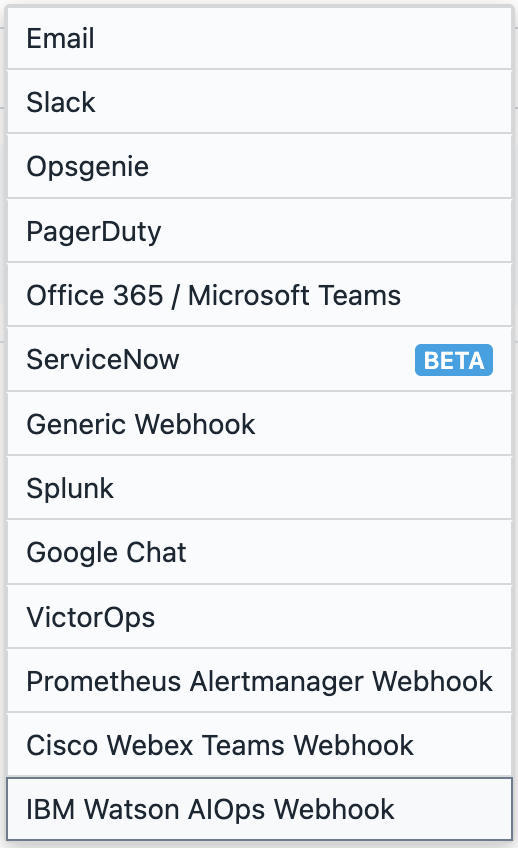
Instana currently supports 13 technologies for alert channels. The full list of available technologies is below:
Adding Slack as an alert channel
In order to create alerts, we first need to create an alert channel. This is a simple process that involves adding an incoming webhook to Slack for a specific Slack channel. To avoid having each person create a new channel, we will just use an existing one for this lab.
In your provided Slack Workspace please join the #instana-alerts channel in Slack.
For the Webhook URL, look for the pinned message in the #instana-alerts channel that will contain the URL.
Creating an alert channel
-
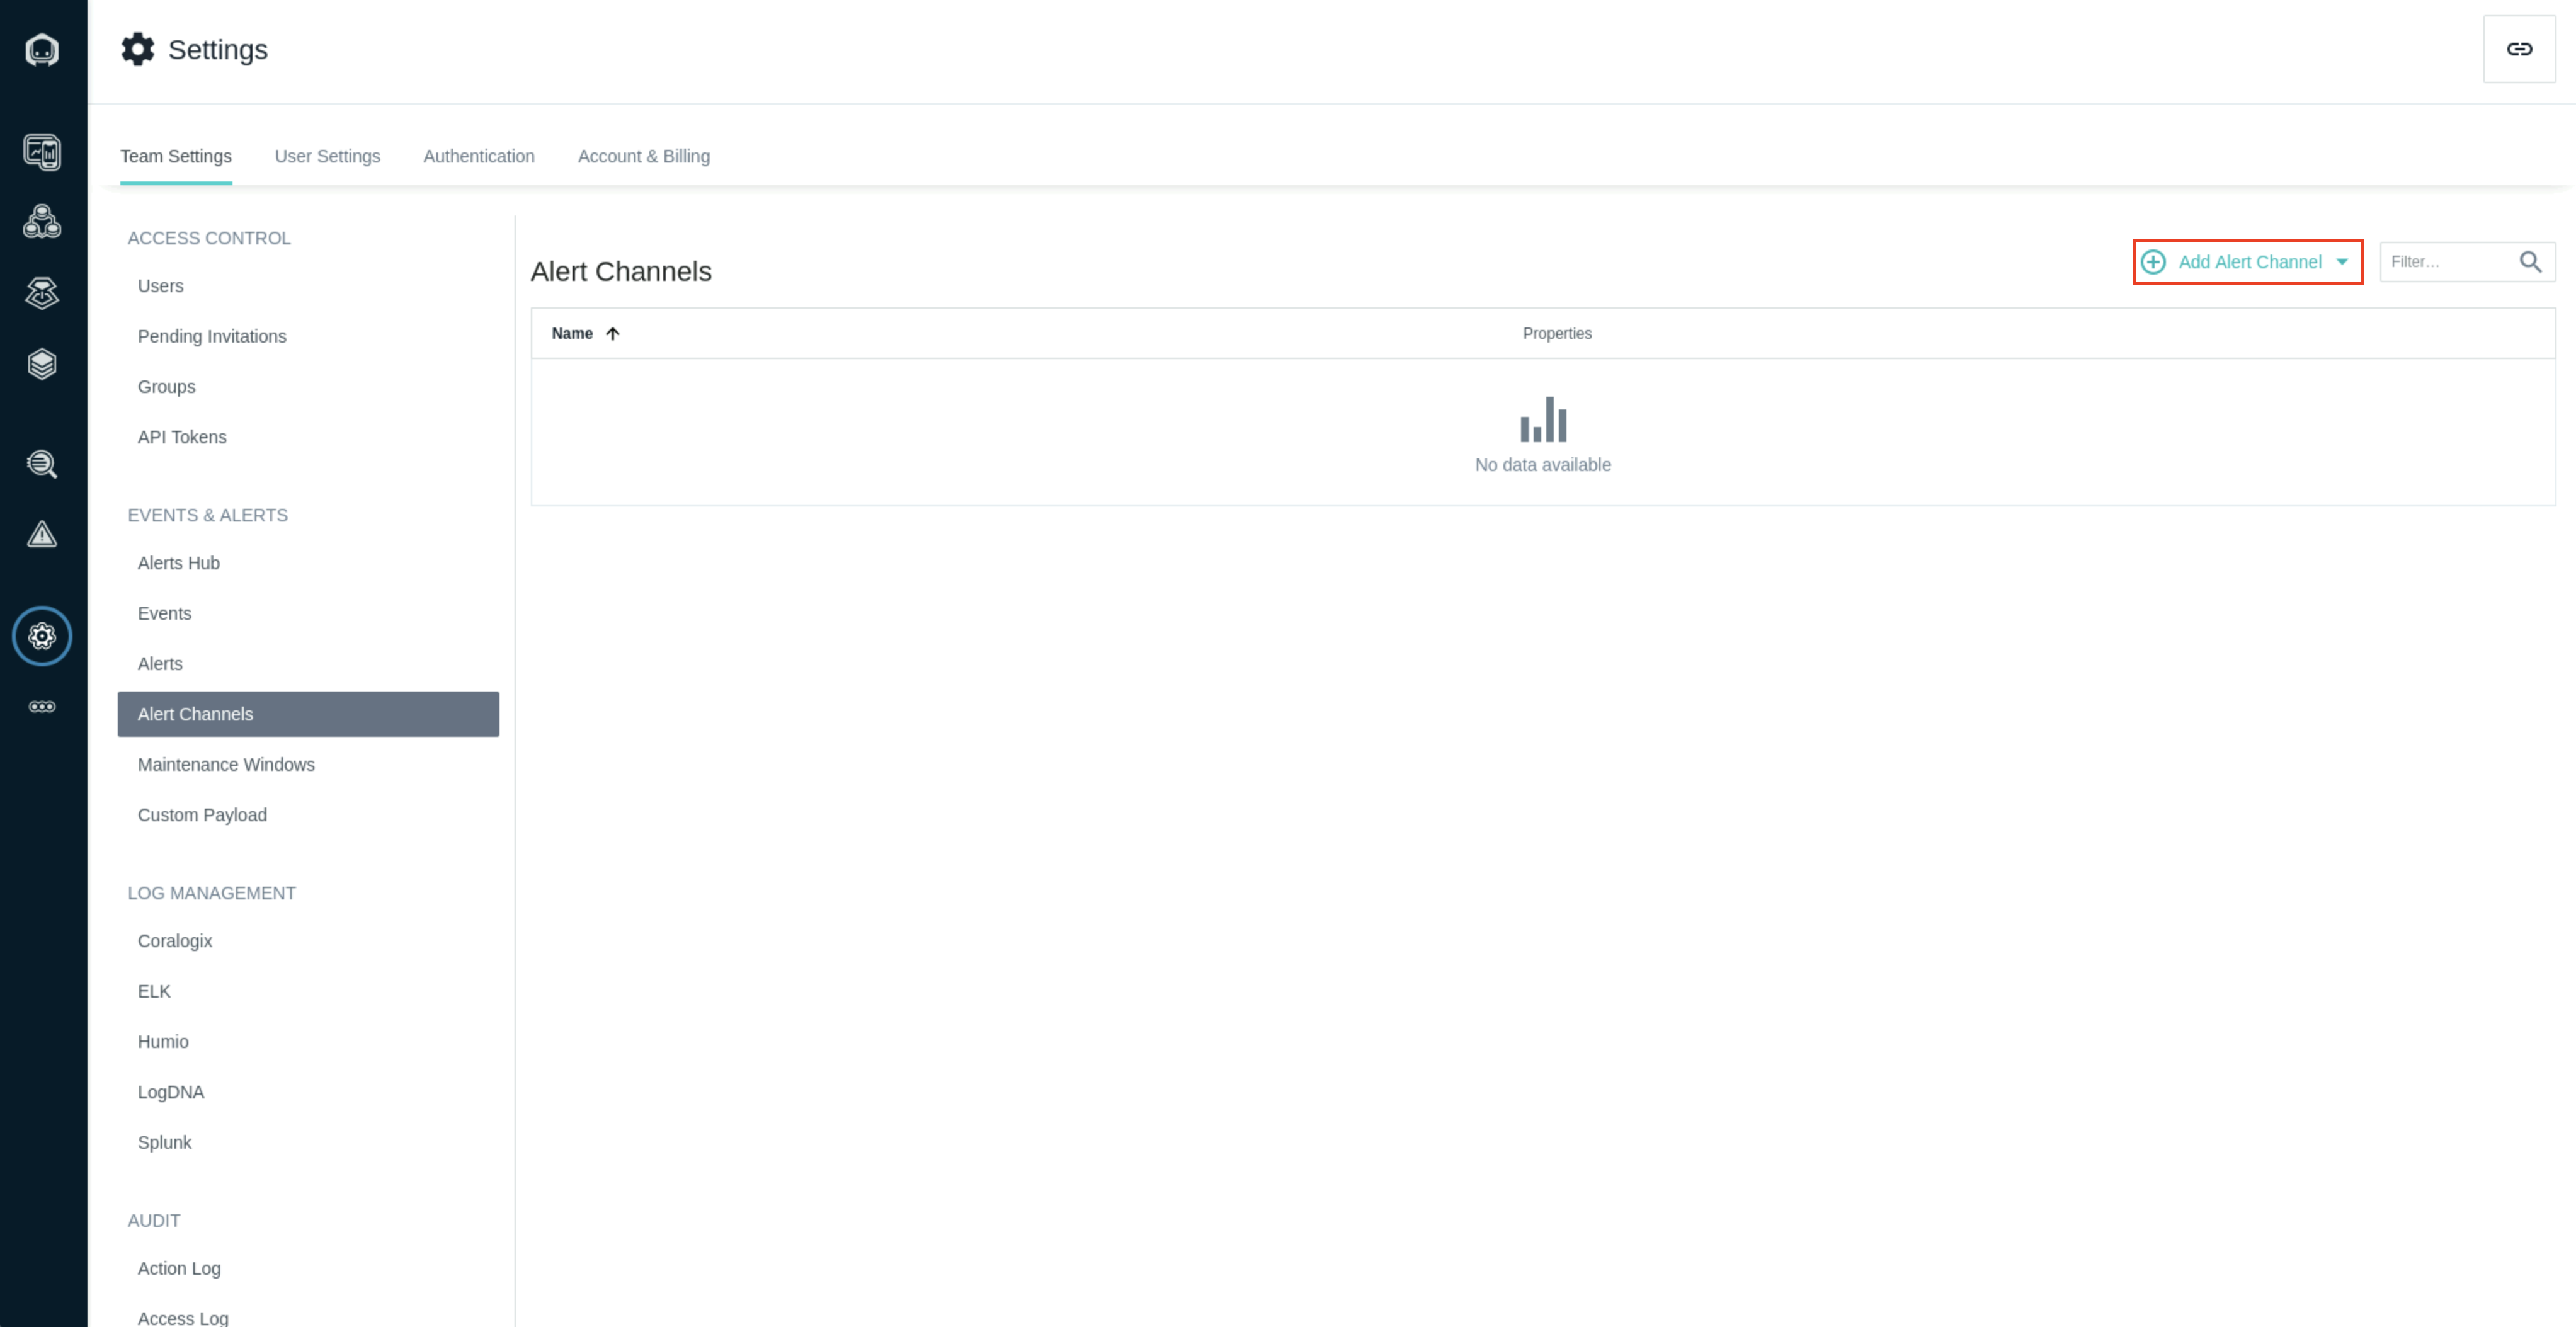
In the left-hand navigation sidebar, click on the Settings section.
-
In Settings page, on the left-hand navigation sidebar, click on the Alert Channels section. Then click on the Add Alert Channel field and select Slack.
-
From the newly opened Create Slack Alert Channel page, fill out the requested information using the following details;
-
Name:
<your-name>-slack-channel -
Webhook URL: Refer to the pinned message in the #instana-alerts channel in your Slack workspace
-
Icon URL (optional): Can be left blank or provide an PNG icon image URL to differentiate your Slack channel alerts
-
Channel Name:
instana-alerts
Once complete, hit Test Channel to ensure everything is setup correctly, you should see a green box indicating a successful channel test. Hit
Createto create you new Alert Channel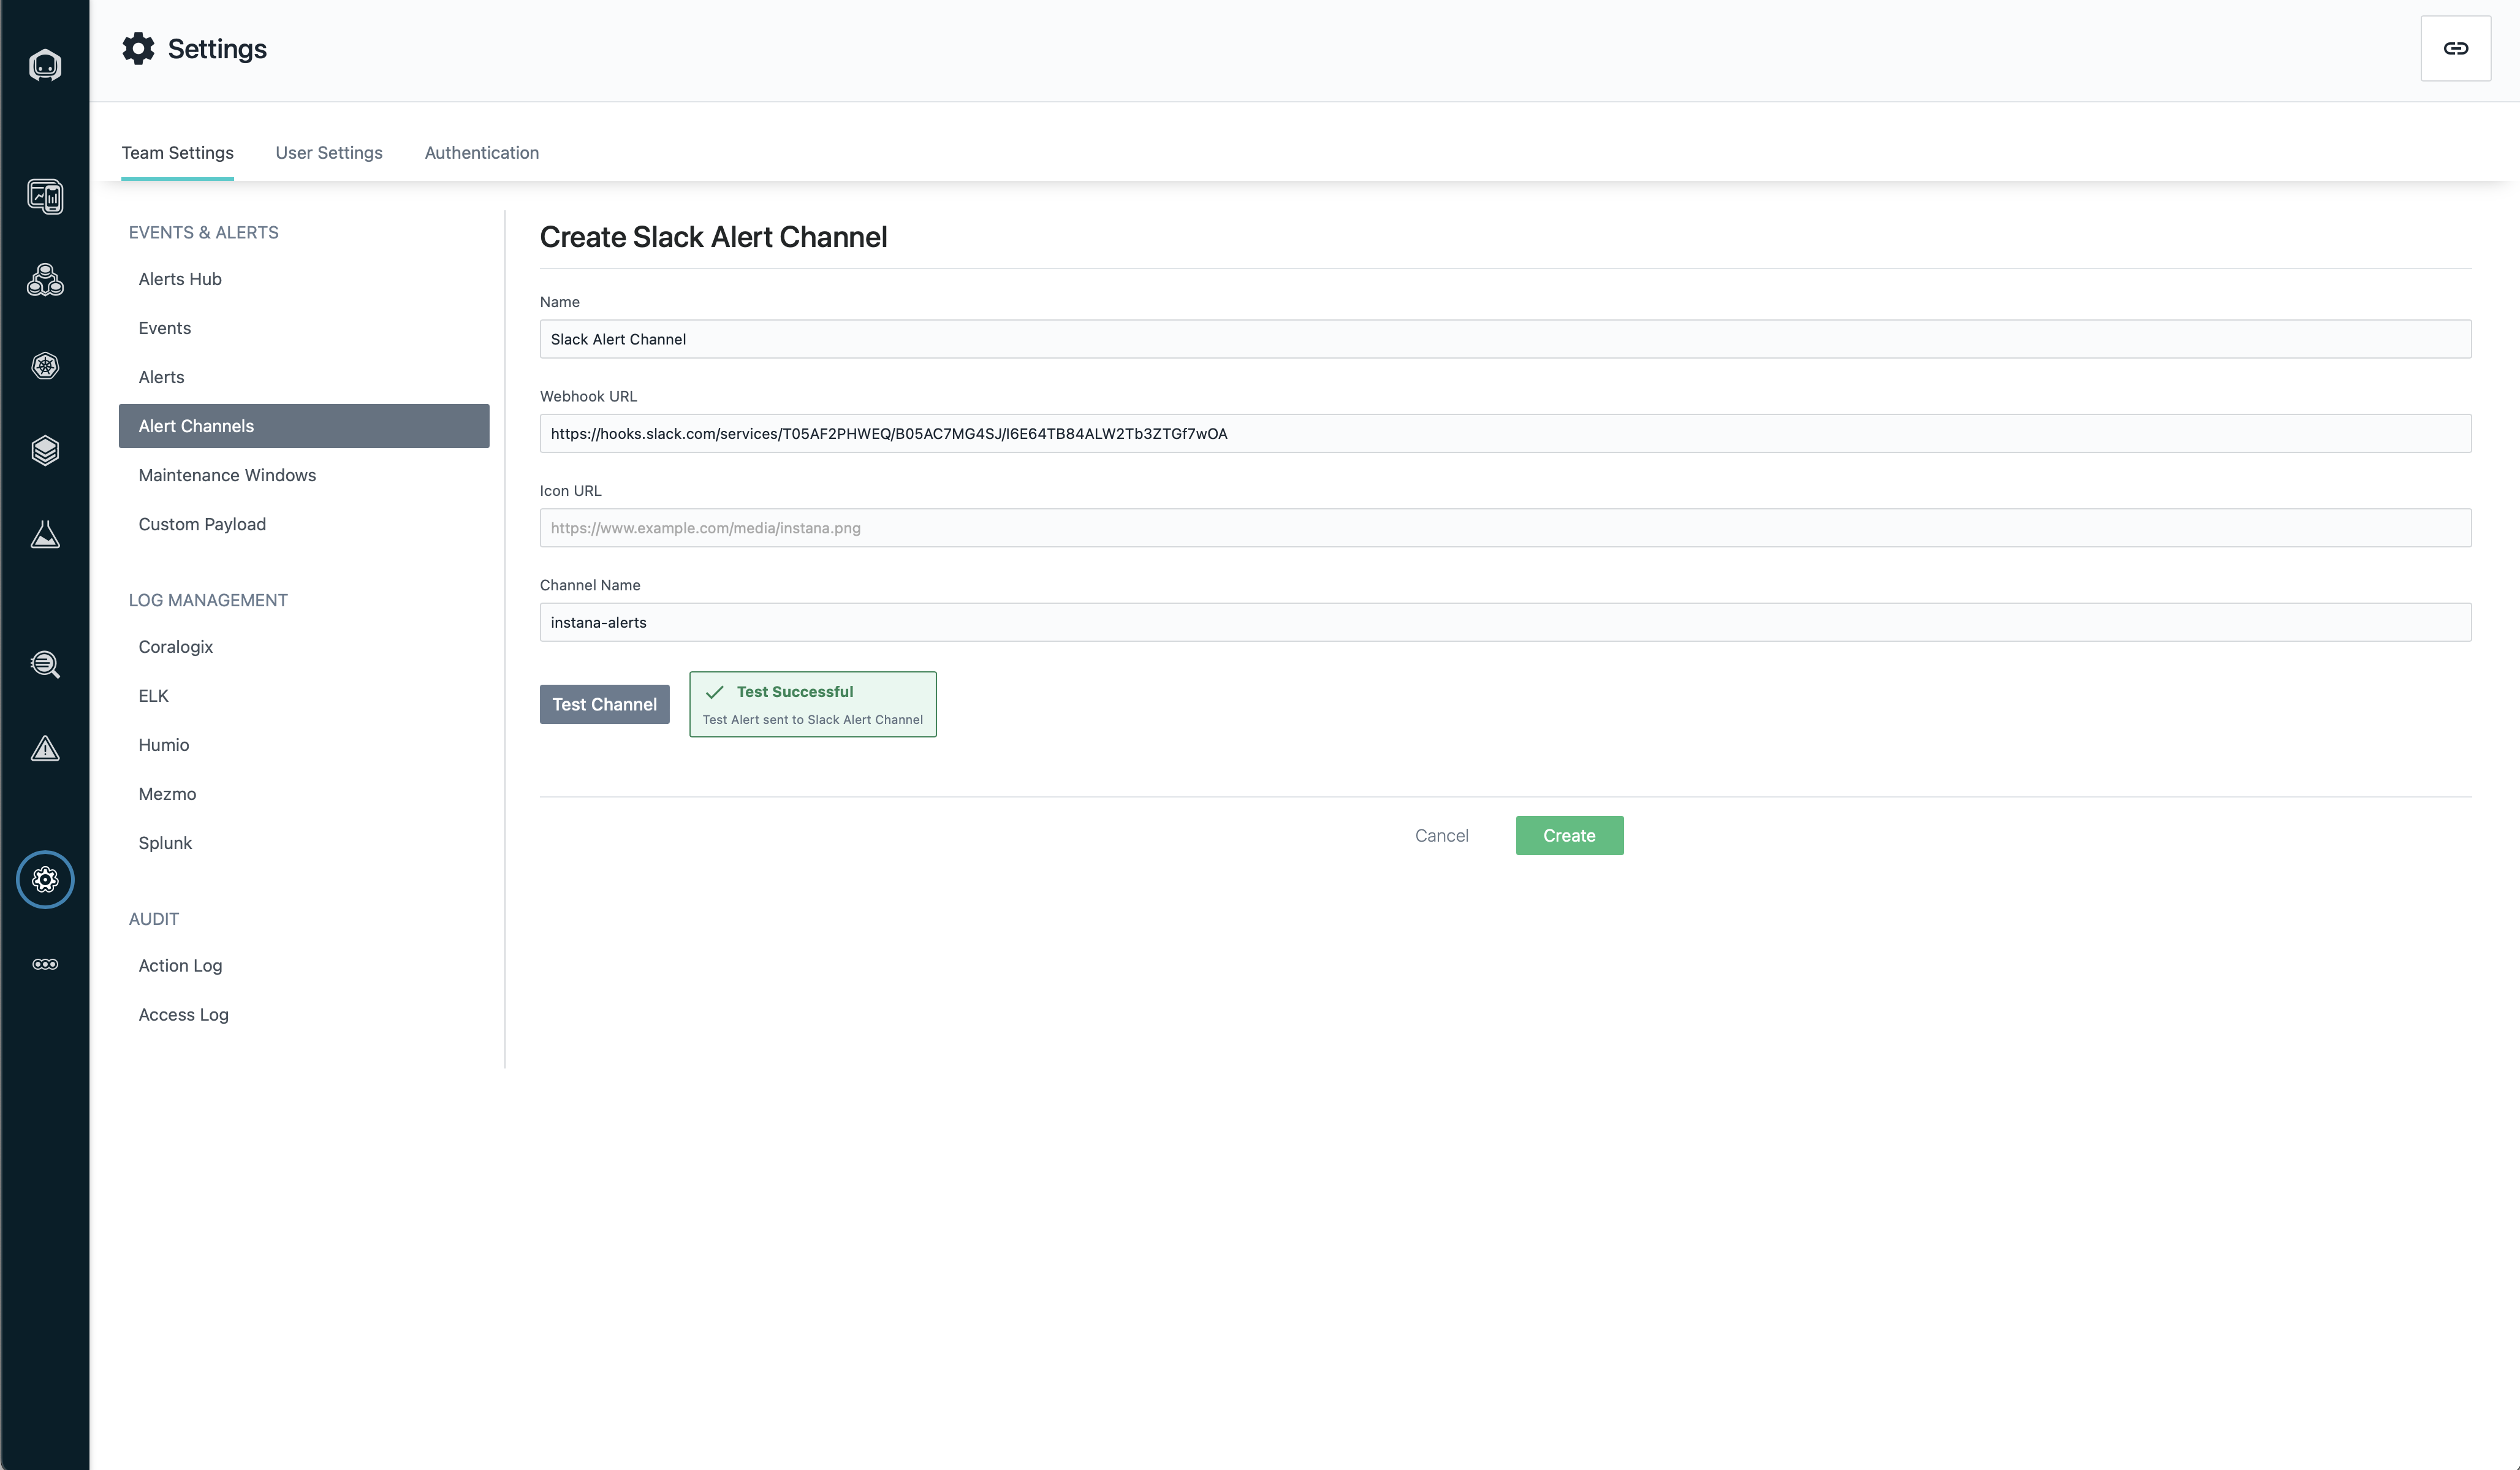
-
Sending specific events to the channel
With the channels already created, we can proceed to decide which alerts we want to push to Slack. For this demo we will push all robot-shop issues to the Slack channel.
-
In the left-hand navigation sidebar, click on the Settings section.
-
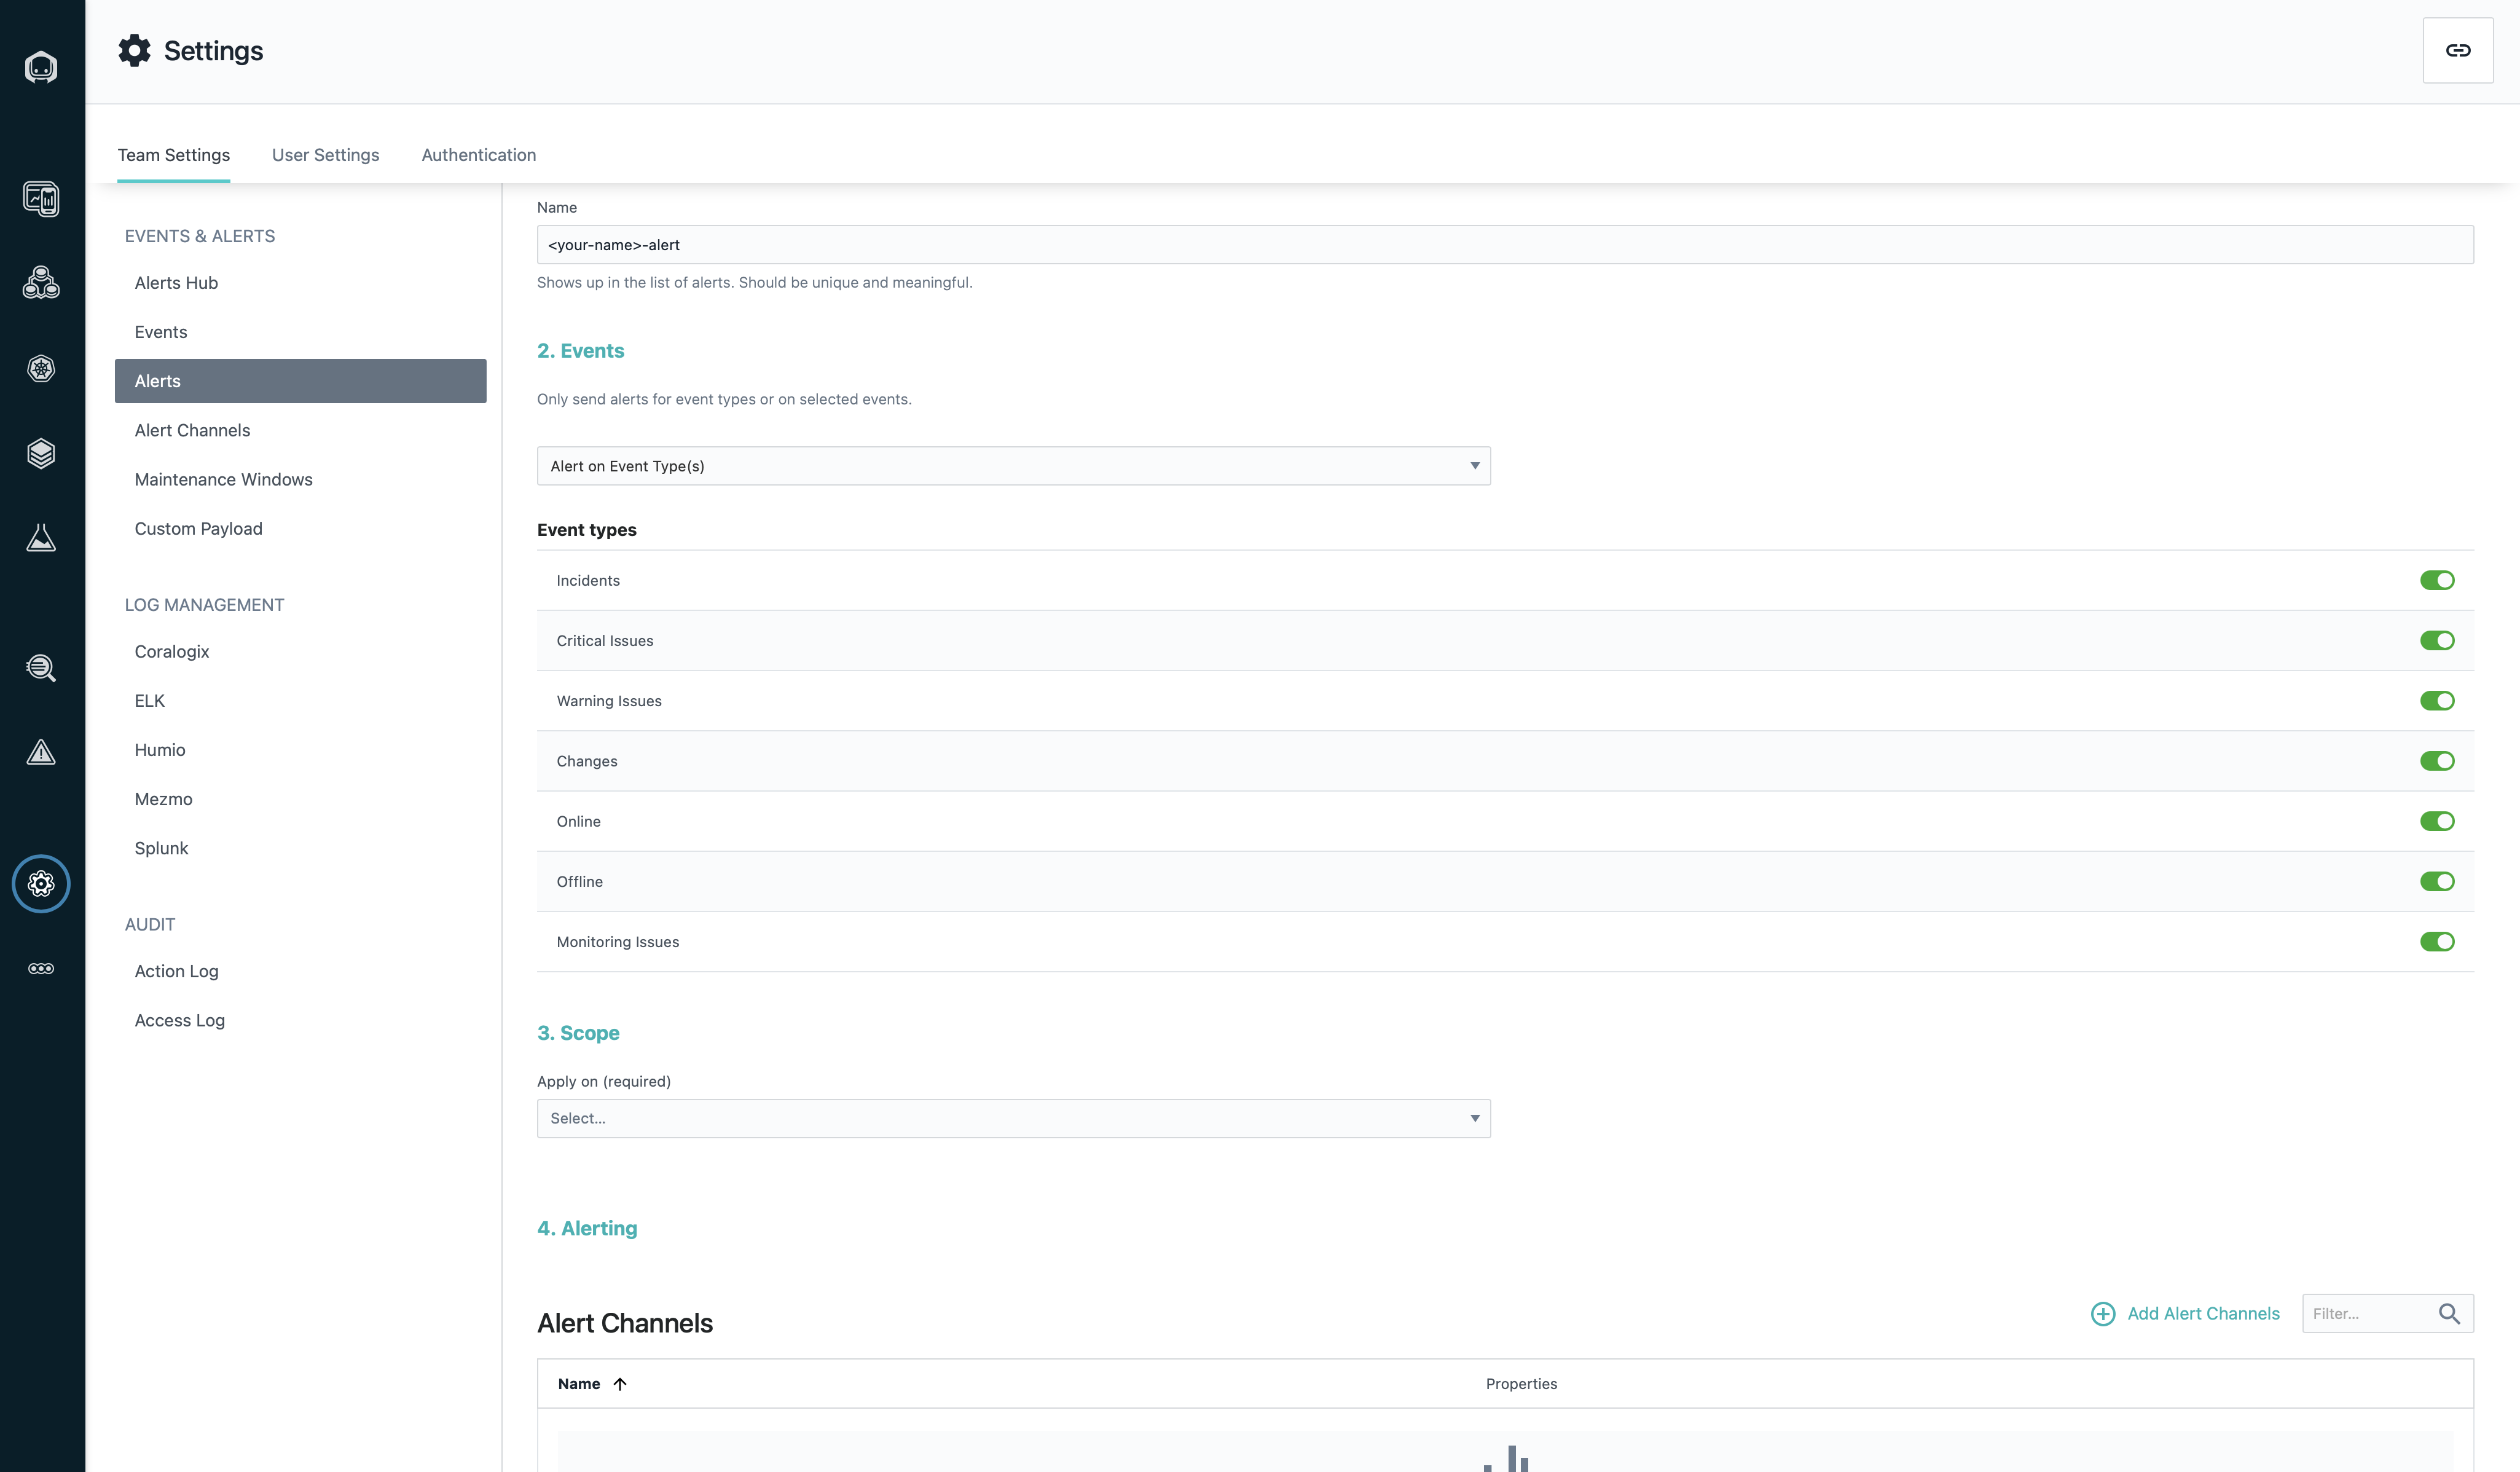
In Settings page, on the left-hand navigation sidebar, click on the Alerts section which is just above the Alert Channels. Then click on the New Alert field
-
For the name use this pattern,
<your-name>-alert -
Under Events, choose the Alert on Event Type(s) option, and then toggle all of the options. This will allow us to showcase how different events show up in Slack.
-
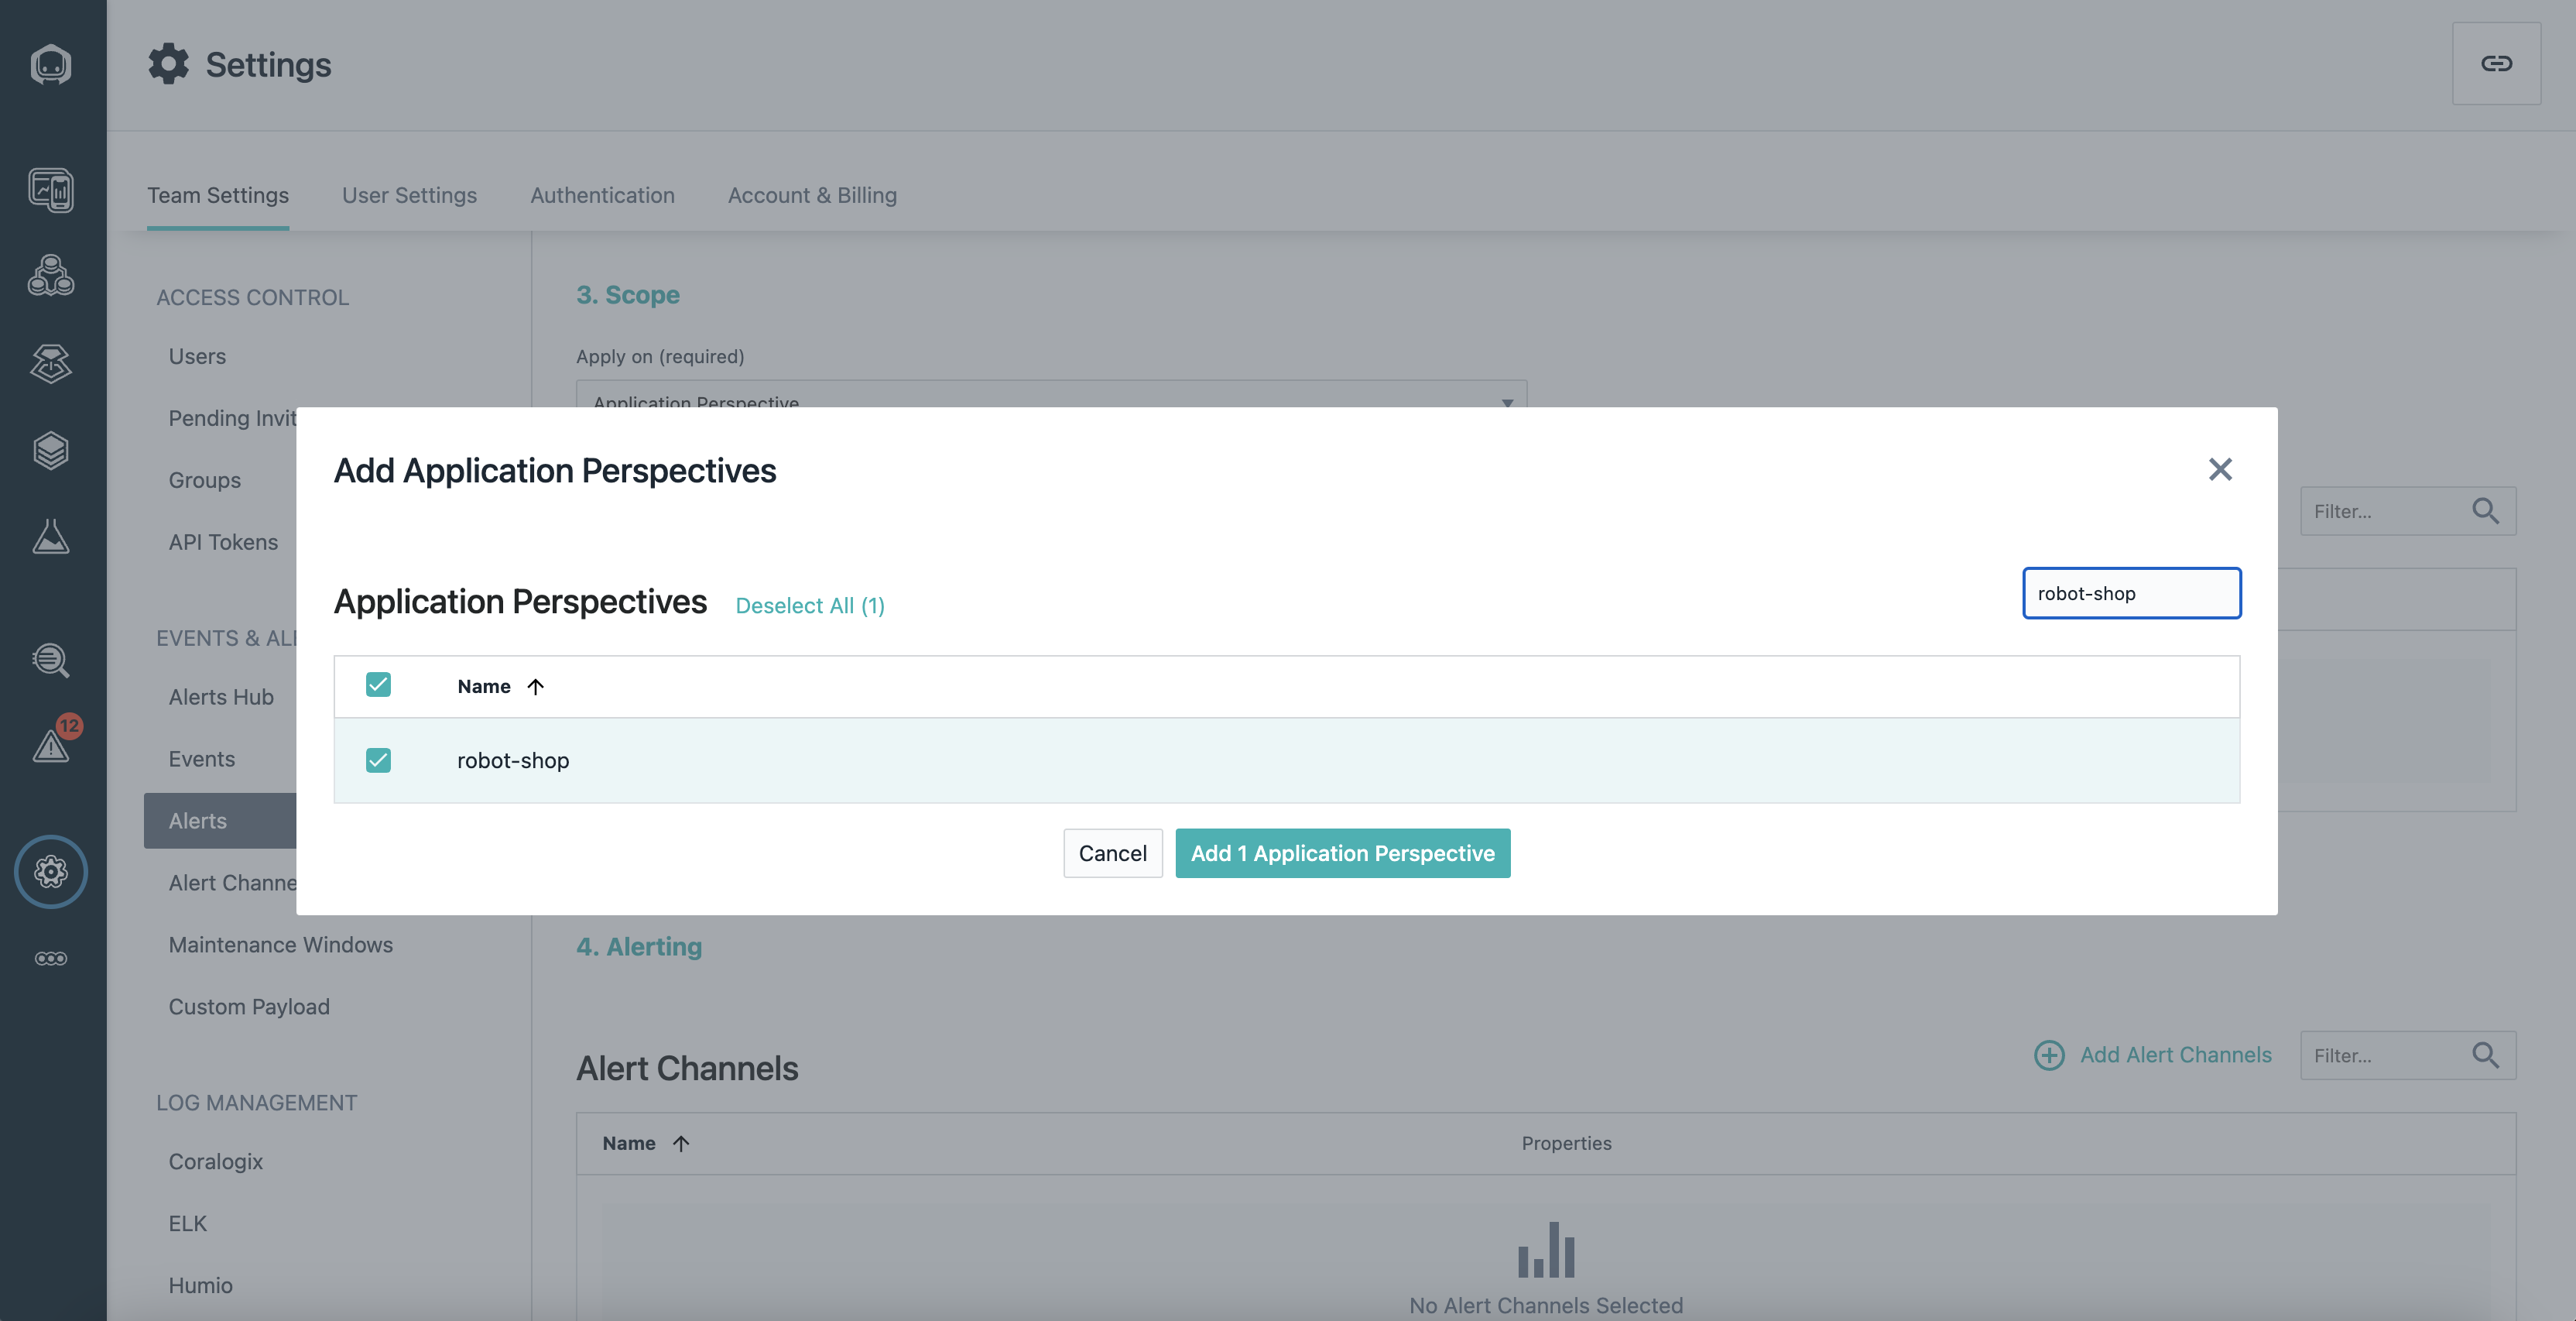
Under Scope, choose the Application Perspective option, and then select the Add Application Perspectives option. Then Select All of the options.
Note: If you are using Instana to observe multiple applications, you can add alerts from multiple different applications at once, or you can create multiple alerts, one for each perspective.
-
Under Alert Channels, select the channel you created in the earlier steps <your-name>-slack-channel
-
In the
Custom Payloadssection, click Add Row and enterworkshop-userfor the custom key; for the value enter your name or something that uniquely identifies you such as your initials. Since we will all be using the same Slack Channel for this lab, these custom payloads will be able to help us identify which events belong to whose Instana instance.
-
Once complete click Create. This channel will allow Instana to post to the #instana-alerts Slack channel. Wait a few minutes and watch for events within the #instana-alerts Slack channel, be sure to watch for events that contain your custom payload to uniquely identify the events from your Instana instance.
That's it! Now as events are generated from Instana, they will be pushed to the Slack channel. This powerful, flexible alerting method allows for need specific alerting, such as using different Slack channels for alerts of different severity, or even paging out developers from PagerDuty for critical issues as they arise.
Synthetics
Synthetics are brand new in Instana! They allow for simulated user experiences in your application, and monitoring for various performance characteristics.
Note: Synthetics are only available in a SaaS instance, not on-prem.
While outside the scope of this lab, given that we are using on-prem Instana instances, directions are provided here to help support you in the future, should you decice to try out this feature within the SaaS version of Instana.
For this section we will be creating synthetics to monitor our application. In order to create a synthetic test, you must first have a Point of Presence (PoP) installed and running. Multiple PoPs can be deployed to clusters in various geographic regions to simulate user experience for those regions. Instructions for deploying PoPs can be found here. This is out of scope for this lab, and we will be using an existing PoP already registered in the Instana dashboard.
-
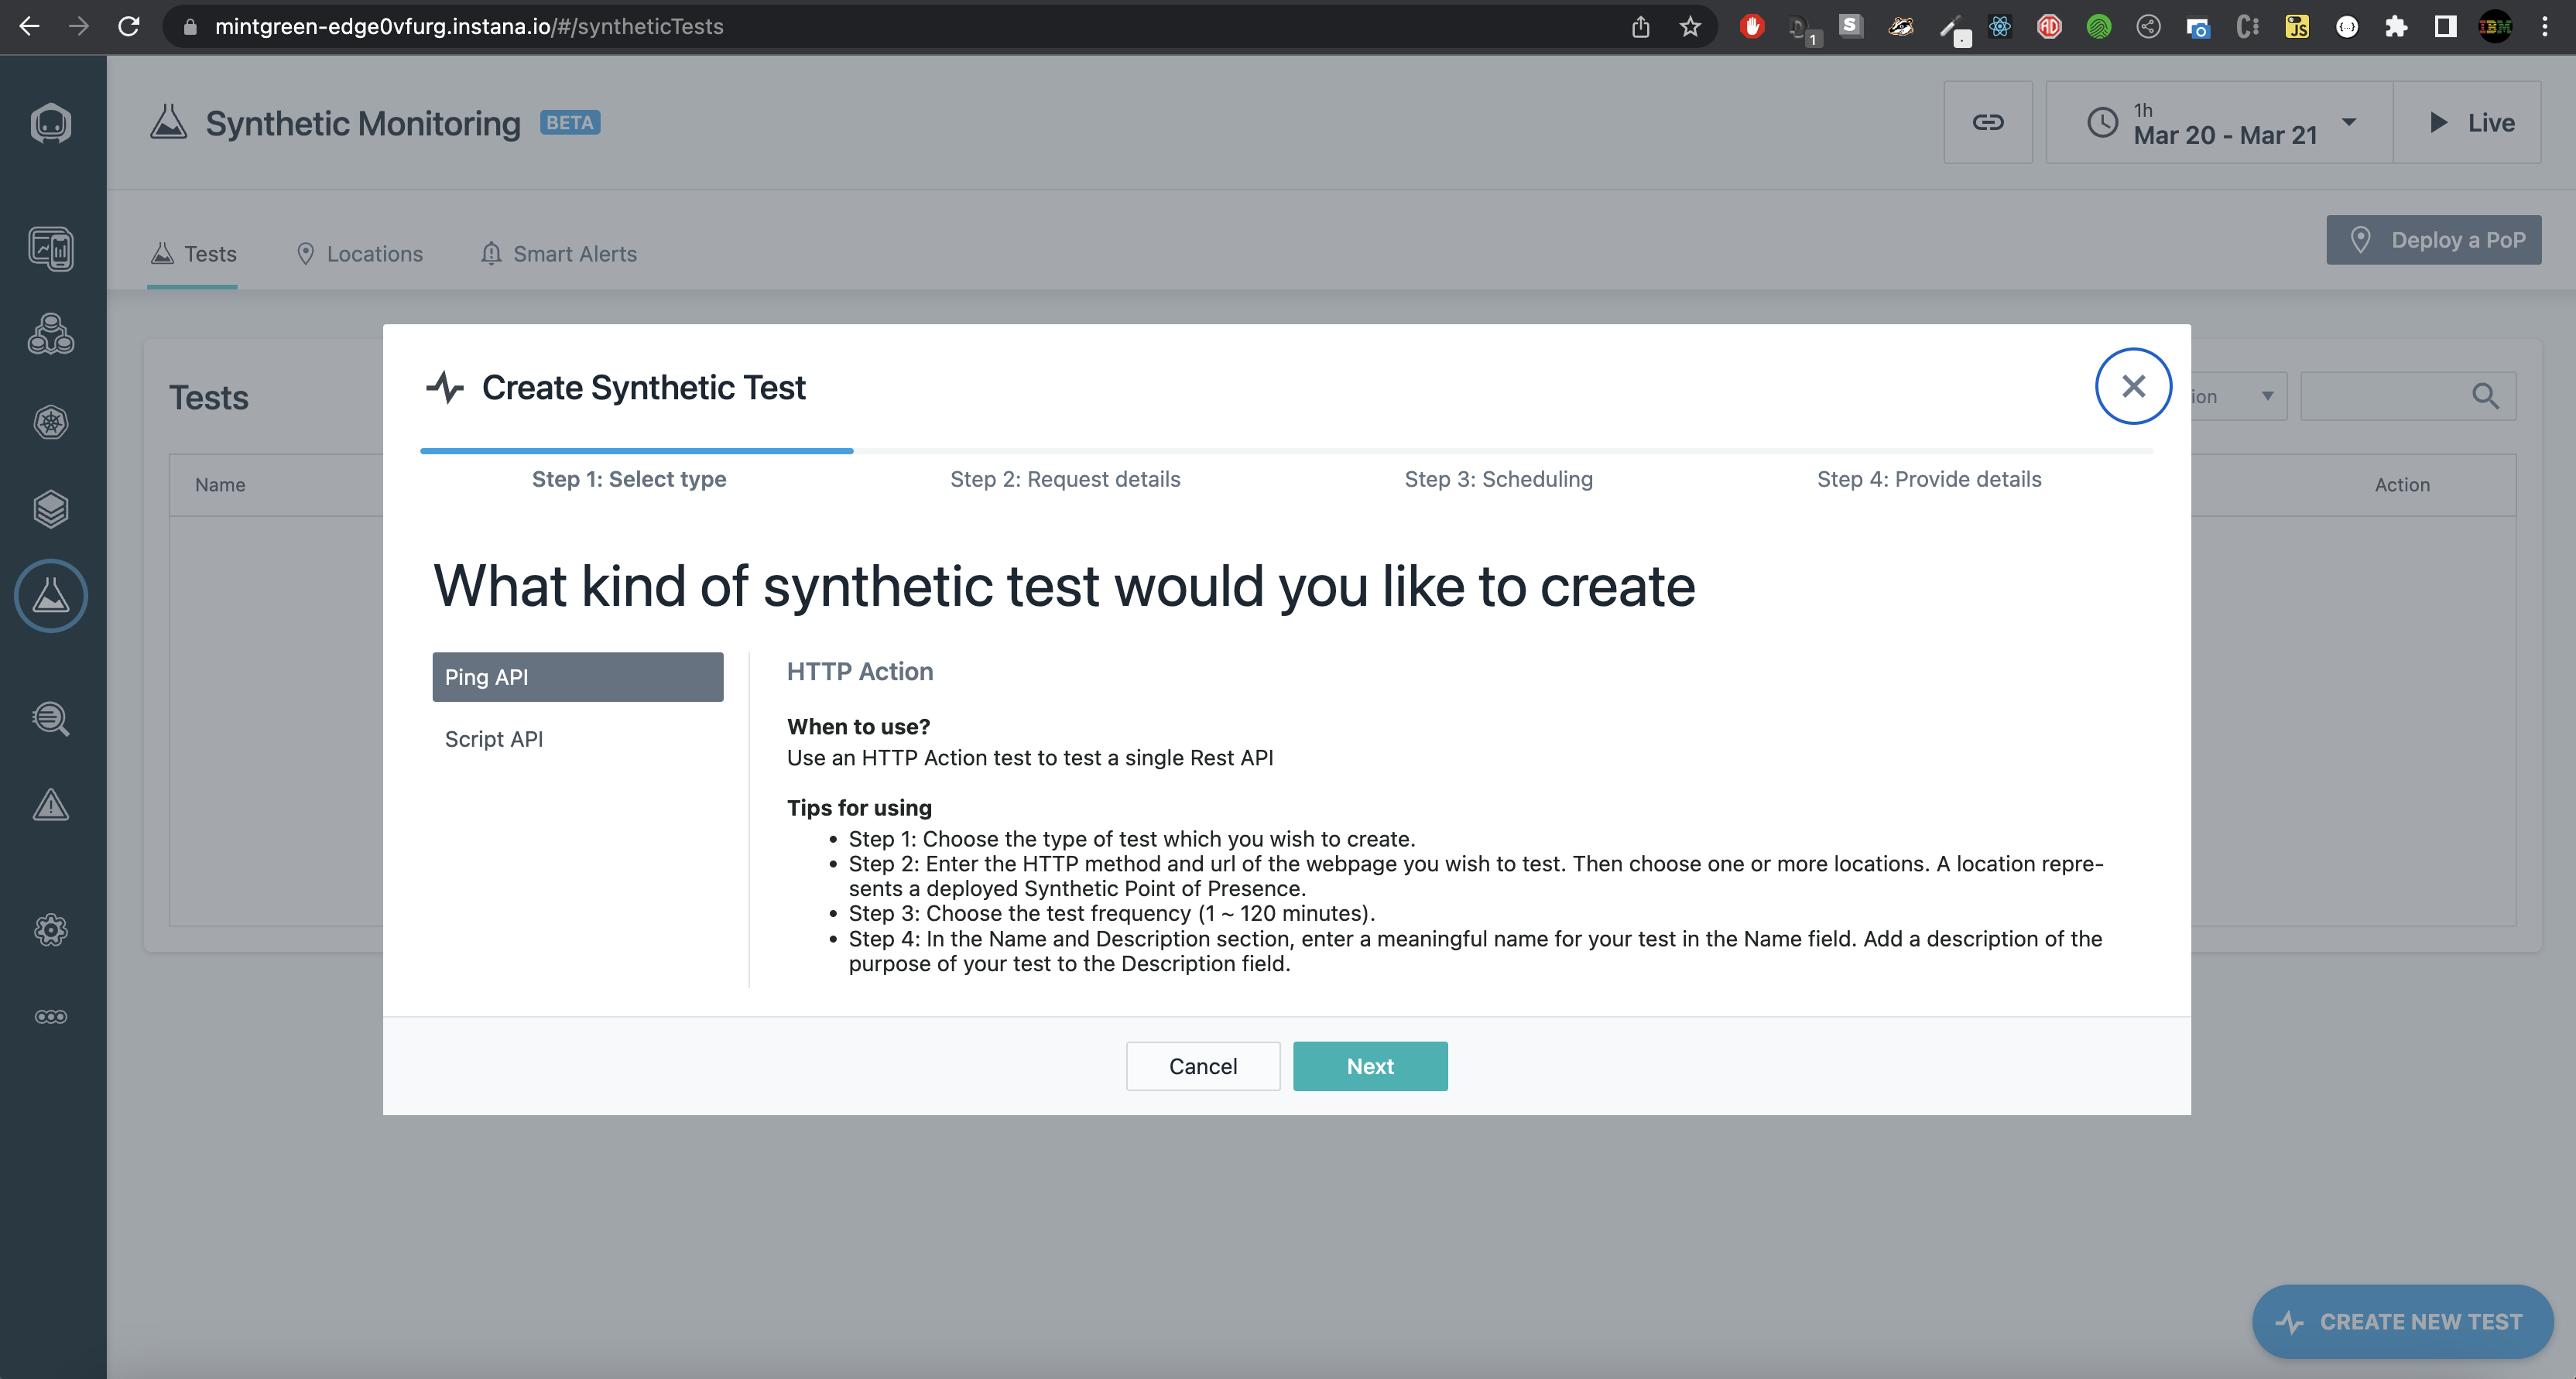
In the Instana SaaS instance (https://sandbox-partner.instana.io/#/home) navigate to Synthetic Monitoring in the left-hand side navigation, and click on Create New Test.
-
To get familiar with the functionality, we will create a ping synthetic.
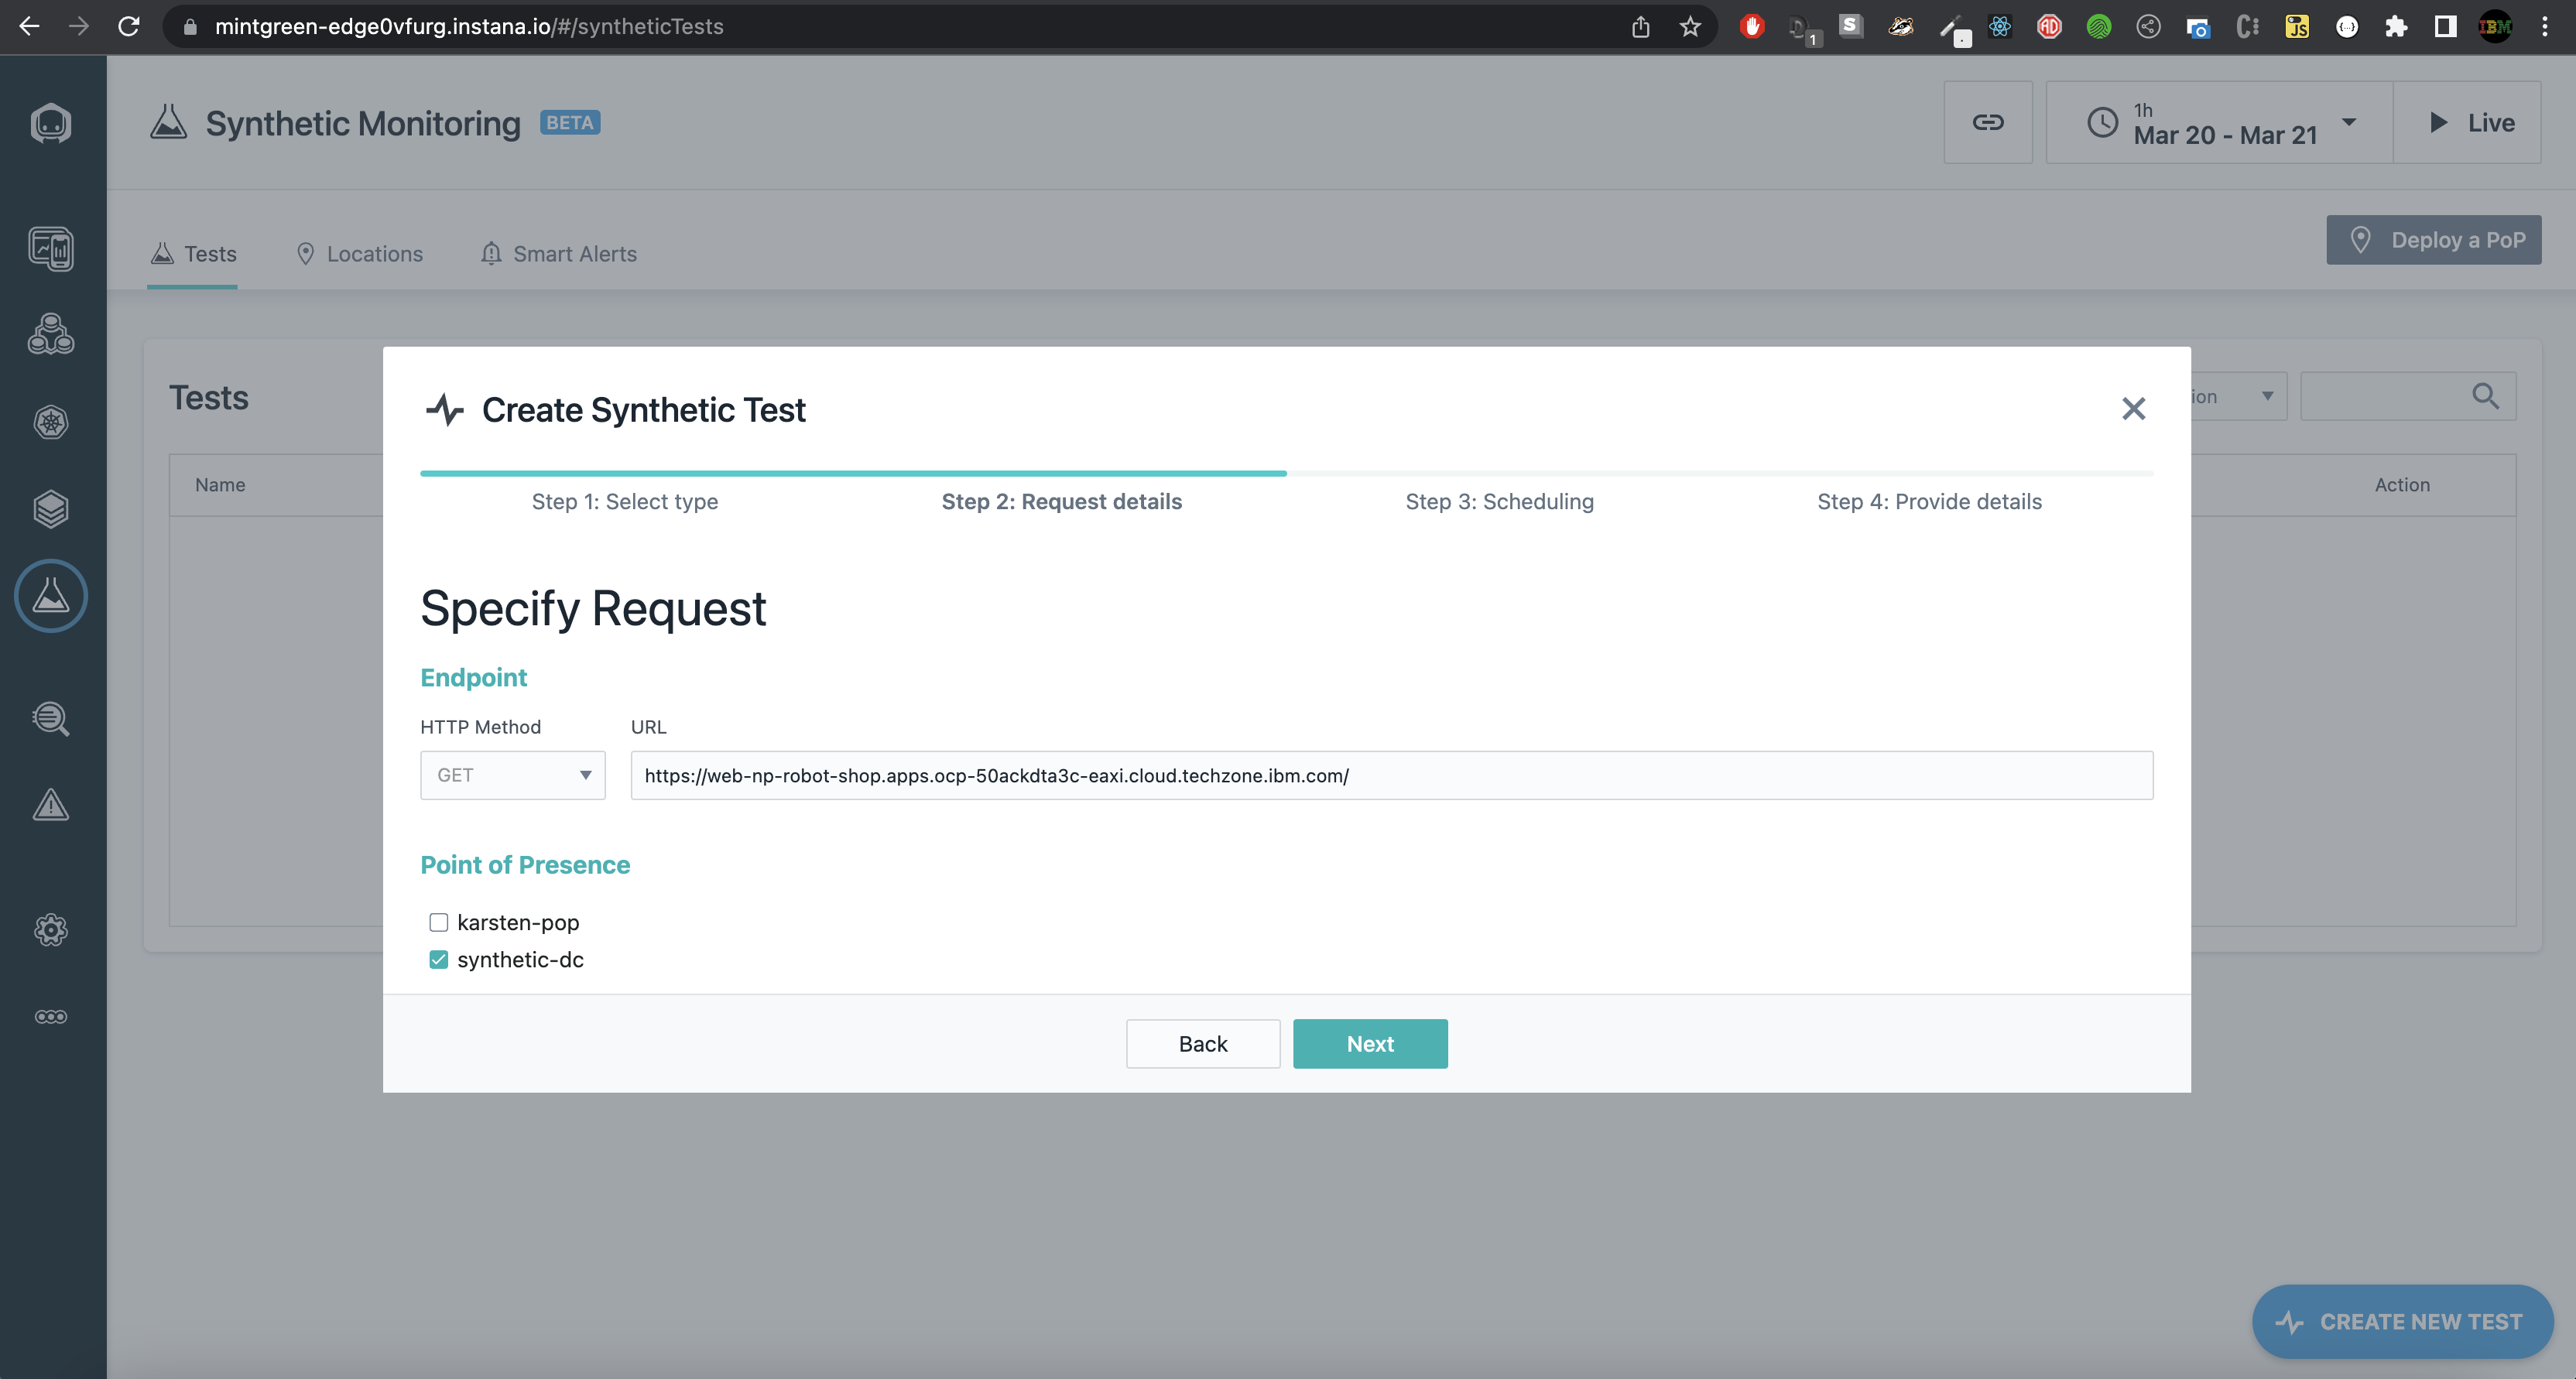
Under Step 2: Request Details add URL for the specific region of your application and choose synthetic-dc as the Point of Presence. Click Next.
-
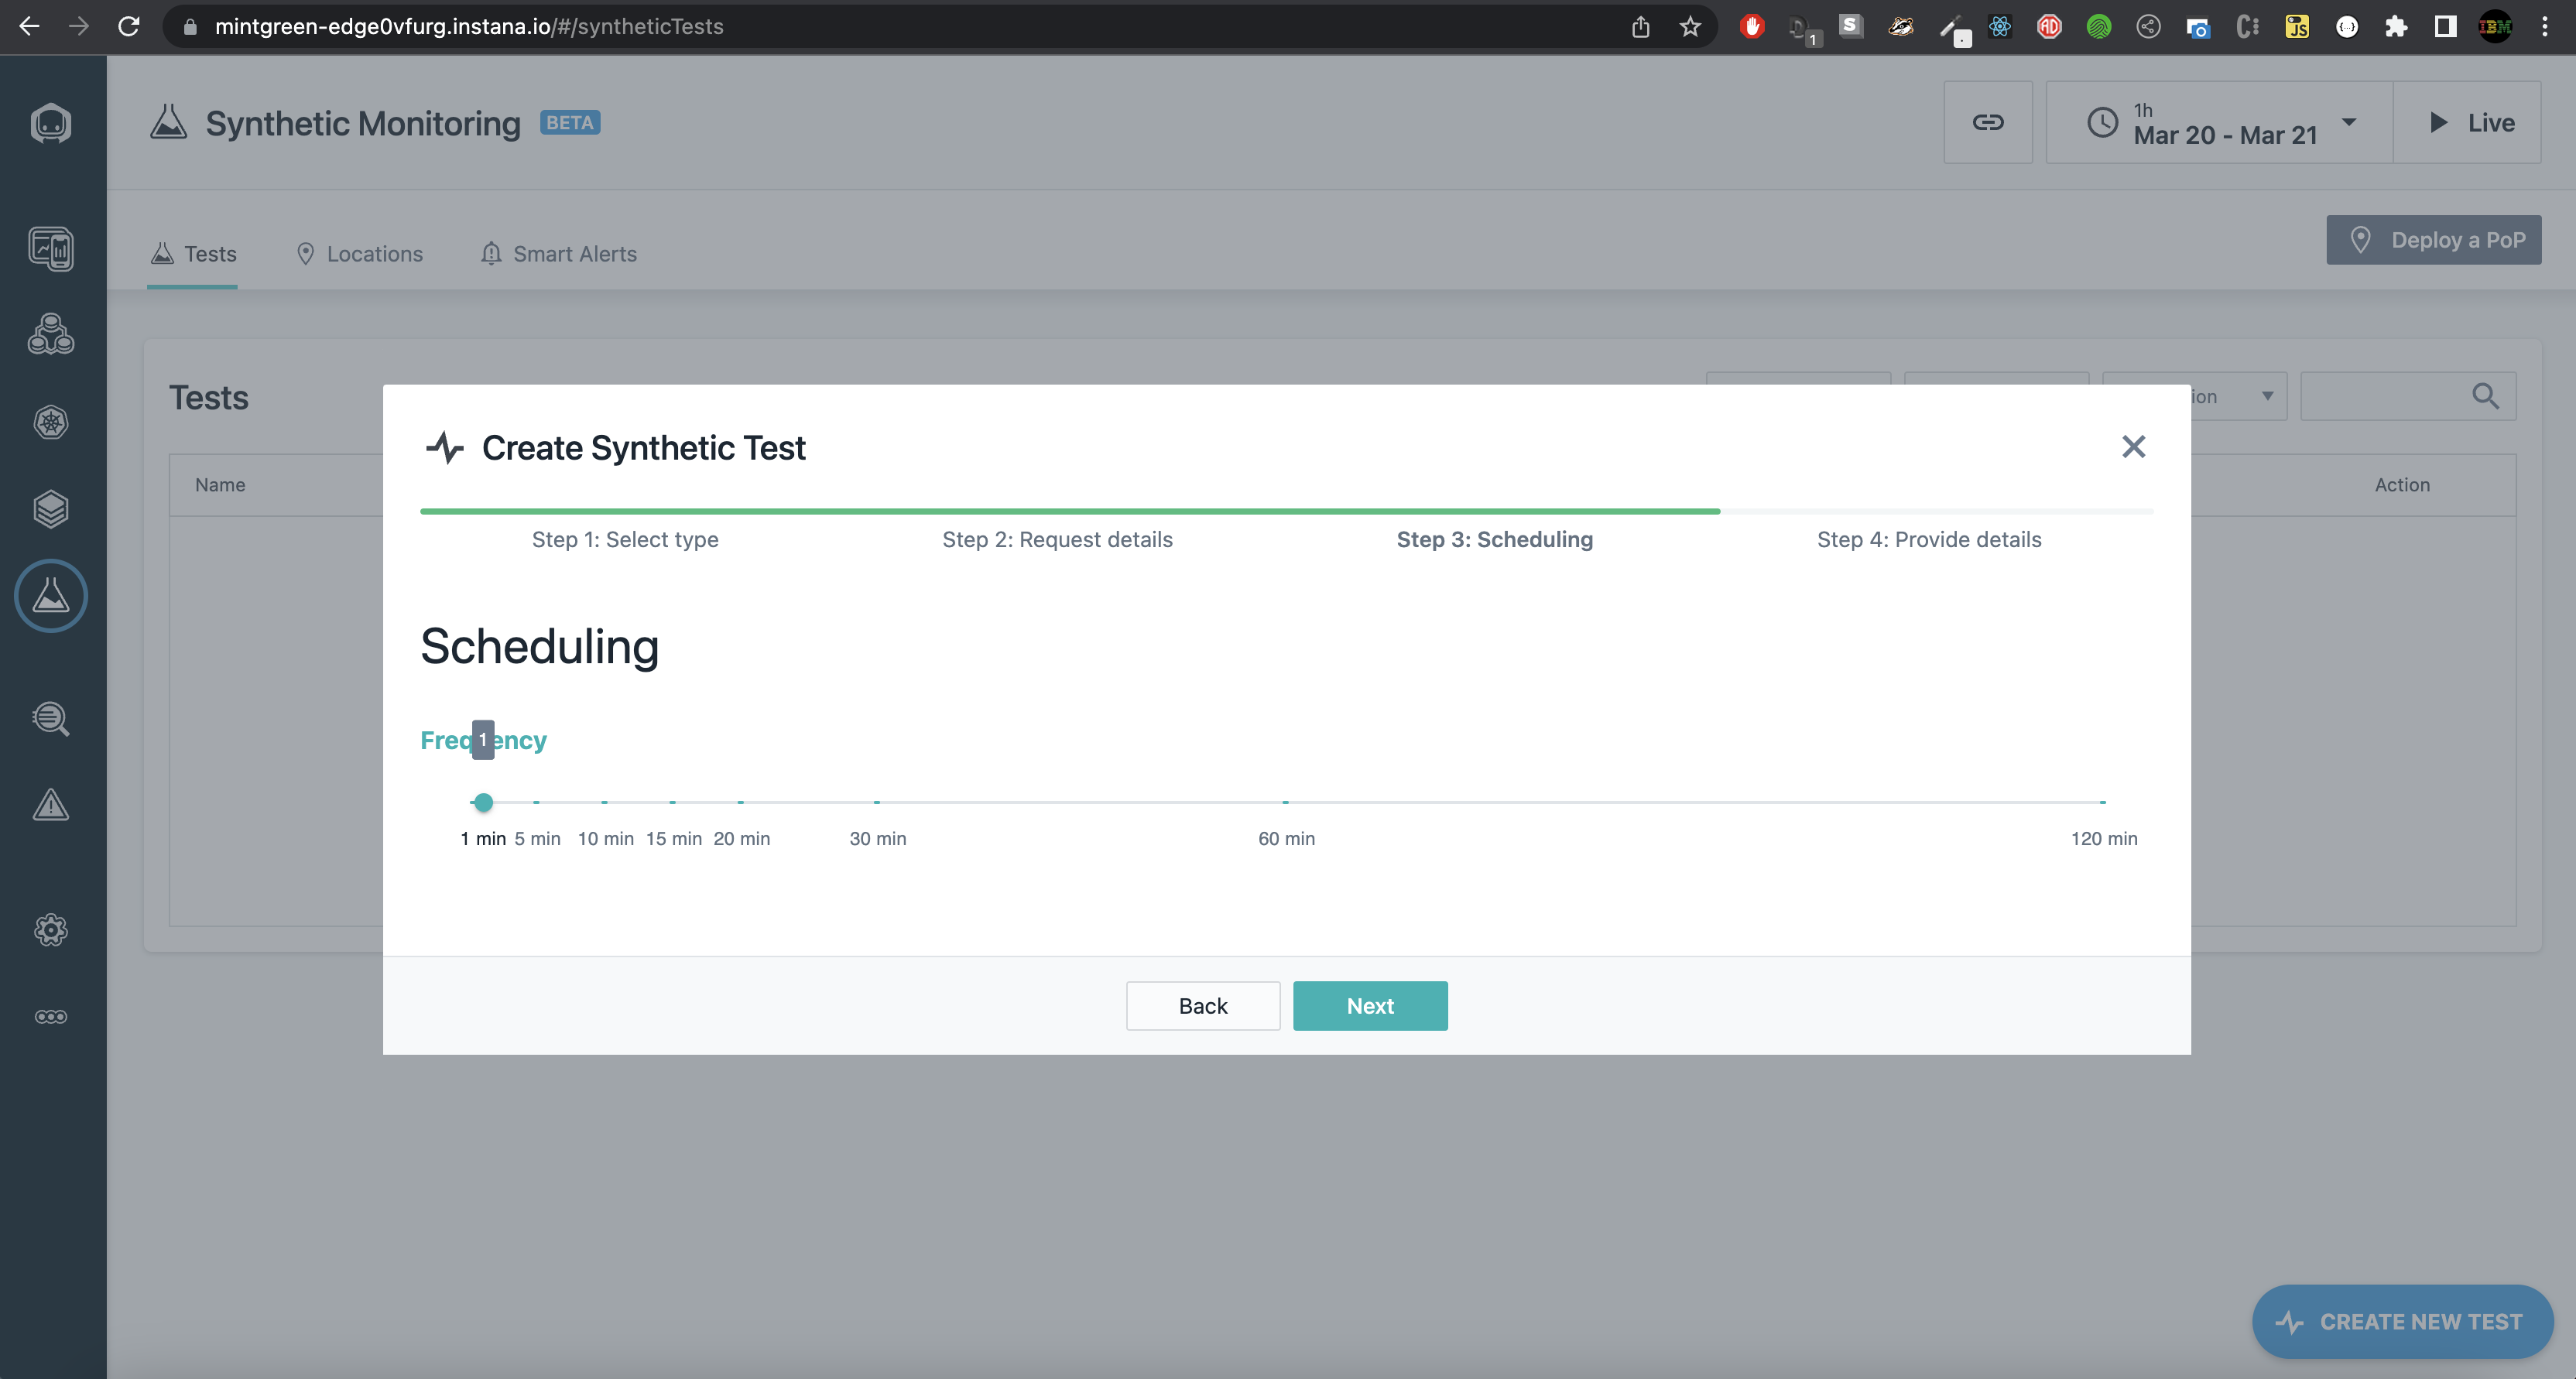
For Frequency choose 1 Minute, and then click next.
-
Name your synthetic using this pattern
<your name>-synthetic, and provide an optional description. Check All Services and then click the Create button.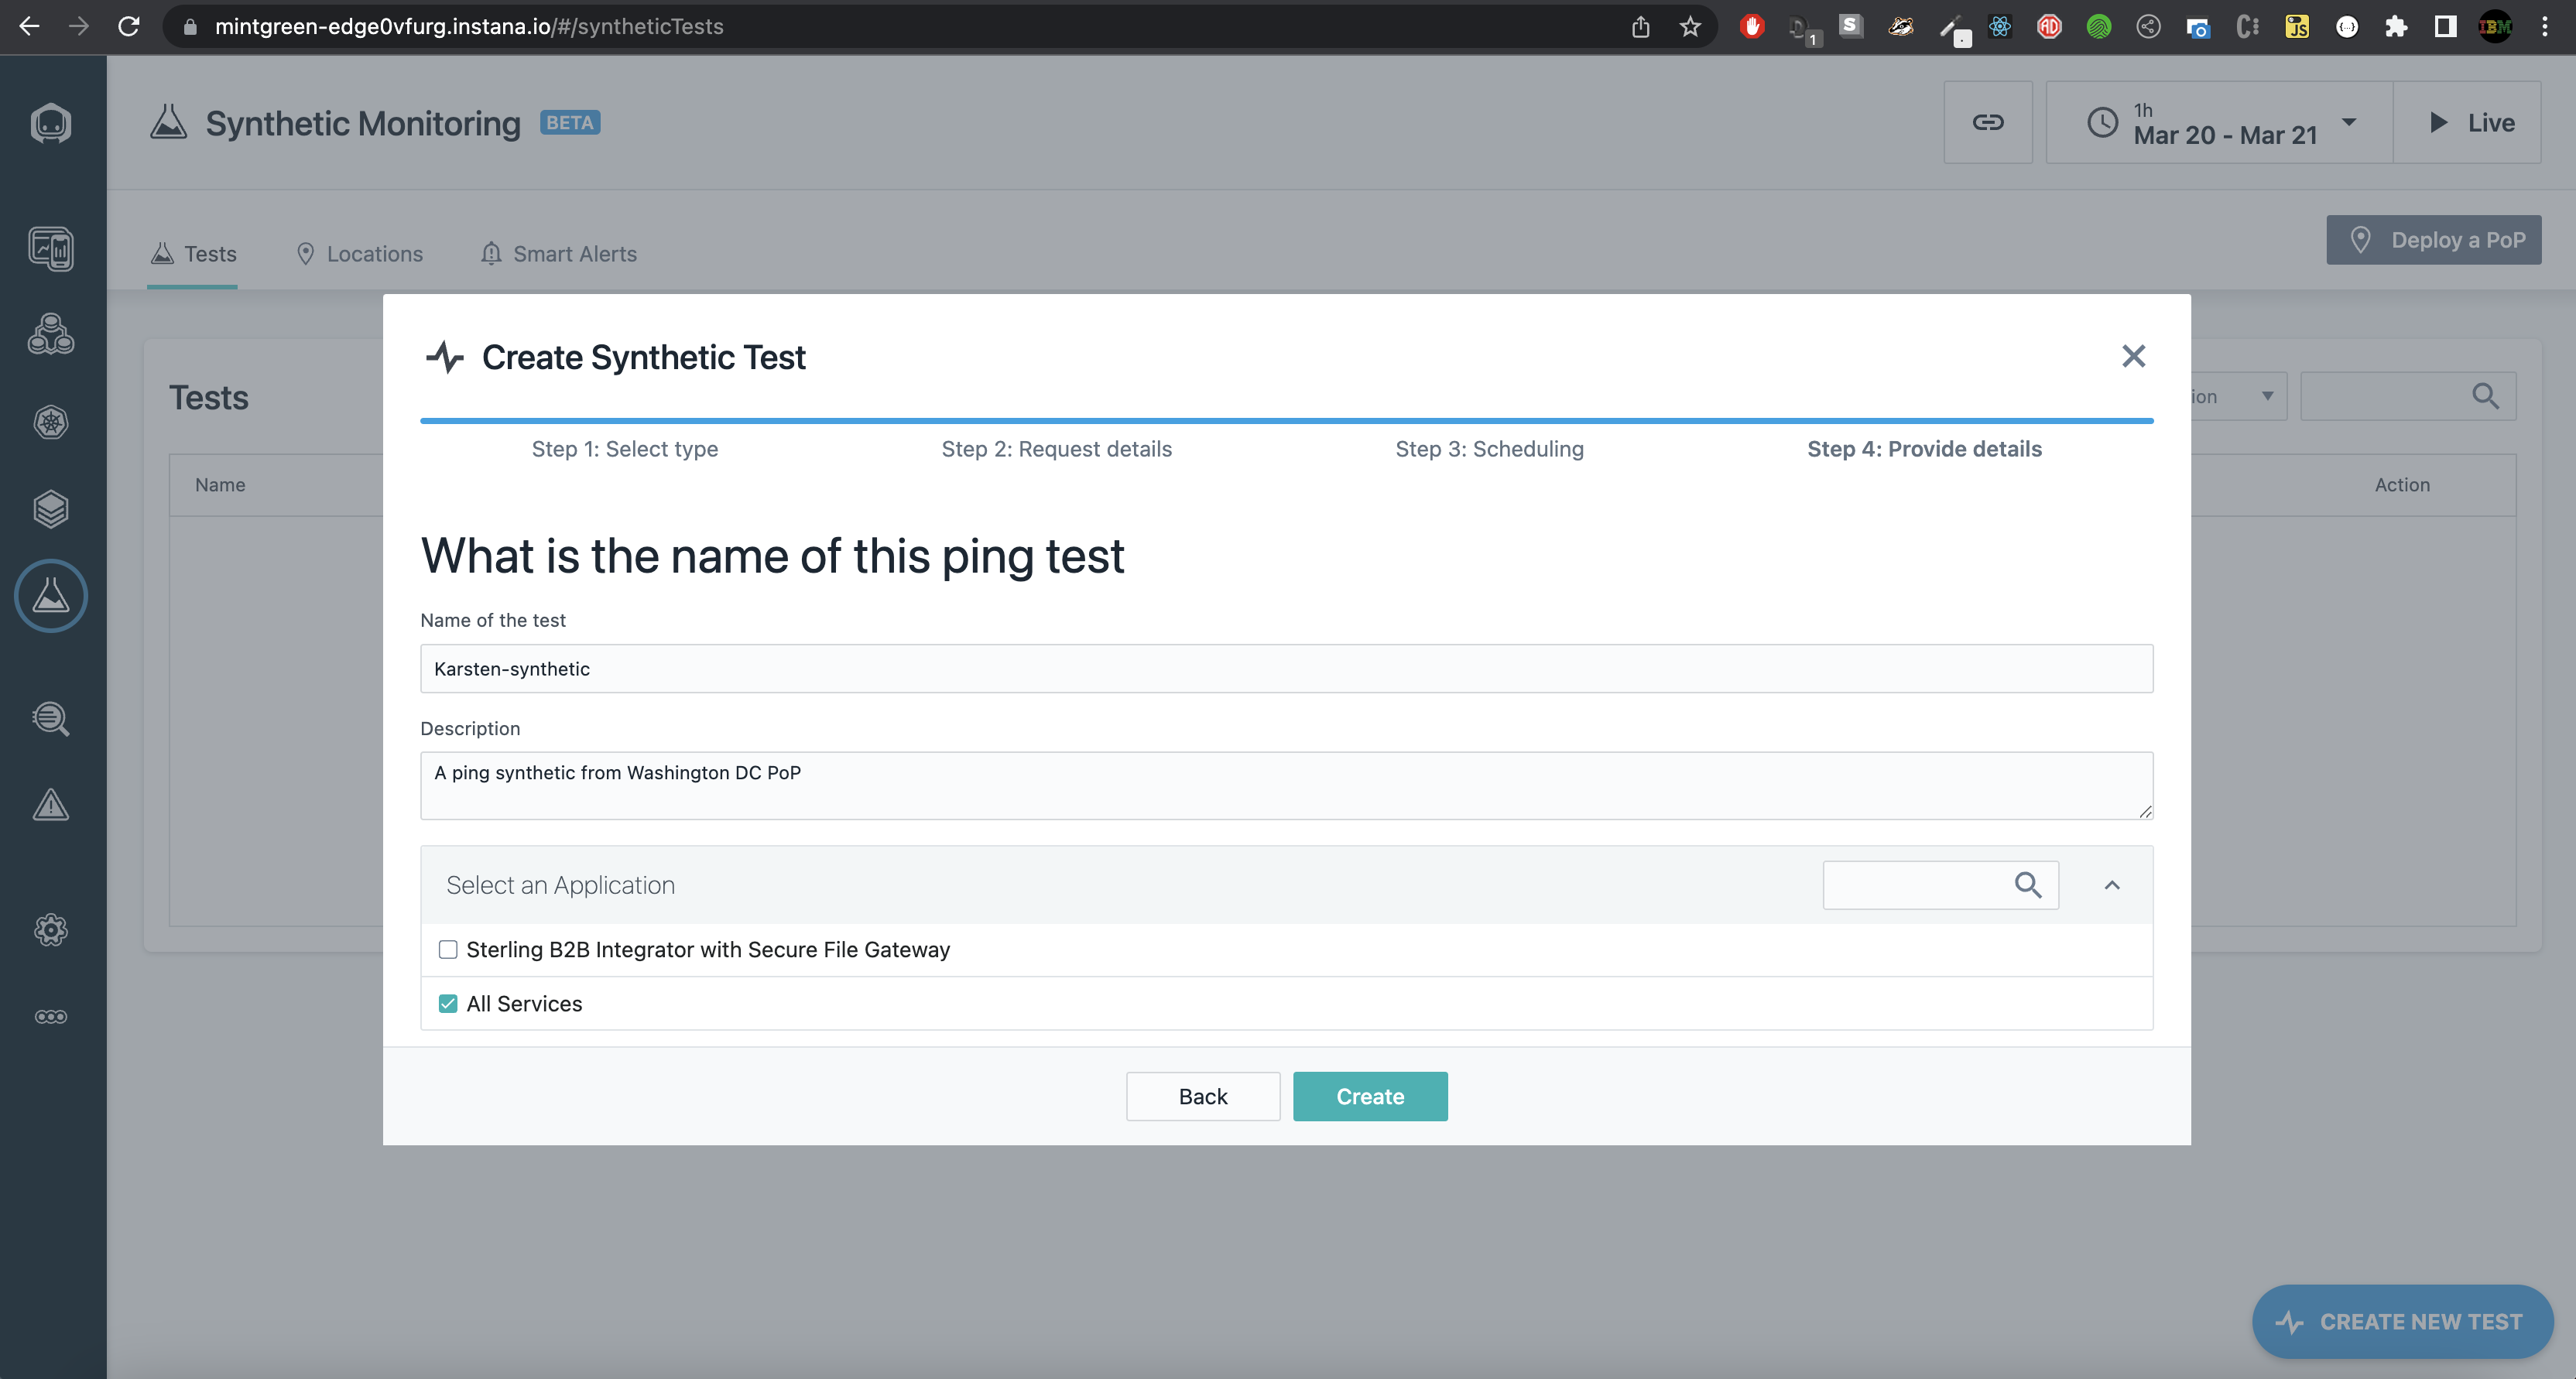
You can now view your synthetic test analytics and metrics under the Tests list