104: Catalog the Data
The data curation process is complete and you are now ready to create the governed catalog and publish the fully enriched data assets to the catalog so they are ready for use by the analytics project team to accomplish their data and AI analytical objectives.
1. Create the Catalog
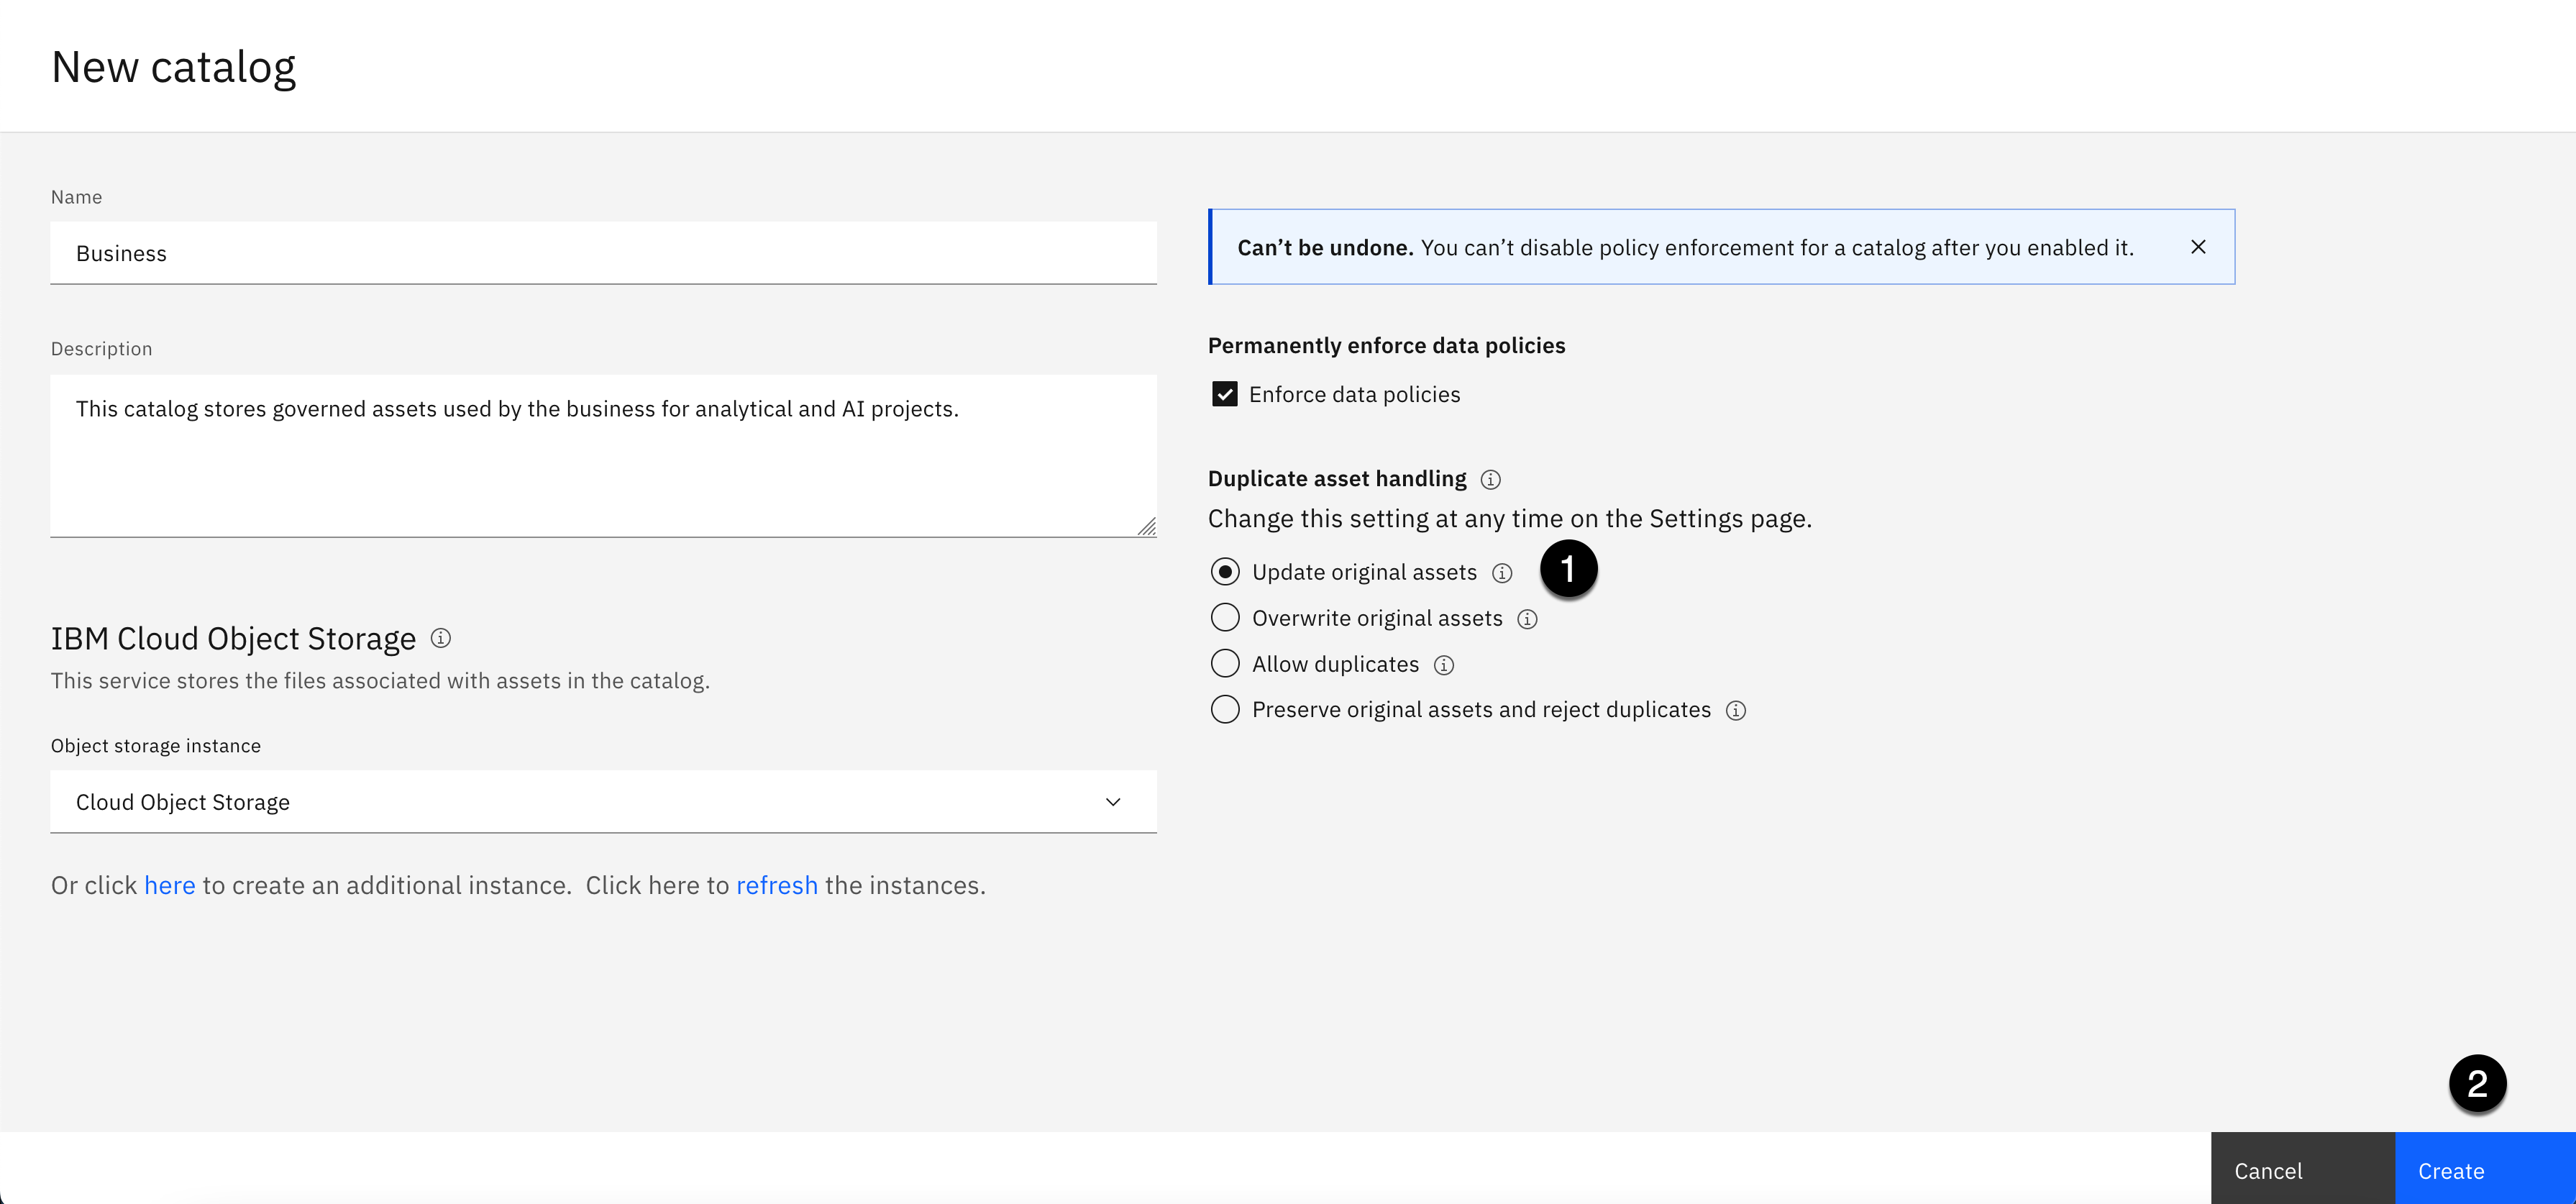
This section creates the governed catalog that you will use to publish the fully enriched data assets that you just curated. This catalog will be named the Business catalog, so make sure you do not have a catalog in your environment, that you created and own, by the same name.
- Select the Navigation menu (the 4 stacked horizontal lines in the upper left corner).
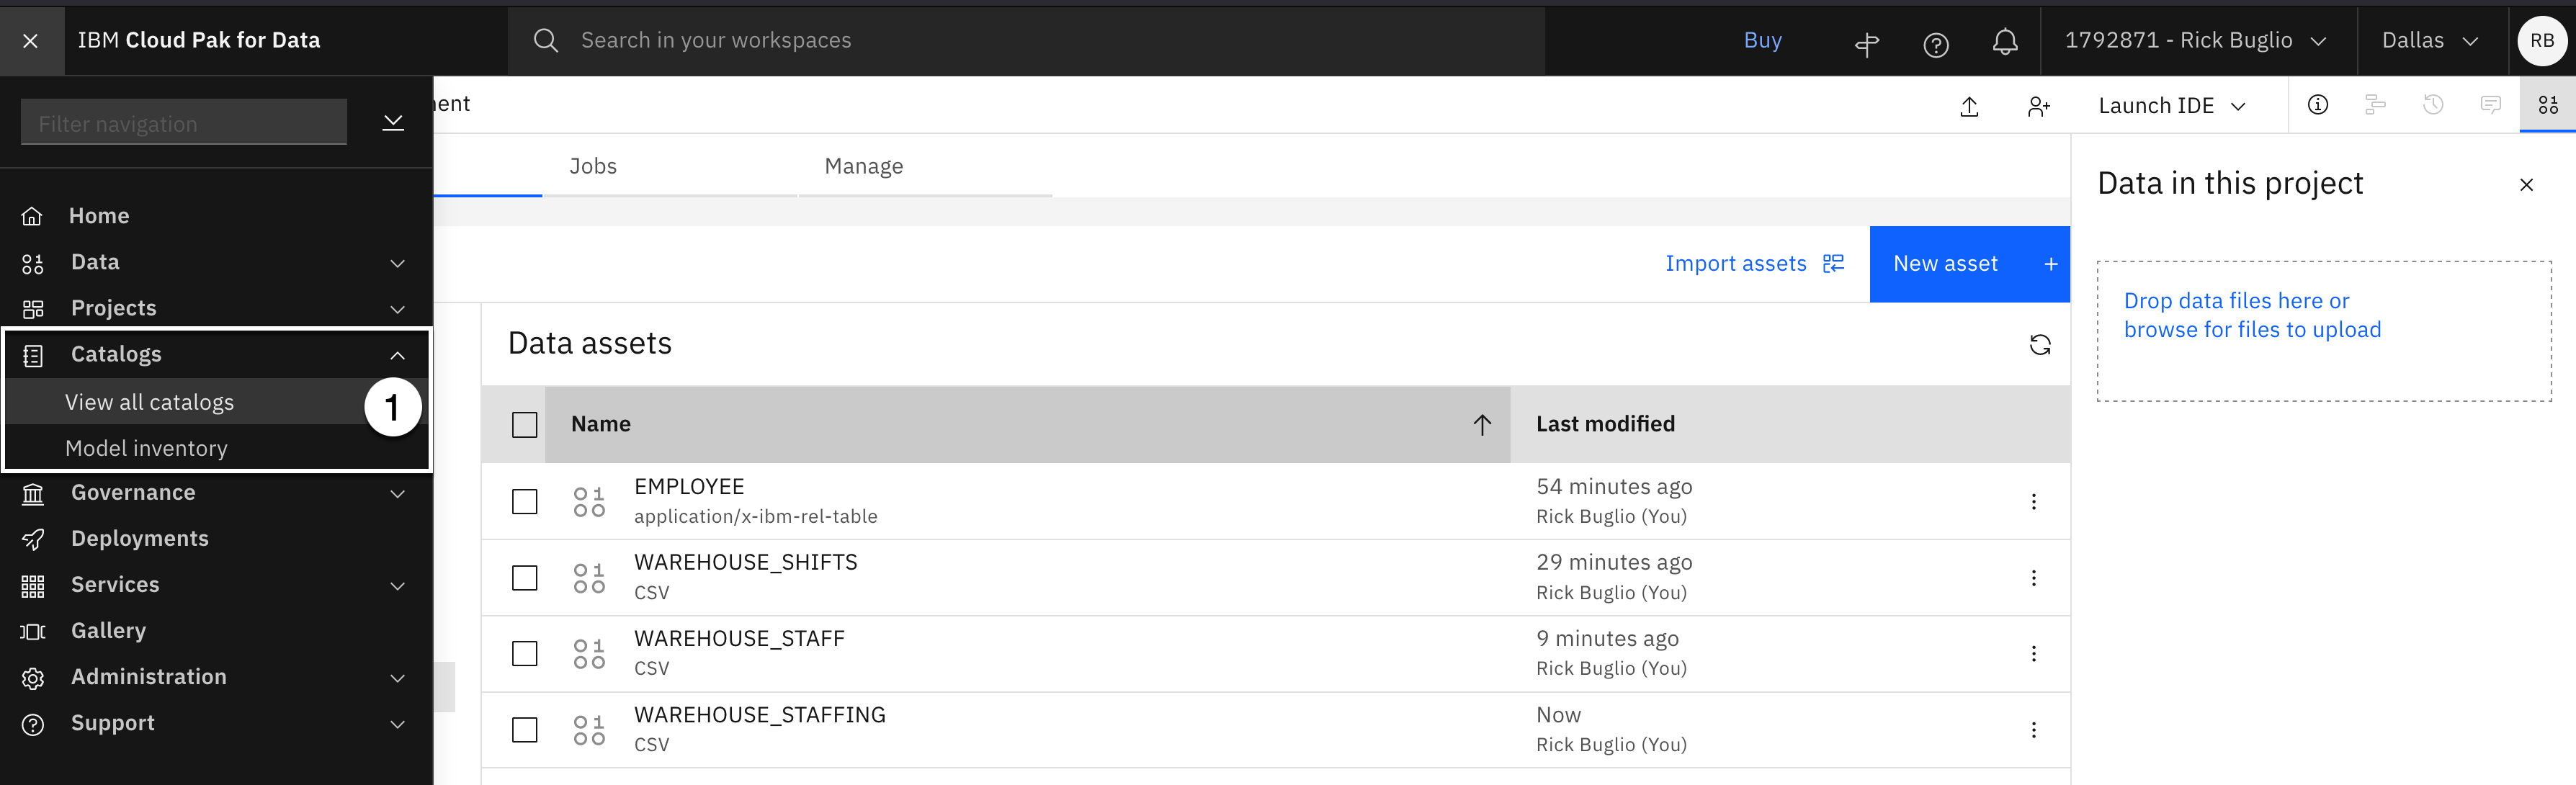
- Select the Catalogs > View all catalogs menu.
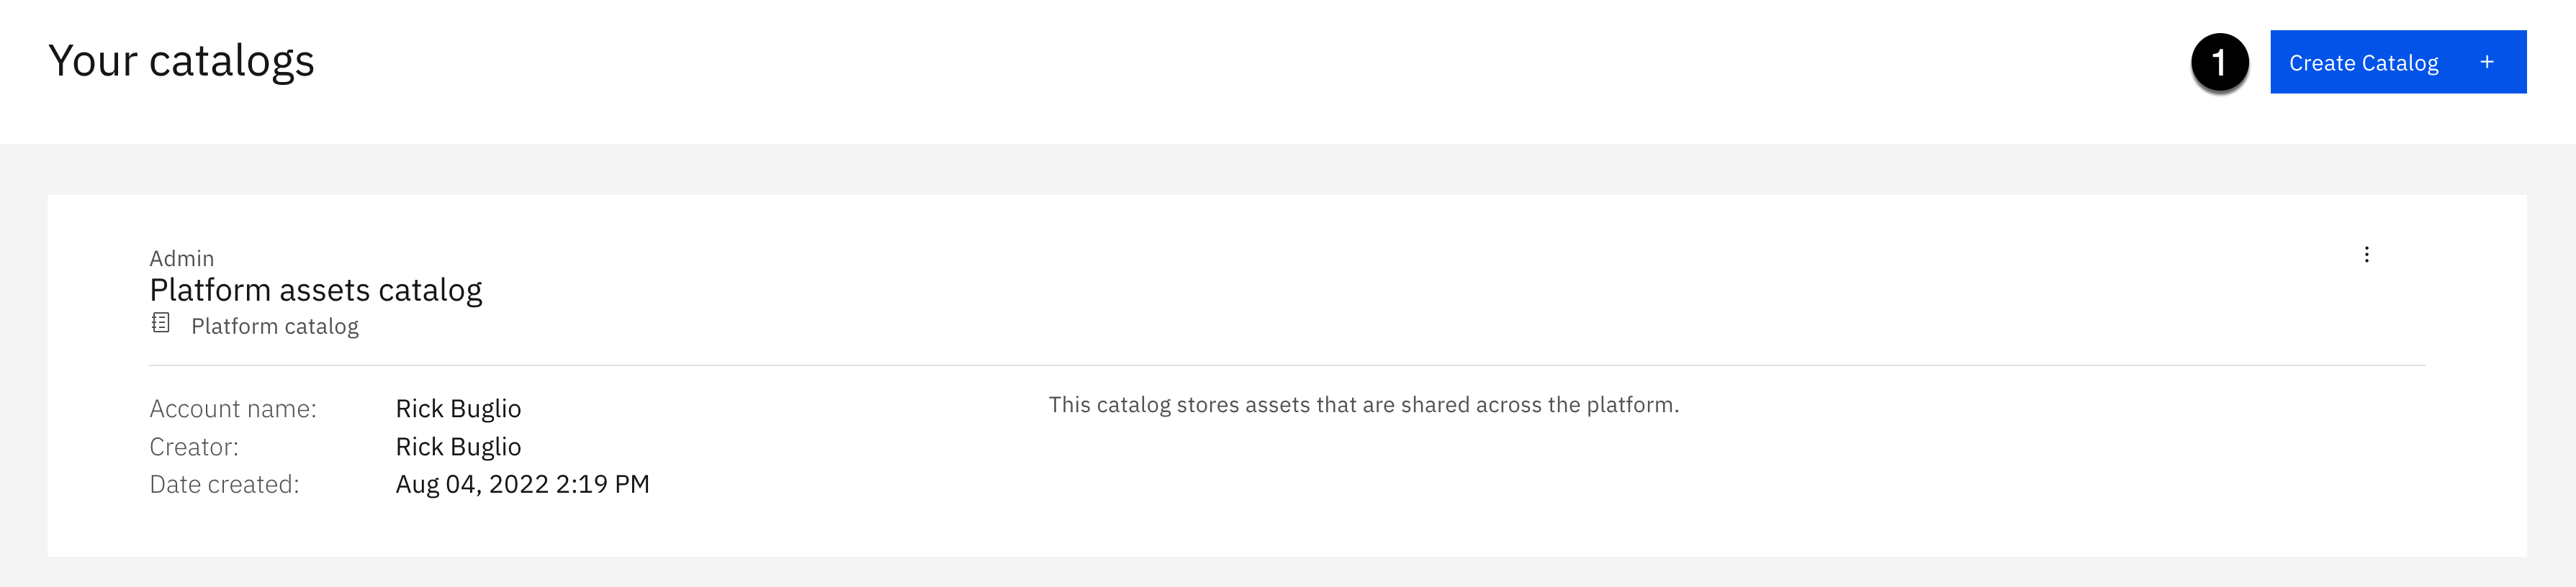
- Click the Create Catalog button.
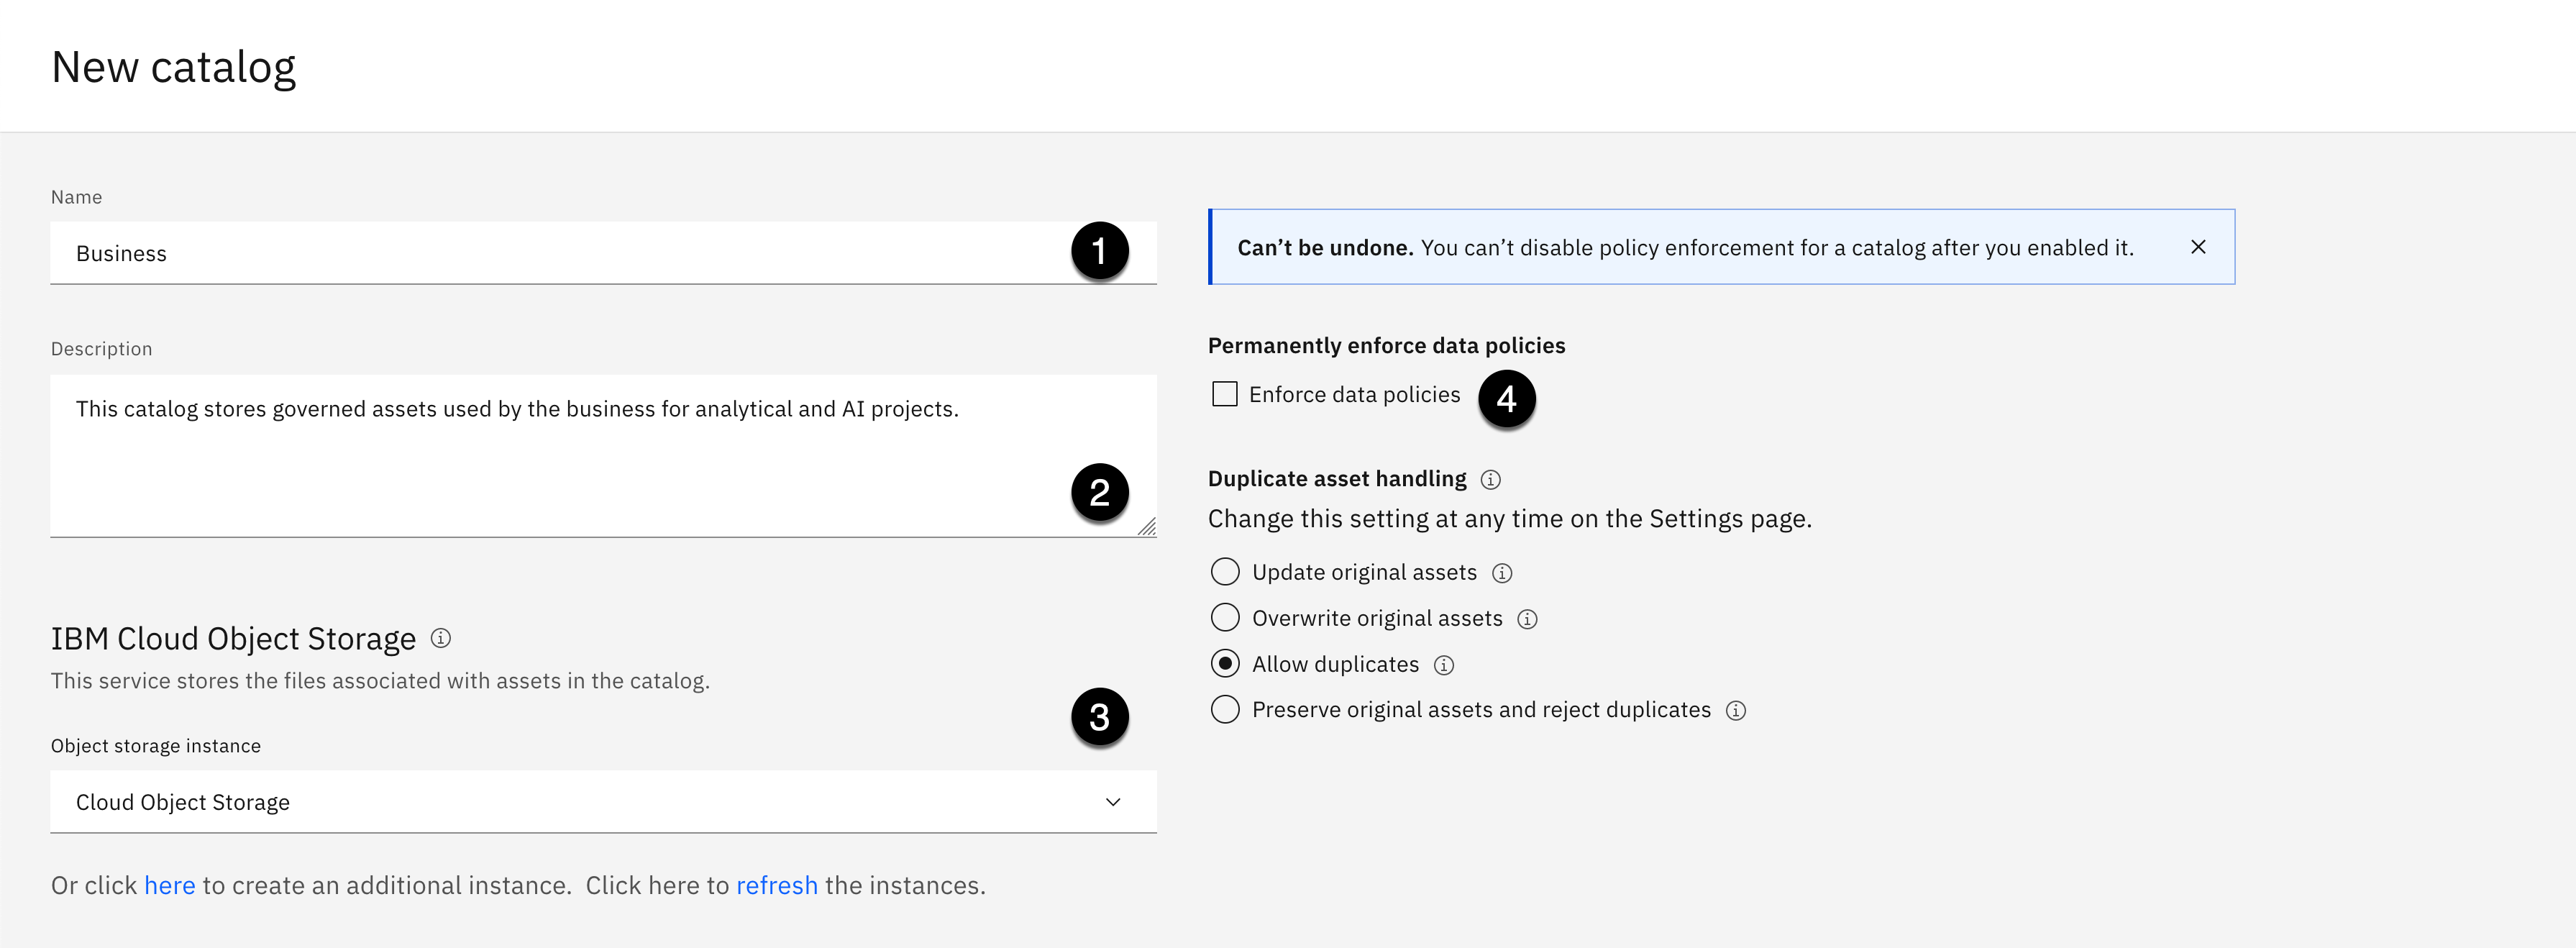
- Copy the text below and paste it into the Name field:
Business
- Copy the text below and paste it into the Description field:
This catalog stores governed assets used by the business for analytical and AI projects.
-
Using the Object storage instance dropdown, select a Cloud Object Storage instance in your environment where you want to create the catalog.
-
Select the checkbox next to Enforce data policies.

- Click the OK button when prompted to confirm you want to Permanently enforce data policies ?.
This is mandatory and must be selected to create a governed catalog!
-
Select the Update original assets option in the Duplicate asset handling section.
-
Click the Create button.
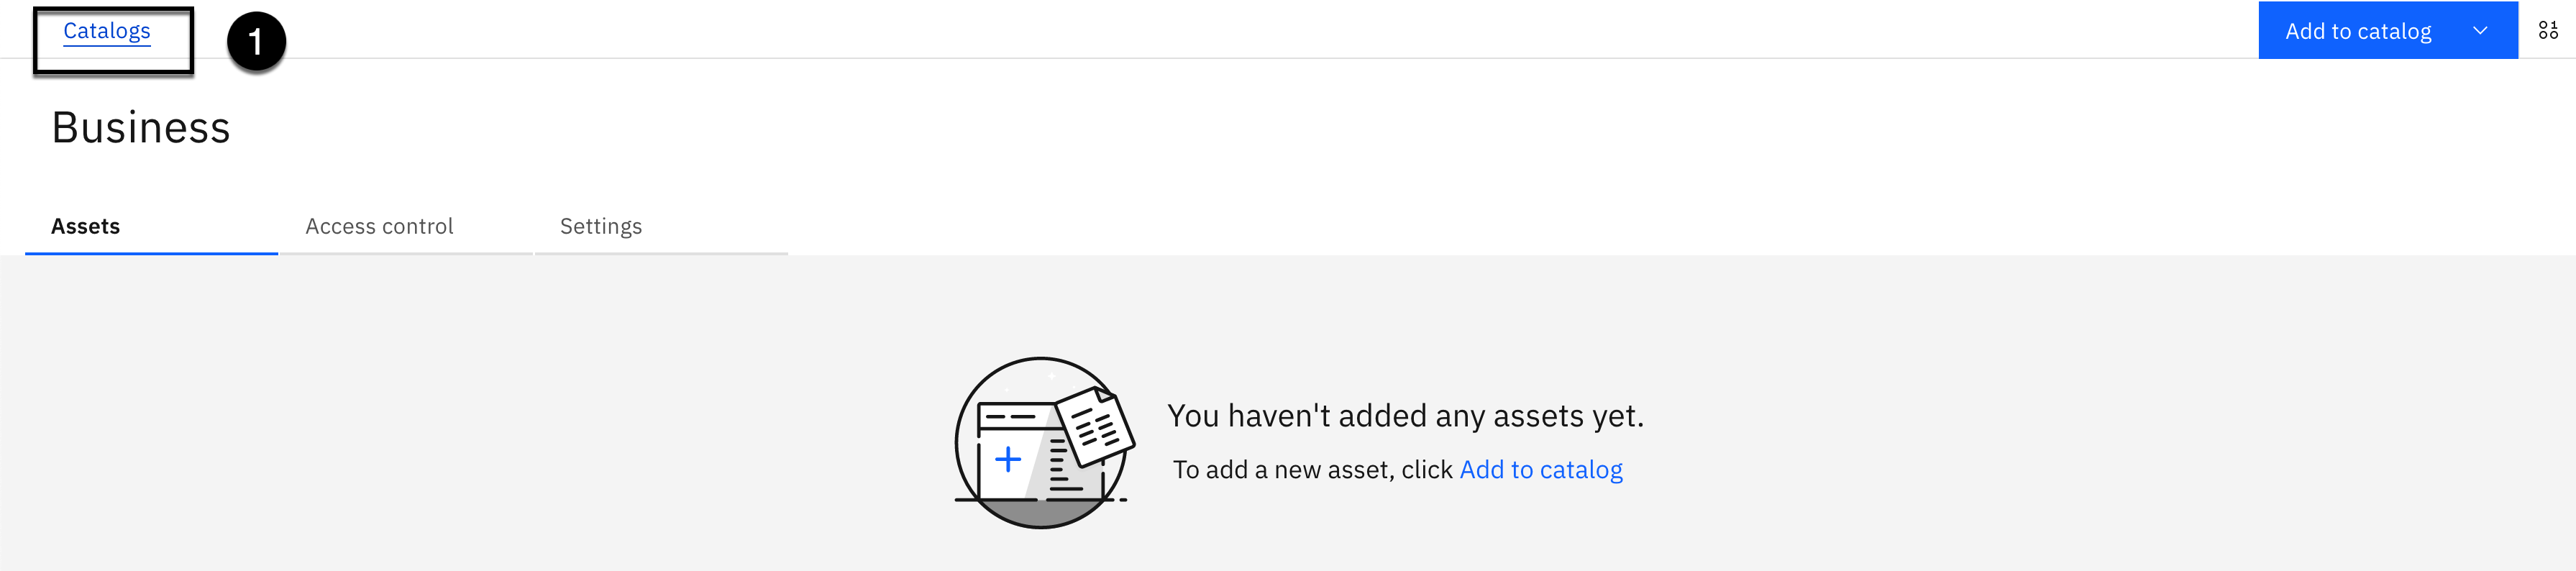
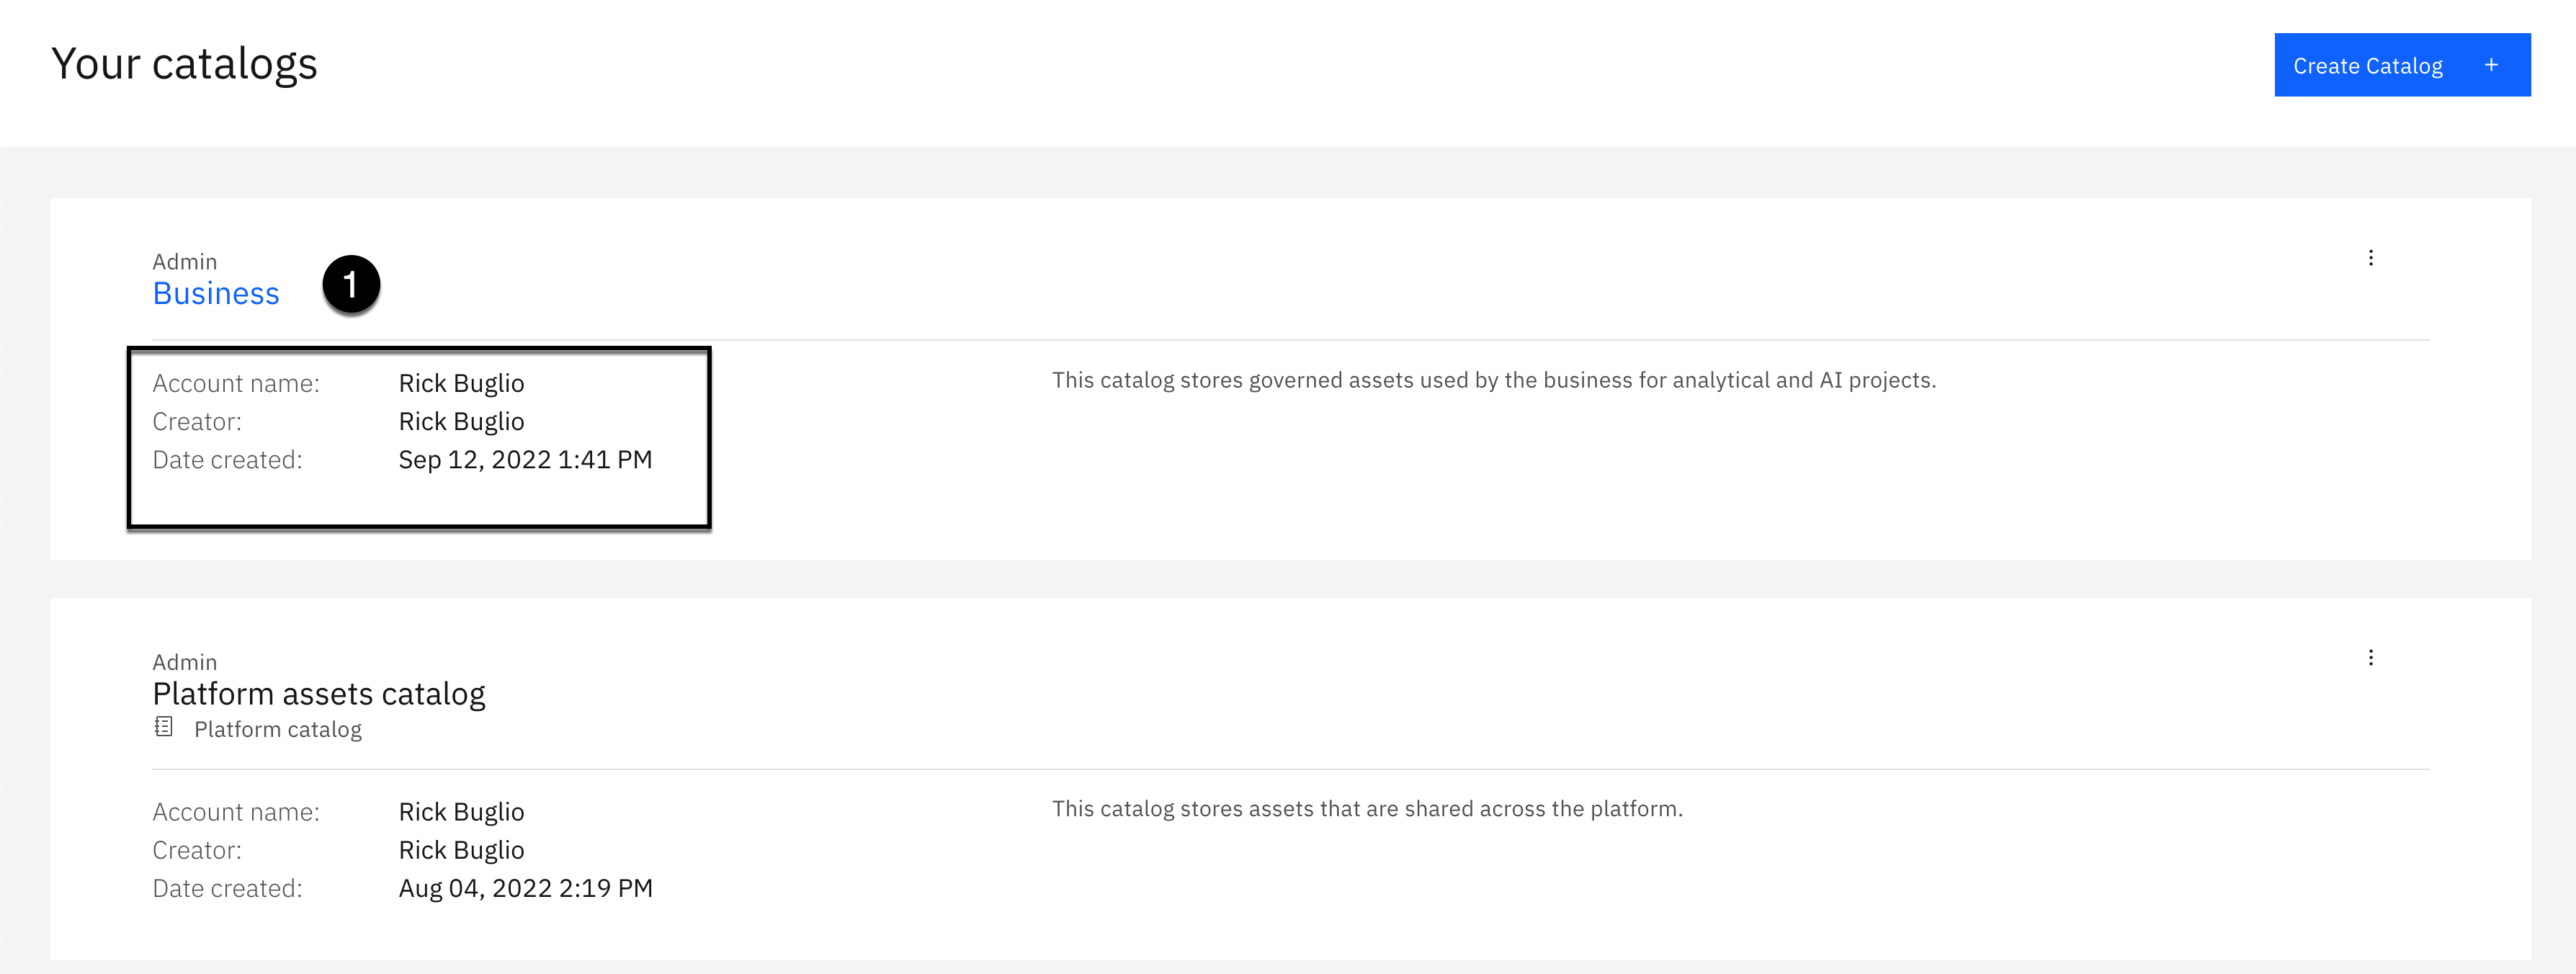
You will see a message: Creating Business, this might take a minute.... When the creation of the catalog is complete, you are taken into the new Business catalog.
- Select the Catalogs breadcrumb at the top of the page to get back to the catalog home page.

You should now see the new Business catalog, and the Platform assets catalog you were instructed to create in the Data fabric lab Getting started section.
- Select the Navigation menu (the 4 stacked horizontal lines in the upper left corner).

- Select the Projects > View all projects menu.

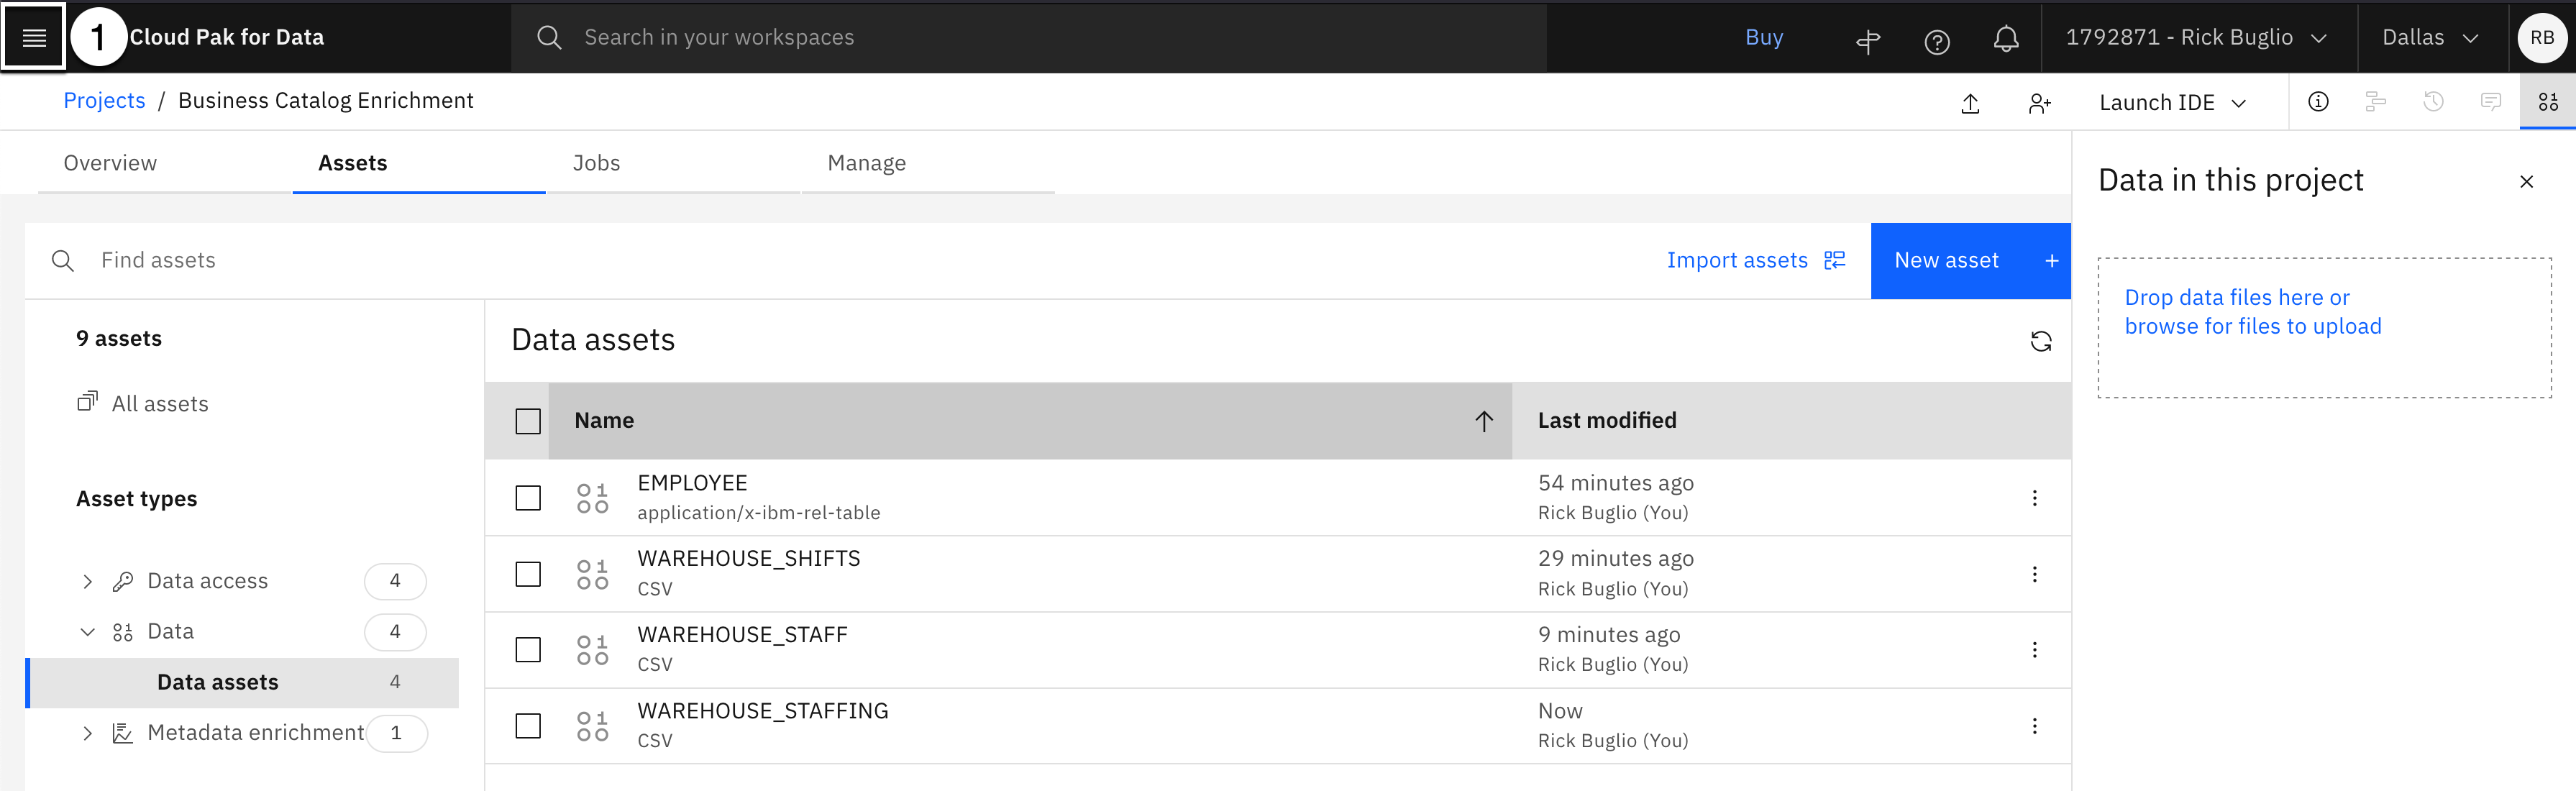
- Select the Business Catalog Enrichment project.
2. Publish Connections
In this section, you will publish the connections, one at a time, and in the order listed in the instructions below, to the governed Business catalog before you publish any data assets. This will place them at the end of the Recently added category list in the catalog, leaving room for the data assets to appear front and center, in order of importance, so they are easily found and viewable.
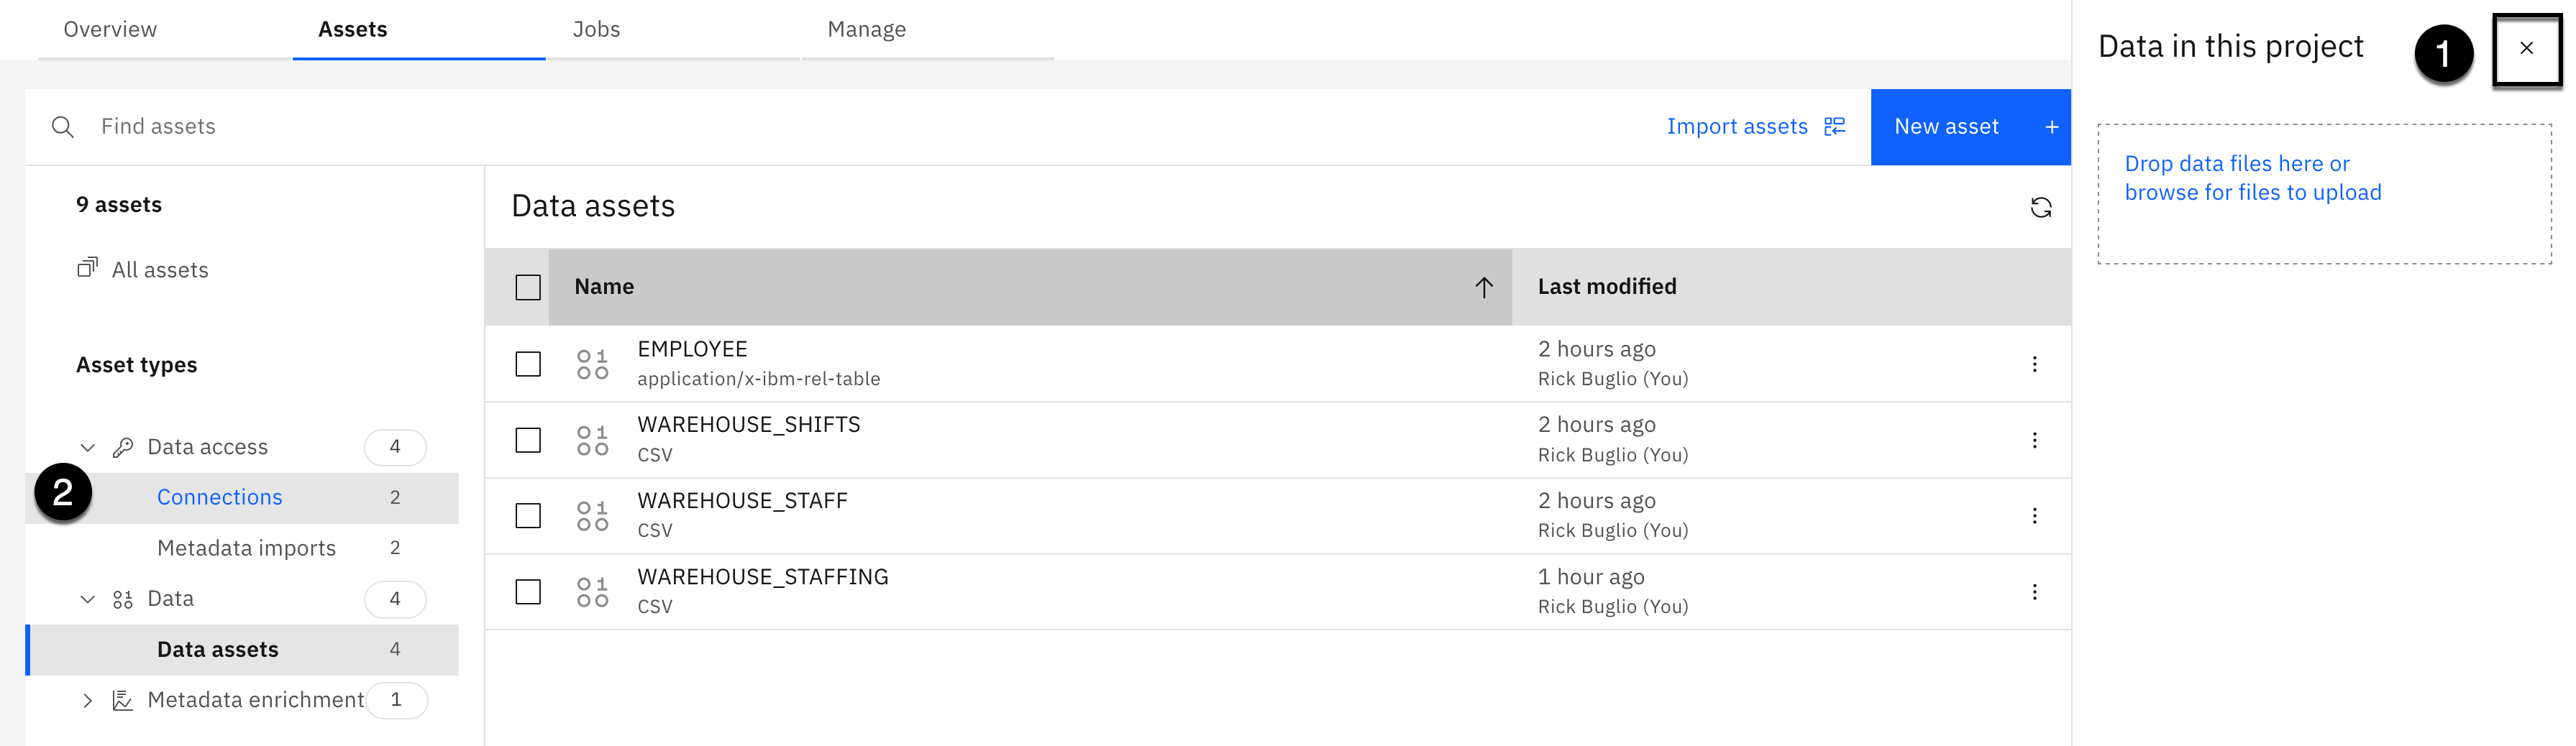
- Select the X in the top right corner of the information panel to close it.
- From the Assets types section on the left, select Data access > Connections.

-
Select the checkbox next to the Cloud Object Storage connection.
-
Select the Publish to catalog button on the toolbar.
-
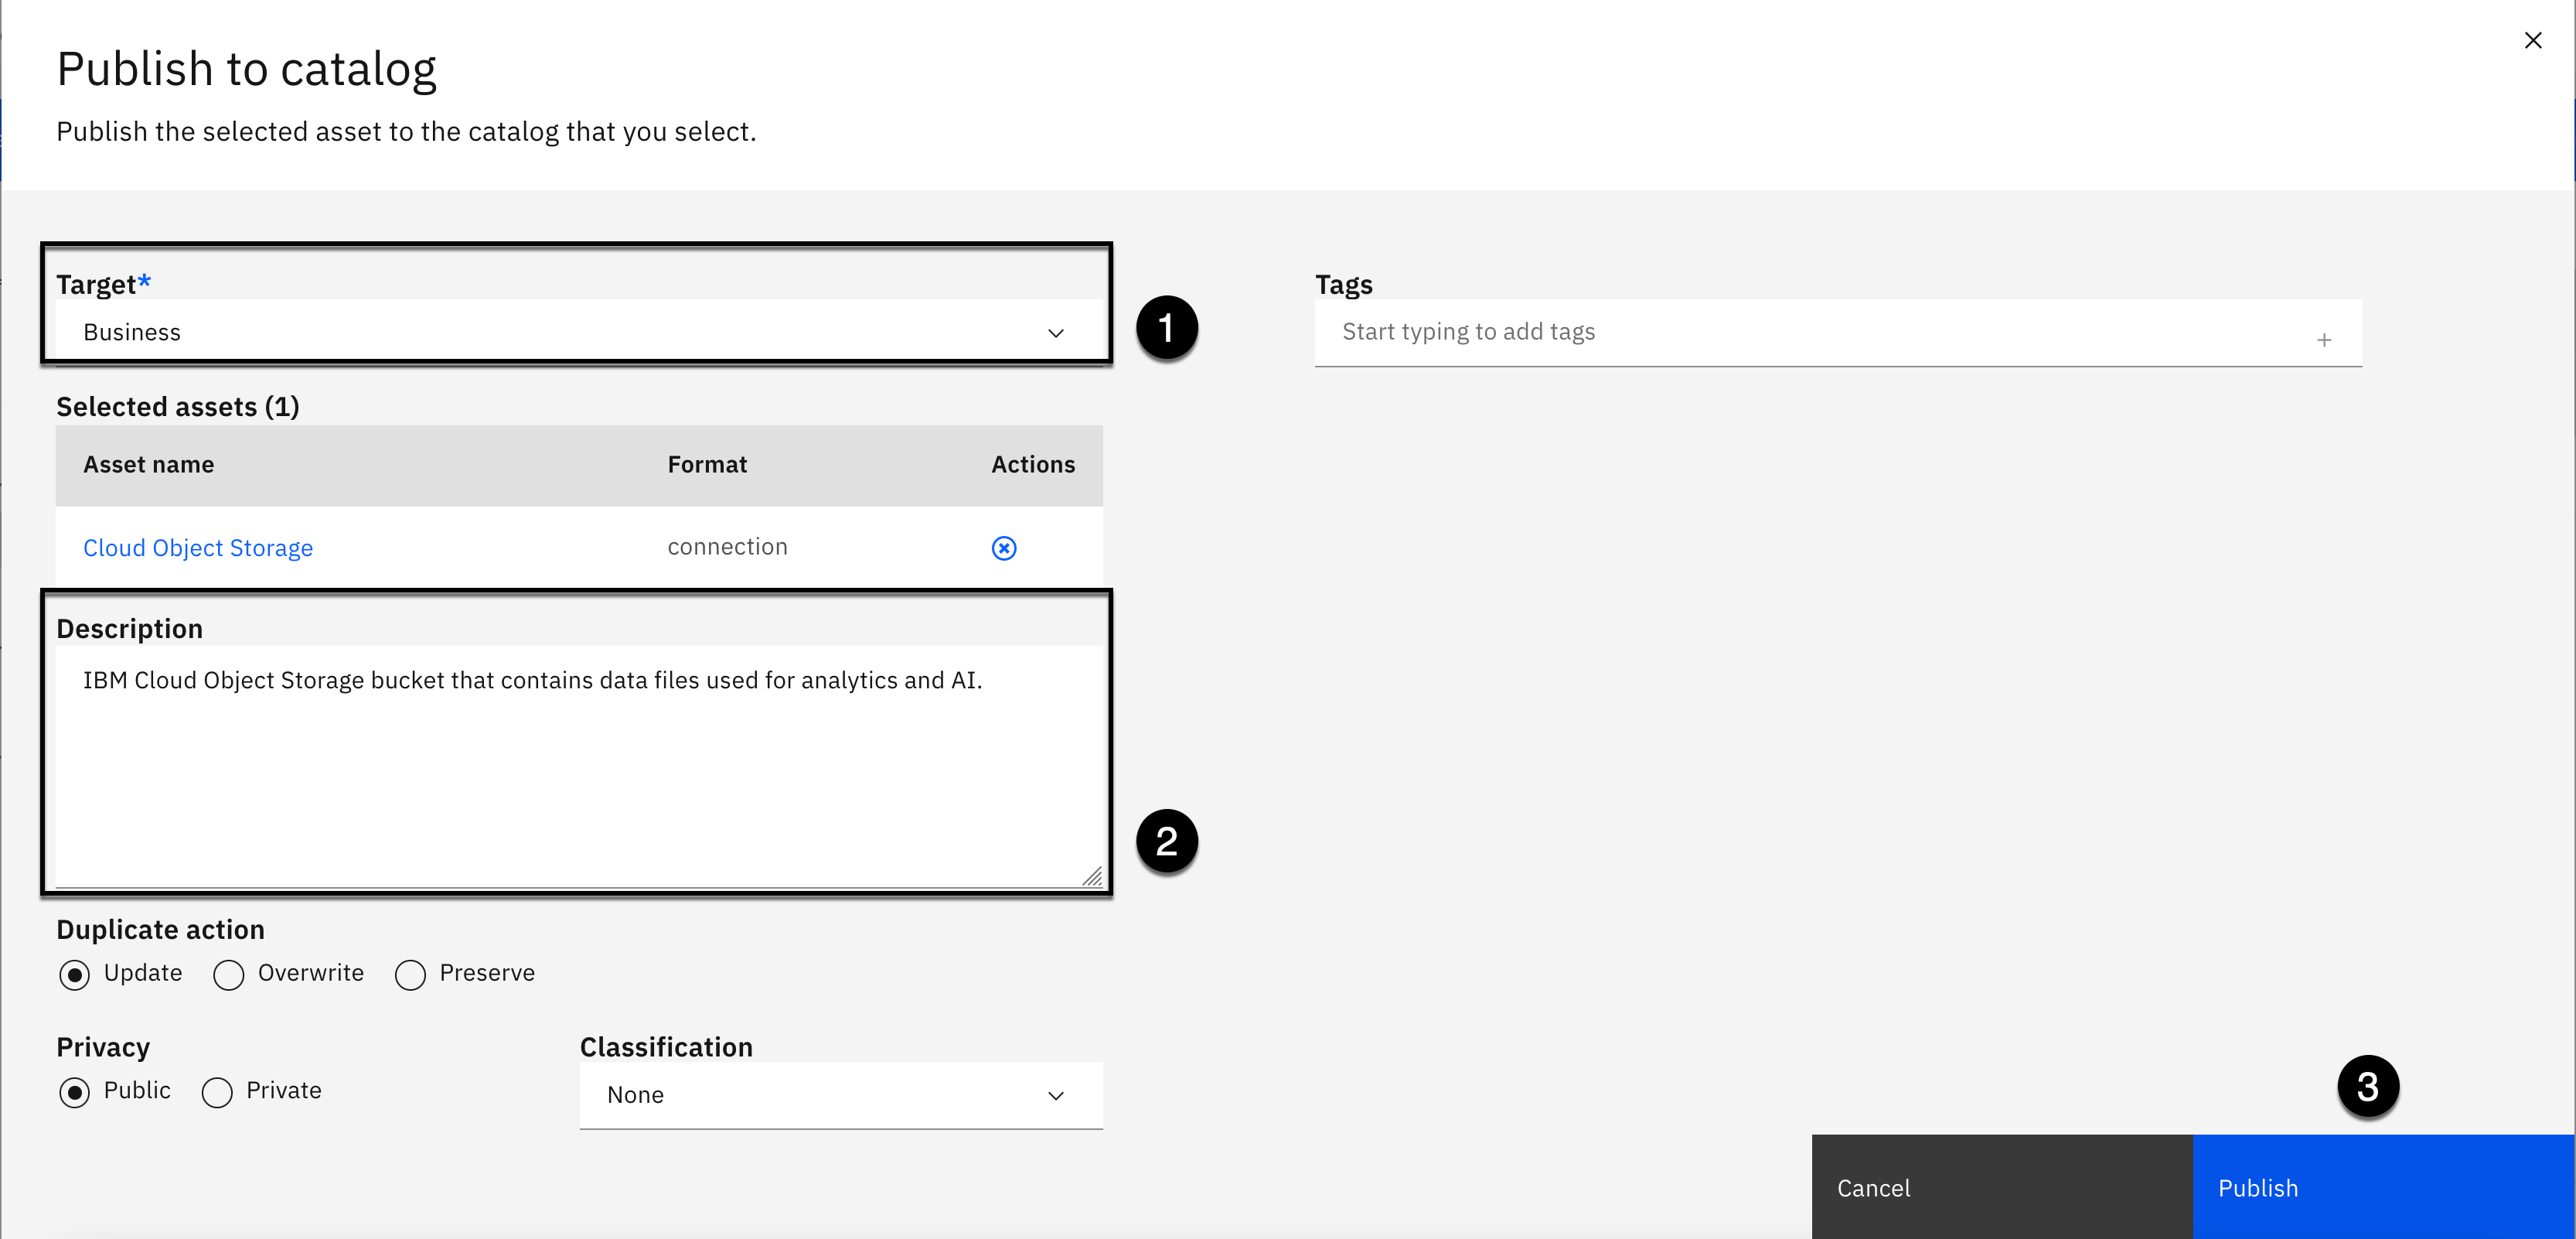
Select the Business catalog as the Target catalog (It should be selected by default).
-
Copy the text below and paste it into the Description field:
IBM Cloud Object Storage bucket that contains data files used for analytics and AI.
- Click the Publish button.

-
Uncheck the checkbox next to the Cloud Object Storage connection.
-
Select the checkbox next to the Data Warehouse connection.
-
Select the Publish to catalog button on the toolbar.

-
Select the Business catalog as the Target catalog (It should be selected by default).
-
Copy the text below and paste it into the Description field:
Database that contains enterprise data needed by the business for analytics and AI projects.
- Click the Publish button.
3. Publish Data Assets
In this section, you will publish the data assets to the Business catalog. As you did with the connections, the data assets are published in a specific order, so that the Recently Added category in the catalog gets populated properly. You will publish the WAREHOUSE_SHIFTS, WAREHOUSE_STAFF, and WAREHOUSE_STAFFING data assets together, in one publication step, and then publish the EMPLOYEE data asset last.

-
Uncheck the checkbox next to the Data Warehouse connection.
-
From the Assets types section on the left, select Data > Data assets.

-
Select the checkbox next to the WAREHOUSE_SHIFTS data asset.
-
Select the checkbox next to the WAREHOUSE_STAFF data asset.
-
Select the checkbox next to the WAREHOUSE_STAFFING data asset.
-
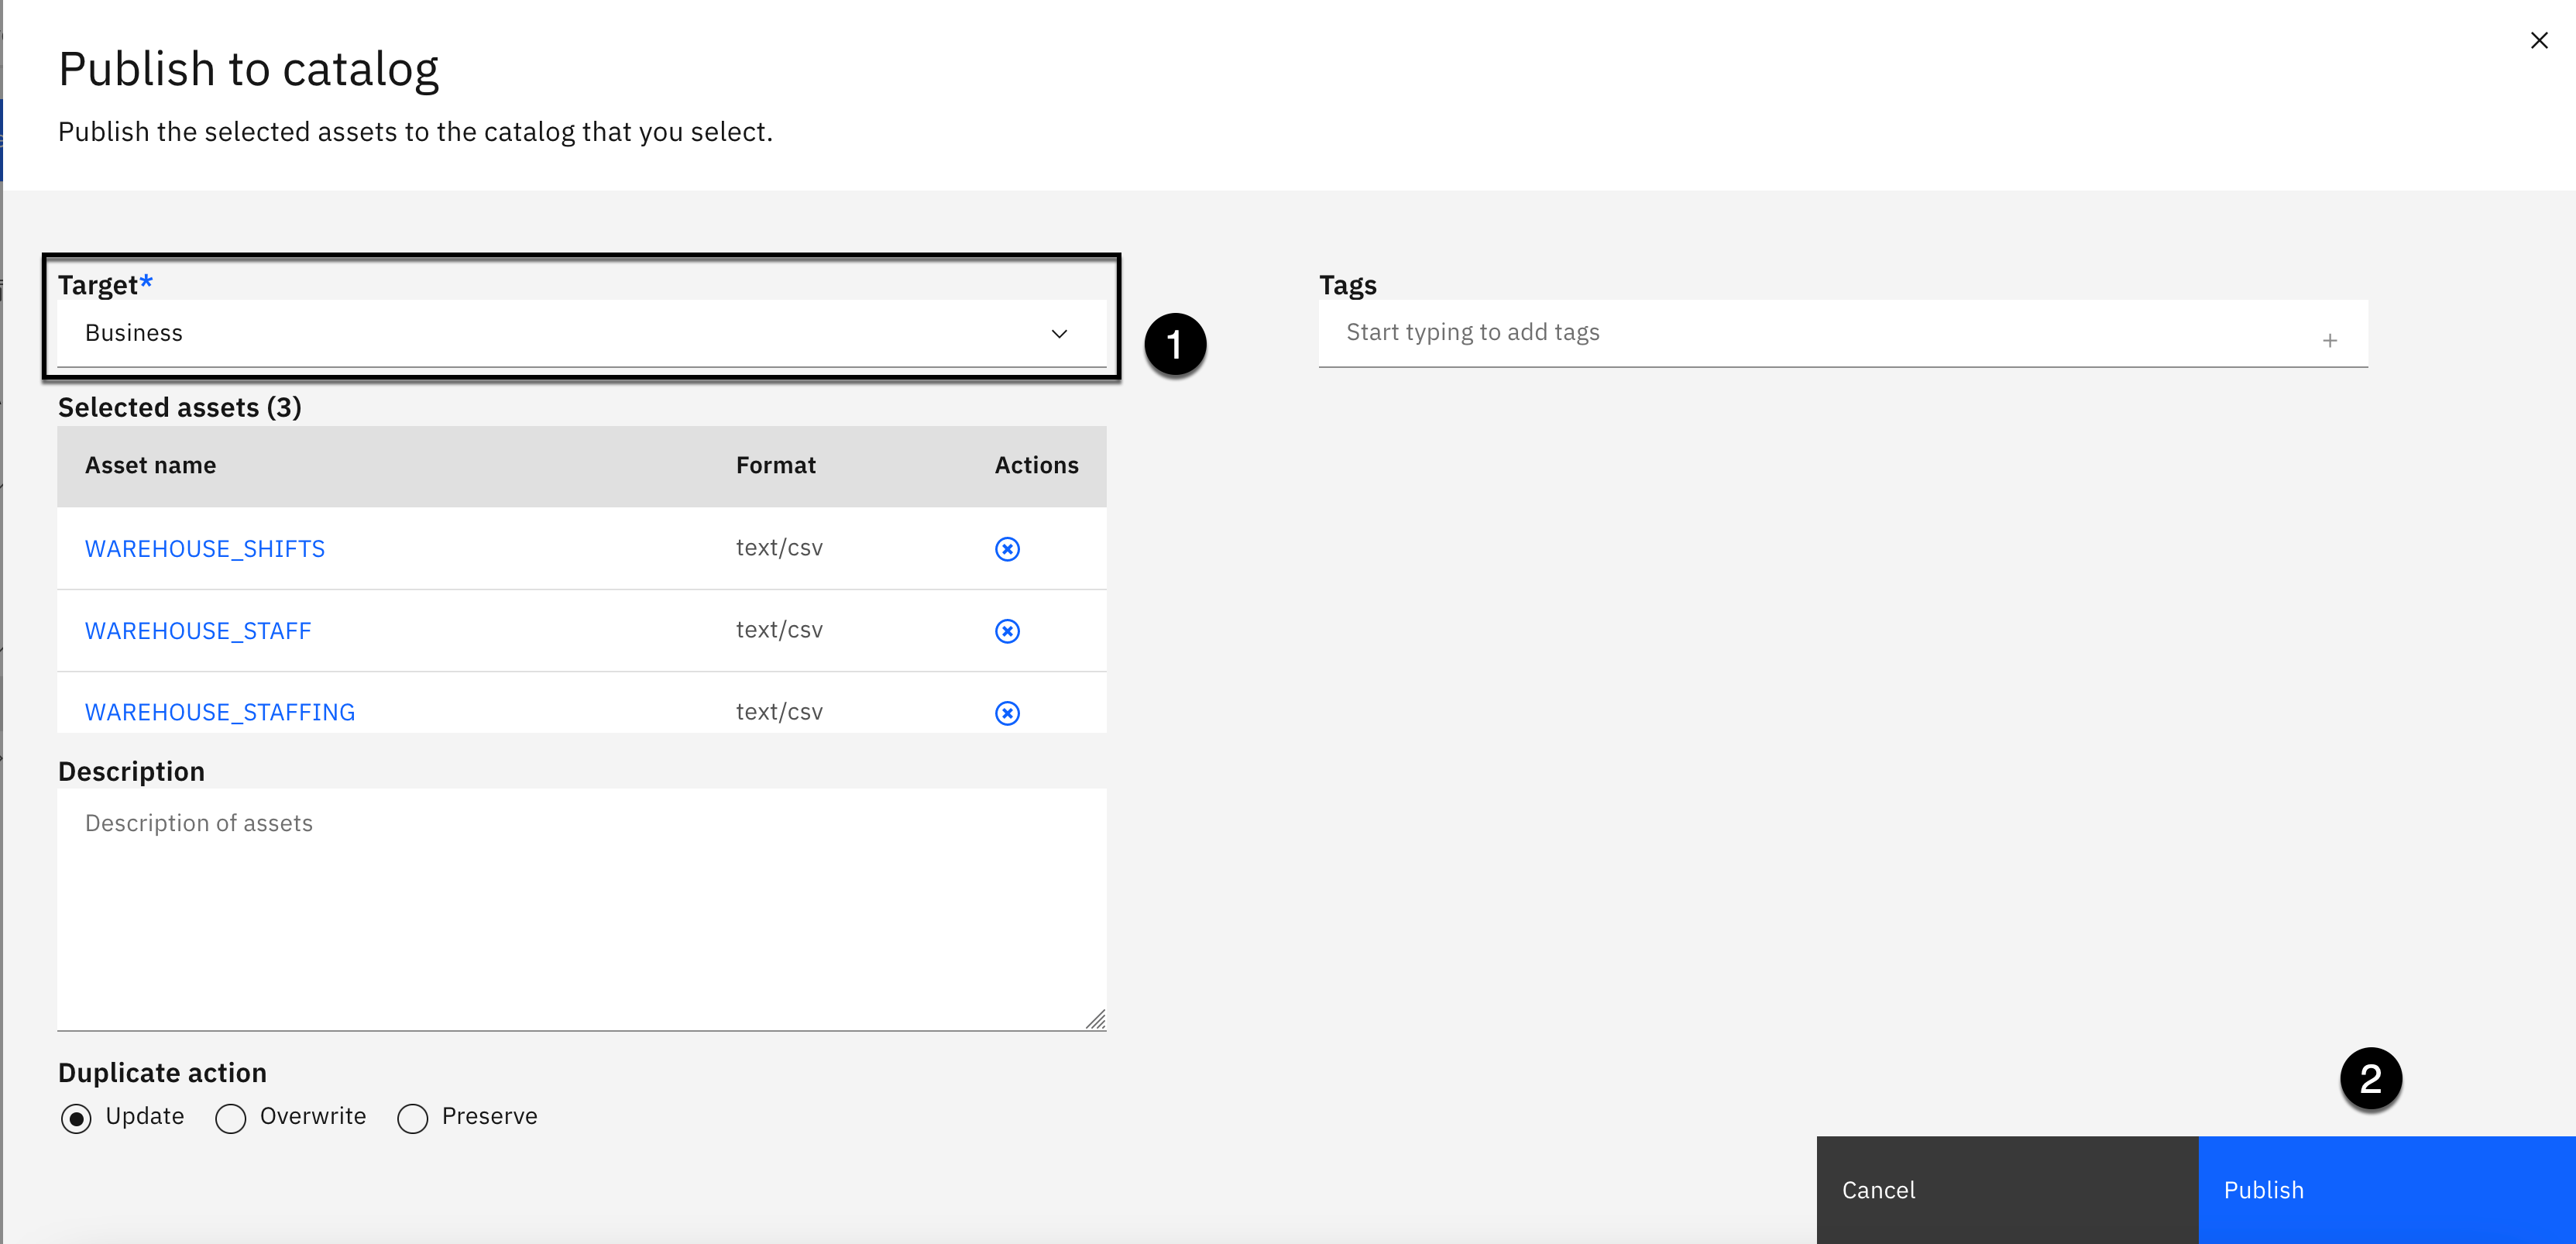
Select the Publish to catalog button on the toolbar.
-
Select the Business catalog as the Target catalog (It should be selected by default).
-
Click the Publish button.

-
Uncheck the checkbox next to the WAREHOUSE_SHIFTS data asset.
-
Uncheck the checkbox next to the WAREHOUSE_STAFF data asset.
-
Uncheck the checkbox next to the WAREHOUSE_STAFFING data asset.
-
Select the checkbox next to the EMPLOYEE data asset.
-
Select the Publish to catalog button on the toolbar.

-
Select the Business catalog as the Target catalog (It should be selected by default).
-
Click the Publish button.
You have successfully published the connections and data assets to the Business catalog, and are finished working from the project. This project is very valuable, and reusable, and the data curation process is repeatable. You can modify the metadata imports to add or remove assets, and modify the metadata enrichment process to improve the business term, and data class assignment accuracy, and learn from the results. You can also make changes upstream, to the business glossary governance artifacts, to improve the data curation accuracy, rerun metadata enrichment, review the results, and re-publish existing assets, or publish new assets, to the governed catalog. Which is why you were instructed to change the Duplicate asset handling option to Update original assets when you created the catalog.

- Uncheck the checkbox next to the EMPLOYEE data asset.
- Select the Navigation menu (the 4 stacked horizontal lines in the upper left corner).

- Select the Catalog > View all catalogs menu.
- Select the Business catalog (Make sure it is the one you own and can administer).